
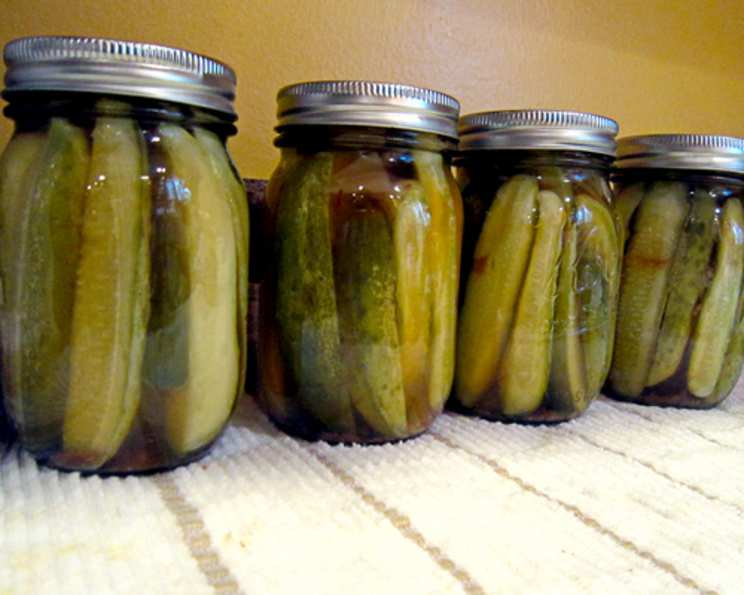
Crisp & Sweet: Canning Stevia Pickles for a Guilt-Free Treat
The scent of dill, vinegar, and that unmistakable pickling spice blend always catapults me back to my grandmother’s kitchen. Summer meant canning season, and while her traditional sweet pickles were legendary, they were also, shall we say, very sweet. I remember sneaking a taste of the brine, the sugar crystals practically crunching between my teeth! Now, creating a version that echoes that nostalgic flavor profile, but with a modern, health-conscious twist, feels like the perfect homage to those cherished memories. These stevia-sweetened pickles deliver all the crunch and tangy sweetness you crave, without the sugar overload.
Recipe Overview
- Prep Time: 24 hours 30 minutes
- Cook Time: 15 minutes
- Total Time: 24 hours 45 minutes
- Yields: 5-6 pints
- Dietary Type: Sugar-Free
Ingredients
- 3 1/2 lbs pickling cucumbers, 4-5 inches long
- 2 1/2 cups water
- 3 1/2 cups apple cider vinegar
- 3/4 cup kosher salt, for brining
- 1 teaspoon kosher salt, for the brine
- 3/4 ounce whole mixed pickling spice, tied in a cheesecloth
- 1 onion, chopped
- Fresh garlic (optional)
- 20 (1 g) packets stevia, I used NOW Foods brand (be sure to check the sugar equivalency charts of your stevia brand)
Equipment Needed
- Large glass bowl
- Dinner plate
- Canning pot with rack
- 6 pint canning jars and lids
- Cheesecloth
- Nonmetallic spatula or chopstick
- Clean dry cloths
Instructions
-
Thoroughly scrub the cucumbers, quarter them lengthwise, and place them in a large glass bowl. Add 3/4 cup kosher salt and cover completely with ice water. Mix well to dissolve the salt.
-
To ensure all cucumbers are submerged, place a dinner plate on top to weigh them down. Refrigerate for several hours or, ideally, overnight. This brining process is crucial for drawing out excess moisture and creating that characteristic crispness.
-
Begin preparing your canning equipment. Bring the water in your canning pot to a boil. Thoroughly wash all 6 pint canning jars and lids in hot, soapy water. Rinse well.
-
Carefully place the washed jars and lids in the boiling water within the canning pot. Make sure the water level completely covers the lids of the jars. Maintain the water at a simmering temperature until you are ready to fill the jars.
-
The next day, drain the cucumbers from the brining solution. Rinse them thoroughly, 2 or 3 times, in cold water to remove excess salt. Set aside to drain.
-
In a large stainless steel pot, combine the apple cider vinegar, water, and 1 teaspoon kosher salt. Bring the mixture to a boil over medium-high heat.
-
Add the chopped onion and the cheesecloth bag filled with pickling spice to the boiling vinegar mixture. Reduce the heat to low and allow the mixture to simmer gently for about 10 minutes to infuse the flavors.
-
Add the stevia packets to the simmering brine and stir continuously until completely dissolved. Taste the brine and adjust the stevia level if needed, keeping in mind the sweetness will intensify slightly during the canning process.
-
Now, bring the canner rack up and raise the heat under the canning pot to bring the water back to a boil. This is important for creating a proper vacuum seal.
-
Carefully remove one jar at a time from the simmering water, allowing the water to drain back into the pot. If desired, add a clove or two of fresh garlic (optional) to the bottom of the jar.
-
Pack the drained cucumber quarters into the jar. It is often easier to turn the jar on its side to efficiently pack the cucumbers tightly.
-
Ladle the simmering pickling liquid into the jar, leaving a 1/2-inch headspace (the space between the top of the liquid and the rim of the jar). Headspace is crucial for a proper seal.
-
Using a nonmetallic spatula or a chopstick, gently slide it down between the cucumbers inside the jar to release any trapped air pockets. Repeat this process a few times to ensure all air is removed.
-
Remove a two-piece lid from the hot water using tongs or a magnetic lid lifter. Carefully wipe the jar rim and lid with a clean, dry cloth to remove any food particles or residue. This ensures a secure seal.
-
Center the lid on the jar and screw the band down until resistance is met. Do not overtighten the band, as this can prevent a proper seal. The band should be snug, but still allow air to escape during processing.
-
Carefully set the filled jar onto the rack inside the canning pot. Repeat the filling and sealing process from step 10 until all the jars are filled.
-
Once all the jars are filled and sealed, carefully lower the rack back into the canning pot. Ensure the water level completely covers the tops of the jars. If necessary, add more boiling water.
-
Place the lid on the canning pot and bring the water back to a gentle but steady boil. Once boiling, start a timer for 15 minutes. Process the jars for the full 15 minutes, maintaining a consistent boil.
-
After 15 minutes of processing, turn off the heat and carefully raise the canner rack. Using jar lifters, carefully remove the hot jars from the canner and set them on a dry towel to cool.
-
Do not jar, shake, or tip the jars while they are cooling. Leave them undisturbed for 24 hours. As the jars cool, you should hear a “popping” sound as the lids seal.
-
After 24 hours, check the seals of each jar. The lid should be concave (slightly curved inward) and should not flex when pressed in the center. If a jar did not seal properly, refrigerate it immediately and consume the pickles within a few weeks.
Expert Tips & Tricks
- For extra crispness, add a grape leaf to each jar before filling with the cucumbers. The tannins in the grape leaf help to maintain the cucumbers’ firm texture.
- Adjust the amount of stevia to your personal preference. Start with the recommended amount and then add more, a packet at a time, until you reach your desired level of sweetness. Remember that stevia can have a slightly different sweetness profile than sugar.
- If you don’t have cheesecloth, you can use a spice infuser or a fine-mesh bag to hold the pickling spices.
- Ensure your canning pot is deep enough to completely submerge the jars by at least an inch or two for safe processing.
- Always use new lids for canning. The sealing compound on used lids may not be reliable.
Serving & Storage Suggestions
These stevia sweet pickles are incredibly versatile! Serve them alongside grilled meats, sandwiches, or as a refreshing addition to a cheese and charcuterie board. They’re also fantastic chopped and added to potato salad or tuna salad.
Properly sealed jars can be stored in a cool, dark place (like a pantry or basement) for up to a year. Once opened, refrigerate the pickles and consume them within a few weeks. The quality will start to degrade after extended exposure to air.
Nutritional Information
(Estimated per serving, assuming 6 servings per batch. Note: Nutritional information can vary based on specific ingredients and serving size)
| Nutrient | Amount per Serving | % Daily Value |
|---|---|---|
| Calories | 92 kcal | N/A |
| Total Fat | 0.4 g | 0% |
| Saturated Fat | 0.1 g | 0% |
| Cholesterol | 0 mg | 0% |
| Sodium | 17342.6 mg | 722% |
| Total Carbohydrate | 15.3 g | 5% |
| Dietary Fiber | 1.9 g | 7% |
| Sugars | 6.9 g | N/A |
| Protein | 2.3 g | 4% |
Note: Sodium content appears high due to the salt used in the brining and pickling process. Actual consumption of sodium per serving will be significantly less as much of the salt is discarded in the brine.
Variations & Substitutions
- Spicy Pickles: Add a pinch of red pepper flakes or a sliced jalapeño to each jar for a touch of heat.
- Dill Pickles: Increase the amount of dill seed and add a few sprigs of fresh dill to each jar. Omit the mixed pickling spice for a more pronounced dill flavor.
- Bread and Butter Pickles: Slice the cucumbers into rounds instead of quarters and add a teaspoon of turmeric to the brine for color and flavor.
- Cucumber-Free Pickles: Try pickling other vegetables like green beans, carrots, or cauliflower using the same brine recipe. Adjust the processing time as needed for the specific vegetable.
- Sweetness Level: The sweetness of stevia is subjective, you can substitute with another sugar alternative to preference as long as it is canning safe.
FAQs (Frequently Asked Questions)
Q: Why do I need to brine the cucumbers overnight?
A: Brining helps to draw out excess moisture from the cucumbers, resulting in a crisper pickle. It also helps to season them throughout.
Q: Can I use regular sugar instead of stevia?
A: Yes, but you will need to adjust the amount to achieve the desired sweetness. Start with about 1 1/2 cups of sugar and adjust to taste. Be aware that using sugar will significantly increase the sugar content of the pickles.
Q: How do I know if the jars are properly sealed?
A: After 24 hours, the lids should be concave (slightly curved inward) and should not flex when pressed in the center. You should also hear a “popping” sound as the jars cool and seal.
Q: What happens if a jar doesn’t seal properly?
A: If a jar doesn’t seal properly, refrigerate it immediately and consume the pickles within a few weeks. They are not shelf-stable.
Q: Can I reuse the pickling brine?
A: No, it is not recommended to reuse pickling brine. The brine has already been exposed to the cucumbers and may contain bacteria that could spoil future batches.
Final Thoughts
These Stevia Sweet Pickles are a testament to the fact that you don’t have to sacrifice flavor for health. The process might seem a little involved at first, but the reward of perfectly crisp, tangy-sweet pickles that you made yourself is absolutely worth it. Gather your ingredients, follow the steps, and prepare to enjoy a taste of summer all year round. Don’t hesitate to experiment with different variations and find your perfect pickle profile. Share your creations with friends and family, and let me know what you think! They’re fantastic on their own, but also try them alongside a juicy burger or as a crunchy element in a charcuterie board. Happy pickling!