
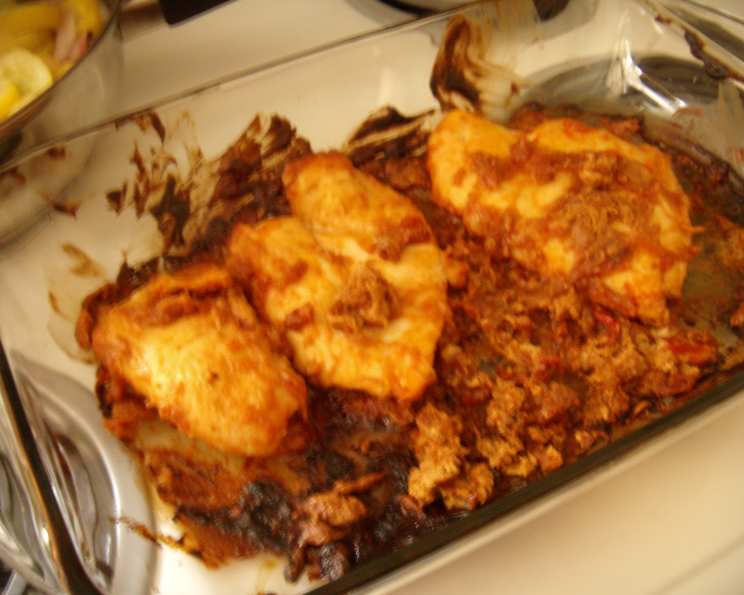
Sticky Chicky: The Easiest, Most Flavorful Chicken You’ll Ever Make
There’s a certain magic to weeknight dinners that practically cook themselves. I remember one particularly hectic Tuesday, juggling a looming deadline and a kid’s soccer practice, when I stumbled upon a version of this recipe. The aroma alone, a symphony of peanut butter, soy sauce, and sweet ketchup, pulled me away from my computer. That first bite was a revelation – tender, juicy chicken coated in a sticky, savory glaze that tasted far more complex than the minimal effort required. It became a family favorite, and I’m excited to share my version with you.
Recipe Overview
- Prep Time: 15 minutes
- Cook Time: 45-60 minutes
- Total Time: 1 hour – 1 hour 15 minutes
- Servings: 5-6
- Yield: Variable, depending on chicken pieces used
- Dietary Type: Varies, see notes below
Ingredients
- 2 tablespoons oil (optional)
- 1 tablespoon soy sauce
- 3 tablespoons smooth peanut butter (I recommend Adam’s all-natural creamy peanut butter for its pure peanut flavor and simple ingredients)
- 3 tablespoons ketchup
- 1 1/2 lbs chicken pieces (5-6 pieces, depending on size. Thighs or hindquarters work best, but chicken breasts can be used as well).
Ingredient Notes:
- Oil: The oil is optional and helps with browning. If you are watching your fat intake or using skin-on chicken that will render fat, you can omit it.
- Soy Sauce: For a gluten-free option, use tamari instead of soy sauce.
- Peanut Butter: Be sure to use smooth peanut butter for the best texture in the sauce. Chunky peanut butter will affect the sauce’s consistency.
- Ketchup: Use your favorite brand of ketchup. For a sugar-free option, look for ketchup sweetened with natural alternatives.
- Chicken: The cooking time will vary depending on the size and type of chicken pieces you use. Bone-in, skin-on pieces will take longer than boneless, skinless chicken breasts.
Equipment Needed
- Large baking dish
- Whisk or fork
- Large bowl or gallon-size freezer bag (optional, for marinating)
Instructions
-
Preheat your oven to 350°F (175°C). Make sure your oven rack is positioned in the center for even cooking.
-
In a large bowl or a 1-gallon freezer bag, combine the sauce ingredients: soy sauce, peanut butter, and ketchup.
-
Blend the sauce ingredients until smooth. Use a whisk or fork to thoroughly combine all ingredients. It may take a little effort to fully incorporate the peanut butter, but keep mixing until the sauce is homogenous and creamy.
-
Add the chicken pieces to the bowl or freezer bag.
-
Toss or shake the chicken with the sauce to coat evenly. Ensure that each piece of chicken is thoroughly covered in the sticky, flavorful sauce. If using a freezer bag, seal it tightly and massage the sauce into the chicken. If using a bowl, use tongs to turn the chicken and coat it completely.
-
(Optional: For Freezer Meal Prep) Lay the bag flat in the freezer. If you’re preparing this as a freezer meal, freeze the chicken in a single layer for easier thawing later.
-
(Optional: Thawing) Thaw the chicken completely in the refrigerator before baking, ideally overnight.
-
Transfer the chicken and sauce to a large baking dish. Arrange the chicken pieces in a single layer in the baking dish, ensuring they are not overcrowded.
-
Bake until the chicken juices run clear when pierced with a fork, or a meat thermometer inserted into the thickest part of the chicken registers 165°F (74°C). For chicken pieces like thighs or hindquarters, this will typically take 45-60 minutes. For chicken breasts, it may only take 20-30 minutes.
Tip: Basting the chicken with the pan juices halfway through the cooking time will help keep it moist and enhance the glaze. -
Remove from the oven and let rest for 5-10 minutes before serving. This allows the juices to redistribute, resulting in more tender and flavorful chicken.
Expert Tips & Tricks
- For extra crispy skin: Place the baking dish under the broiler for the last few minutes of cooking, but watch it carefully to prevent burning.
- Marinate for maximum flavor: If you’re not freezing the chicken, marinating it in the sauce in the refrigerator for at least 30 minutes (or up to 24 hours) will intensify the flavor.
- Prevent sticking: Line your baking dish with parchment paper for easy cleanup.
- Adjust the sweetness: If you prefer a less sweet sauce, reduce the amount of ketchup. For a spicier kick, add a pinch of red pepper flakes or a dash of sriracha.
- Don’t overcrowd the pan: Overcrowding the baking dish will steam the chicken instead of allowing it to brown properly. Use a larger dish or bake in batches if necessary.
- To ensure doneness: Use a meat thermometer inserted into the thickest part of the chicken, avoiding the bone. The internal temperature should reach 165°F (74°C). If the chicken is browning too quickly, tent it loosely with foil.
Serving & Storage Suggestions
Serve Sticky Chicky hot, straight from the oven. It’s delicious with steamed rice, noodles, or roasted vegetables. A simple side salad also complements the rich flavors of the chicken.
- Storage: Leftovers can be stored in an airtight container in the refrigerator for up to 3-4 days.
- Reheating: Reheat the chicken in the oven at 350°F (175°C) until warmed through, or in the microwave in 30-second intervals, checking frequently to avoid overcooking. The microwave can make the chicken a little rubbery, so the oven is preferred.
- Freezing (after cooking): Cooked chicken can be frozen for up to 2 months. Thaw completely in the refrigerator before reheating.
Nutritional Information
Note: Nutritional information is an estimate and may vary based on specific ingredients and portion sizes.
| Nutrient | Amount per Serving | % Daily Value |
|---|---|---|
| Calories | 450 kcal | 23% |
| Total Fat | 25g | 38% |
| Saturated Fat | 7g | 35% |
| Cholesterol | 100mg | 33% |
| Sodium | 700mg | 30% |
| Total Carbohydrate | 15g | 5% |
| Dietary Fiber | 2g | 8% |
| Sugars | 10g | |
| Protein | 40g | 80% |
Variations & Substitutions
- Honey-Garlic Chicken: Replace the ketchup with an equal amount of honey and add 2 cloves of minced garlic to the sauce.
- Spicy Peanut Chicken: Add 1-2 teaspoons of sriracha or chili garlic sauce to the sauce.
- Lemon-Ginger Chicken: Add the zest and juice of one lemon and 1 tablespoon of grated ginger to the sauce.
- Teriyaki Chicken: Use teriyaki sauce instead of soy sauce and ketchup. Adjust the peanut butter to taste, as teriyaki sauce is already sweet.
- Sesame Chicken: Add 1-2 teaspoons of sesame oil to the sauce and sprinkle sesame seeds over the chicken before baking.
FAQs (Frequently Asked Questions)
Q: Can I use boneless, skinless chicken breasts instead of thighs?
A: Yes, you can, but reduce the baking time to 20-30 minutes, or until the internal temperature reaches 165°F (74°C). Boneless, skinless chicken breasts tend to dry out more easily than thighs, so be careful not to overcook them.
Q: Can I make this recipe in a slow cooker?
A: Absolutely! Place the chicken and sauce in a slow cooker and cook on low for 6-8 hours or on high for 3-4 hours, or until the chicken is cooked through.
Q: Can I use a different type of nut butter?
A: While peanut butter provides a classic flavor, you can experiment with almond butter, cashew butter, or sunflower seed butter (for a nut-free option). The flavor profile will change slightly depending on the nut butter you use.
Q: Can I add vegetables to the baking dish?
A: Yes! Broccoli florets, bell pepper strips, or sliced onions would be great additions. Add them to the baking dish along with the chicken, and they’ll roast alongside it, soaking up the flavorful sauce.
Q: What should I do if the sauce is too thick?
A: If the sauce is too thick, add a tablespoon or two of water or chicken broth to thin it out to your desired consistency.
Final Thoughts
Sticky Chicky is more than just a recipe; it’s a testament to the fact that incredibly delicious food doesn’t have to be complicated or time-consuming. This dish is perfect for busy weeknights, potlucks, or any occasion where you want to impress without spending hours in the kitchen. So, gather your ingredients, preheat your oven, and prepare to be amazed by the ease and flavor of Sticky Chicky! I encourage you to try this recipe and let me know what you think. Perhaps pair it with a crisp cucumber salad and a chilled glass of Riesling for a complete and satisfying meal. Happy cooking!