
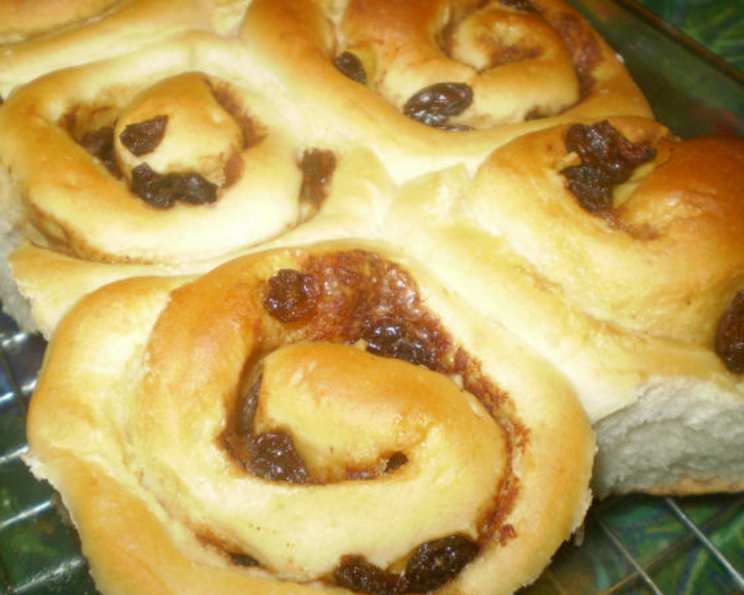
Sticky Cinnamon Buns: A Classic Comfort
The aroma alone is enough to transport me back to childhood. I can almost feel the warmth radiating from the kitchen as my grandmother pulled a pan of these golden, glistening cinnamon buns from the oven. The sticky sweetness, the soft, yielding dough, the swirl of cinnamon – it was pure, unadulterated happiness on a plate. This recipe isn’t just a set of instructions; it’s a memory, a tradition, and a taste of home.
Recipe Overview
- Prep Time: 1 hour 20 minutes
- Cook Time: 20-25 minutes
- Total Time: 2 hours 20 minutes
- Servings: 24-30 buns
- Yield: 24-30 buns
- Dietary Type: Not specified
Ingredients
- 2 (1/4 ounce) packages active dry yeast
- 1⁄2 cup warm water (105-115 degrees F)
- 1 1⁄4 cups buttermilk
- 1⁄2 cup butter, softened
- 1⁄2 cup sugar
- 2 eggs
- 6 cups flour
- 2 teaspoons baking powder
- 2 teaspoons salt
For the Filling:
- 1⁄4 cup butter, softened
- 1 cup brown sugar, packed
- 1 tablespoon ground cinnamon
- 1 cup raisins (optional)
- 1⁄2 cup walnuts, finely chopped (optional)
For the Glaze:
- 5 1/3 tablespoons butter
- 2 cups powdered sugar
- 1⁄2 teaspoon vanilla extract
- 1⁄3 cup hot water
Equipment Needed
- Large mixing bowl
- Measuring cups and spoons
- Baking sheets
- Electric mixer
- Lightly floured surface
- Rolling pin
Instructions
-
Begin by activating the yeast. In a small bowl, dissolve the active dry yeast in 1/2 cup of warm water (between 105-115 degrees F). Let it stand for about 10 minutes, or until it becomes foamy. This indicates that the yeast is alive and active.
-
In a large mixing bowl, combine the activated yeast mixture with buttermilk, 1/2 cup softened butter, sugar, and eggs. Mix well.
-
Gradually add 3 cups of flour, along with the baking powder and salt. Stir to combine.
-
Continue to add the remaining flour gradually, stirring until the dough becomes easy to handle. You may not need all 6 cups. The dough should be soft but not sticky.
-
Turn the dough out onto a lightly floured board.
-
Knead the dough until it is smooth and elastic, about 10 minutes. This develops the gluten, which gives the buns their structure.
-
Divide the dough in half.
-
Roll each half into a rectangle approximately 15×9 inches.
-
Spread each rectangle with 2 tablespoons of softened butter. Ensure even coverage for a rich, moist filling.
-
In a separate bowl, combine the brown sugar and cinnamon for the filling.
-
Sprinkle each buttered rectangle with half of the brown sugar-cinnamon mixture. If desired, sprinkle with raisins and/or finely chopped walnuts.
-
Roll up each rectangle tightly, beginning at the wide side. This creates the classic cinnamon bun swirl.
-
Using a sharp knife, cut each roll into 15 slices.
-
Place the slices onto greased baking sheets. Be sure to leave some space between each bun to allow for expansion during baking.
-
Cover the baking sheets with a clean kitchen towel and allow the buns to rise in a warm place until doubled in size, about 1 hour. This is a crucial step for achieving light and fluffy buns.
-
While the buns are rising, preheat your oven to 375 degrees F (190 degrees C).
-
Bake the buns until they are golden brown, 20-25 minutes. Keep a close eye on them, as baking times can vary depending on your oven.
-
While the buns are baking, prepare the glaze. In a medium bowl, combine the butter and powdered sugar using an electric mixer.
-
Add the vanilla extract and hot water, and continue to mix until smooth. Adjust the consistency by adding more powdered sugar for a thicker glaze or more hot water for a thinner glaze.
-
Once the buns are out of the oven, immediately spread the glaze generously over them. The heat from the buns will help the glaze melt and create that irresistible sticky coating.
Expert Tips & Tricks
- For extra soft buns, try using a tangzhong – a roux made with flour and water – in the dough. It helps retain moisture and creates a softer texture.
- If your kitchen is cold, place the covered baking sheets in a slightly warmed oven (turned off) to help the buns rise faster.
- To prevent the bottoms of the buns from burning, use a double layer of baking sheets or line the sheets with parchment paper.
- For a deeper cinnamon flavor, lightly toast the cinnamon in a dry pan before adding it to the brown sugar mixture.
- Make-ahead tip: The dough can be made the night before. After kneading, place it in a greased bowl, cover, and refrigerate overnight. Let it come to room temperature before rolling and shaping the buns.
Serving & Storage Suggestions
Serve these sticky cinnamon buns warm, ideally straight from the oven. They’re perfect with a cup of coffee or tea for breakfast, brunch, or a sweet treat any time of day.
Leftover buns can be stored at room temperature in an airtight container for up to 2 days. For longer storage, refrigerate them for up to a week or freeze them for up to 2 months. To reheat, warm them in the oven at 350 degrees F (175 degrees C) for about 10-15 minutes, or microwave them individually for a few seconds.
Nutritional Information
| Nutrient | Amount per Serving | % Daily Value |
|---|---|---|
| Calories | 291 kcal | N/A |
| Calories from Fat | 82g | 28% |
| Total Fat | 9.2 g | 14% |
| Saturated Fat | 5.5 g | 27% |
| Cholesterol | 40.2 mg | 13% |
| Sodium | 307.1 mg | 12% |
| Total Carbohydrate | 48.1 g | 16% |
| Dietary Fiber | 1.1 g | 4% |
| Sugars | 23.5 g | 94% |
| Protein | 4.5 g | 9% |
Variations & Substitutions
- Nut-Free: Omit the walnuts entirely or substitute with sunflower seeds.
- Dairy-Free: Use a dairy-free butter substitute and plant-based milk (such as almond or soy milk) for the buttermilk. You can also substitute the butter in the glaze with a dairy-free alternative.
- Spiced Up: Add a pinch of nutmeg or cardamom to the cinnamon-sugar filling for a warmer, more complex flavor.
- Fruit Forward: Swap the raisins for other dried fruits like cranberries, chopped apricots, or golden raisins.
- Maple Glaze: Replace the vanilla extract in the glaze with maple extract and use maple syrup instead of hot water for a delicious maple-flavored glaze.
FAQs (Frequently Asked Questions)
Q: Why isn’t my yeast rising?
A: The water might be too hot or too cold, or the yeast could be expired. Ensure the water is between 105-115 degrees F and check the expiration date on the yeast packet.
Q: My cinnamon buns are dry. What did I do wrong?
A: Overbaking is the most common cause of dry buns. Make sure to bake them until they are golden brown but still slightly soft to the touch. Adding a tangzhong to the dough will also help to keep them moist.
Q: Can I freeze the unbaked cinnamon buns?
A: Yes! After shaping the buns, place them on a baking sheet and freeze until solid. Then, transfer them to a freezer bag. When ready to bake, let them thaw overnight in the refrigerator and then let them rise before baking as directed.
Q: How do I get a perfectly smooth glaze?
A: Ensure the butter is softened and use powdered sugar that is free of lumps. Sift the powdered sugar if necessary. Whisk or use an electric mixer for a smooth consistency.
Q: Can I use whole wheat flour in this recipe?
A: Yes, but the texture will be slightly different. Substitute up to half of the all-purpose flour with whole wheat flour for a nuttier flavor and added fiber.
Final Thoughts
These sticky cinnamon buns are more than just a recipe; they’re an invitation to create memories, share warmth, and indulge in a little bit of happiness. Don’t be intimidated by the steps – each one is simple, and the end result is well worth the effort. Gather your ingredients, roll up your sleeves, and get ready to fill your kitchen with the irresistible aroma of homemade cinnamon buns. Share your creations with loved ones, and don’t forget to let me know how they turn out! A warm glass of milk or a strong cup of coffee is the perfect accompaniment to these sweet treats.