
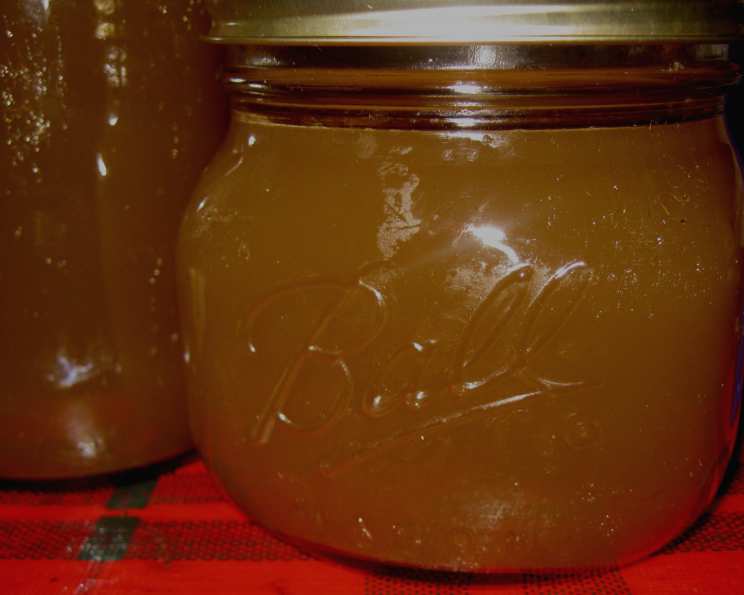
Stock from Roasted Beef Marrow Bones: A Culinary Elixir
The scent of roasted bones simmering on the stovetop always transports me back to my grandmother’s kitchen. She believed that homemade stock was the foundation of every good meal, and she was right. The rich, savory aroma that filled her house was a promise of deliciousness to come, a secret ingredient whispered into soups, stews, and sauces. I remember standing on a stool, mesmerized as she carefully skimmed the impurities from the surface of the bubbling broth, a ritual passed down through generations, transforming simple ingredients into liquid gold.
Recipe Overview
- Prep Time: 20 minutes
- Cook Time: 4 hours 45 minutes
- Total Time: 5 hours 5 minutes
- Yields: 2 quarts
- Serves: 4
- Dietary Type: Gluten-Free, Dairy-Free
Ingredients
- 2 lbs beef bones with marrow (adding some veal bones is also great!)
- ½ lb stew meat (optional)
- Olive oil
- 1 medium onion, peeled and quartered
- 1 large carrot, cut into 2-inch segments
- Celery tops (a handful) or 1 large celery rib, cut into 1-inch segments
- 1 garlic clove, unpeeled and crushed with the side of a knife
- Fresh parsley, stems and leaves (small handful)
- 1 bay leaf
- 6 peppercorns
Equipment Needed
- Roasting pan
- Large stockpot
- Tongs
- Cheesecloth
- Strainer
Instructions
- Preheat your oven to 400 degrees F (200 degrees C).
- Place the beef bones, stew meat (if using), onions, and carrots in a roasting pan. Drizzle everything generously with a little olive oil.
- Roast in the preheated oven for approximately 45 minutes, flipping the bones, meat, and vegetables halfway through.
- Keep a close watch on the bones, meat, and vegetables as they roast. They should be beautifully browned, but not charred. If they appear to be burning, reduce the oven temperature slightly.
- Once the bones, meat and vegetables are roasted, remove the roasting pan from the oven and carefully transfer everything to a large stockpot.
- Place the roasting pan over two burners on your stovetop. Add about a cup of hot water to the pan. Use a spatula to scrape up all the flavorful browned bits from the bottom of the pan.
- Pour the water and the scraped-up browned bits into the stockpot with the bones, meat, and vegetables.
- Add enough water to the stockpot to completely cover the bones by about 2 to 3 inches. Then, add the celery, garlic, parsley, bay leaf, and peppercorns.
- Heat the stockpot over medium heat until the stock reaches a low simmer. Once simmering, reduce the heat to the lowest setting possible and almost simmer the stock (covered) for at least 3 hours. For an even richer and more flavorful stock, simmer for 6 to 8 hours. Avoid stirring the stock during this time, as it can cause the fat to emulsify and make the stock cloudy.
- During the long simmering time, you can periodically skim off any fat and scum that rises to the top of the stock. This will result in a cleaner, clearer stock. The skimmed fat can be saved and used for cooking other dishes!
- After simmering for the desired amount of time, use tongs to carefully remove the bones and vegetables from the stockpot. Discard the solids.
- Strain the stock through a cheesecloth-lined strainer to remove any remaining solids, ensuring a clear and smooth broth.
- Allow the stock to cool to room temperature.
- Store the cooled stock in the refrigerator with the fat layer intact. This layer of fat acts as a natural barrier, protecting the stock from bacteria and helping to preserve its freshness.
- If you plan to store the stock in the freezer, remove the fat layer before freezing. Remember to leave about an inch of headspace in the container, as the liquid will expand when frozen.
Expert Tips & Tricks
- Don’t overcrowd the roasting pan. Overcrowding will steam the bones and vegetables instead of roasting them properly, preventing them from developing a deep, rich flavor. Roast in batches if necessary.
- Don’t skip the scraping step! Those browned bits at the bottom of the roasting pan are packed with flavor. Deglazing the pan with hot water and scraping them up is crucial for adding depth to the stock.
- Low and slow is the way to go. Simmering the stock for a long time is essential for extracting maximum flavor from the bones and vegetables. Don’t rush the process.
- Adding veal bones alongside the beef bones will create a richer, more gelatinous stock due to their higher collagen content.
- If you don’t have stew meat, you can omit it or substitute other cuts of beef, such as short ribs or oxtail. These cuts will add even more richness and flavor to the stock.
Serving & Storage Suggestions
This homemade beef stock is a versatile ingredient that can be used in a variety of dishes. Use it as a base for soups, stews, and sauces, or use it to deglaze pans when making pan sauces. It can also be used to cook grains like rice or quinoa for added flavor.
To store the stock, first cool it completely. Then, store it in an airtight container in the refrigerator for up to 4 days. For longer storage, freeze the stock in freezer-safe containers for up to 3 months. Be sure to leave some headspace in the containers, as the stock will expand when frozen.
To reheat frozen stock, thaw it in the refrigerator overnight or in a pot over low heat. Once thawed, use it as you would fresh stock.
Nutritional Information
| Nutrient | Amount per Serving | % Daily Value |
|---|---|---|
| Calories | 20 kcal | 1% |
| Total Fat | 0.1 g | 0% |
| Saturated Fat | 0 g | 0% |
| Cholesterol | 0 mg | 0% |
| Sodium | 13.4 mg | 0% |
| Total Carbohydrate | 4.8 g | 1% |
| Dietary Fiber | 0.9 g | 3% |
| Sugars | 2 g | 8% |
| Protein | 0.5 g | 0% |
Variations & Substitutions
- Vegetarian Stock: Omit the beef bones and stew meat and use vegetable scraps instead. Roast the vegetable scraps for a deeper flavor.
- Chicken Stock: Substitute chicken bones for beef bones.
- Spiced Stock: Add additional spices like star anise, cloves, or ginger for a more complex flavor profile.
- Herb-Infused Stock: Add fresh herbs like thyme, rosemary, or sage during the last hour of simmering for an herbal infusion.
FAQs (Frequently Asked Questions)
Q: Why do I need to roast the bones before making stock?
A: Roasting the bones intensifies their flavor through caramelization, resulting in a richer, more complex stock.
Q: How long can I store the stock in the refrigerator?
A: Properly stored, homemade beef stock will last for up to 4 days in the refrigerator.
Q: Can I use frozen vegetables to make stock?
A: While fresh vegetables are preferred, frozen vegetables can be used in a pinch.
Q: What does skimming the stock do?
A: Skimming removes impurities and excess fat, resulting in a clearer, cleaner-tasting stock.
Q: Why is my stock cloudy?
A: Over-stirring the stock during simmering can emulsify the fat and make it cloudy. Avoid stirring as much as possible.
Final Thoughts
There’s something profoundly satisfying about crafting your own beef stock from roasted bones. The deep, savory flavor is unparalleled, and the process itself is a testament to the power of simple ingredients transformed by time and technique. I urge you to try this recipe and experience the difference that homemade stock can make in your cooking. Don’t be afraid to experiment with different vegetables, herbs, and spices to create a stock that is uniquely your own. And if you are planning on a hearty beef stew to use your stock with, try adding a red wine like a Cabernet Sauvignon; it will compliment the beef perfectly. Happy cooking!