
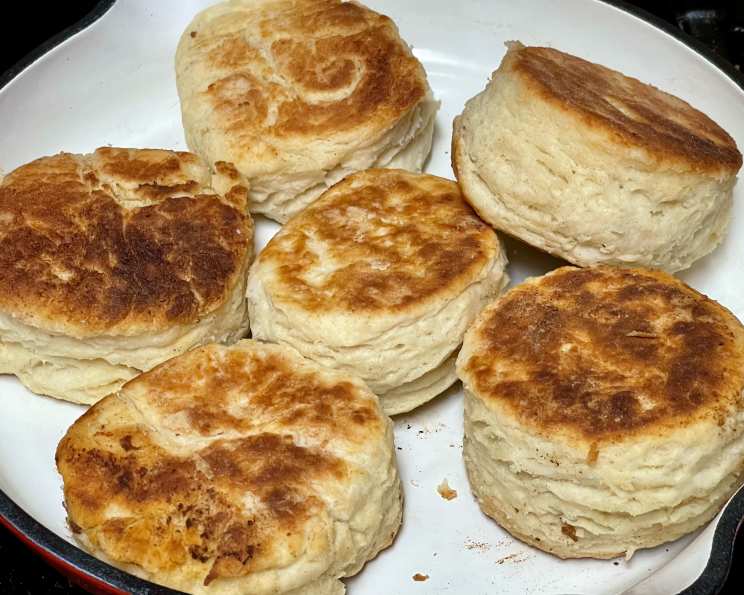
Golden Stove Top Biscuits: A Skillet of Comfort
My grandmother, Elsie, wasn’t much for baking in the oven. Summers in Louisiana were sweltering enough without adding extra heat, and she claimed stove-top biscuits were just as good, if not better. I remember sitting on a stool in her kitchen, watching her expertly pat out the dough and sizzle those golden rounds in a cast iron skillet. The aroma of buttery, slightly browned biscuits filled the air, a scent that instantly transported me to a place of warmth and home. These weren’t just biscuits; they were love made edible.
Recipe Overview
- Prep Time: 10 minutes
- Cook Time: 12 minutes
- Total Time: 22 minutes
- Servings: 12
- Yield: 12 biscuits
- Dietary Type: Vegetarian
Ingredients
- 2 cups all-purpose flour
- 4 teaspoons baking powder
- 1 teaspoon salt
- 1/4 cup margarine
- 1 cup milk
- 1/4 cup margarine (for frying)
Equipment Needed
- Large Mixing Bowl
- Fork or Pastry Cutter
- Iron Skillet
- Paper Towels
Instructions
- In a large mixing bowl, combine the all-purpose flour, baking powder, and salt. Whisk to ensure even distribution. This is crucial for a consistent rise.
- Using a fork, pastry cutter, or even your fingers, cut in the 1/4 cup of margarine into the dry ingredients. You want the margarine to be evenly distributed, creating small, pea-sized pieces throughout the flour mixture. This process creates pockets of fat that, when heated, will create those delightful layers in your biscuits. Don’t overmix!
- Stir in the 1 cup of milk. Mix until just combined. Be careful not to overmix the dough, as this will develop the gluten and result in tough biscuits. The dough should be slightly sticky.
- Lightly flour a clean surface. Gently turn the dough out onto the floured surface. Form the dough into a roughly rectangular shape, about 1/2-inch to 3/4-inch thick. Use a biscuit cutter or a sharp knife to cut out 12 biscuits. If you don’t have a biscuit cutter, don’t fret! A drinking glass works in a pinch.
- Melt 2 tablespoons of margarine in an iron skillet over medium/low heat. Make sure the skillet is evenly coated with the melted margarine. The skillet needs to be hot enough to cook the biscuits without burning them.
- Fry half of the biscuits in the skillet for about 6 minutes on each side, or until golden brown and cooked through. Keep a close eye on them; the time can vary slightly depending on your stove top. Adjust the heat as needed to prevent burning.
- Drain the fried biscuits on paper towels to remove any excess margarine. This will help prevent them from becoming soggy.
- Repeat steps 5-7 with the remaining 2 tablespoons of margarine and the remaining biscuit dough. Ensure the skillet is sufficiently hot before adding the second batch of biscuits.
Expert Tips & Tricks
- Cold Ingredients: For the flakiest biscuits, use cold margarine and milk. Cold ingredients help create steam during cooking, resulting in a lighter, more tender biscuit. You can even chill your flour for 15-20 minutes before starting!
- Don’t Overmix: Overmixing the dough develops gluten, which leads to tough biscuits. Mix until just combined. A few streaks of flour are perfectly acceptable.
- Cast Iron is Key: An iron skillet distributes heat evenly, ensuring that your biscuits cook uniformly and develop a beautiful golden-brown crust. If you don’t have a cast iron skillet, a heavy-bottomed stainless steel skillet will work, but the results may not be quite as good.
- The “Fold” Technique: After combining the dough and milk, instead of just patting the dough out, try folding the dough over on itself a few times. This will create even more layers in your biscuits.
- Brush with Butter: For an extra touch of richness, brush the tops of the warm biscuits with melted butter immediately after frying. You can even add a sprinkle of sea salt for added flavor.
Serving & Storage Suggestions
Serve these stove top biscuits warm with butter, jam, honey, or gravy. They are perfect alongside a hearty breakfast, a comforting soup, or as a side to your favorite dinner.
Leftover biscuits can be stored in an airtight container at room temperature for up to 2 days, or in the refrigerator for up to 5 days. For longer storage, freeze them for up to 2 months.
To reheat, wrap the biscuits in foil and warm them in a 350°F (175°C) oven for about 10-15 minutes, or until heated through. You can also microwave them for a few seconds, but they may become slightly soggy.
Nutritional Information
| Nutrient | Amount per Serving | % Daily Value* |
|---|---|---|
| Calories | 123.5 kcal | N/A |
| Calories from Fat | 42 kcal | 35% |
| Total Fat | 4.7 g | 7% |
| Saturated Fat | 1.3 g | 6% |
| Cholesterol | 2.9 mg | 0% |
| Sodium | 369.6 mg | 15% |
| Total Carbohydrate | 17.3 g | 5% |
| Dietary Fiber | 0.6 g | 2% |
| Sugars | 0.1 g | 0% |
| Protein | 2.9 g | 5% |
*Percent Daily Values are based on a 2,000 calorie diet.
Variations & Substitutions
- Buttermilk Biscuits: Substitute buttermilk for regular milk for a tangier flavor. You may need to adjust the amount of milk slightly depending on the consistency of the dough.
- Cheese Biscuits: Add 1/2 cup of shredded cheddar cheese to the dry ingredients for a cheesy twist.
- Herb Biscuits: Incorporate 1-2 tablespoons of chopped fresh herbs, such as rosemary, thyme, or chives, into the dry ingredients.
- Sweet Biscuits: Add 2 tablespoons of sugar to the dry ingredients for a slightly sweeter biscuit.
- Gluten-Free Biscuits: Use a gluten-free all-purpose flour blend. You may need to add a binder like xanthan gum to help with the structure.
- Vegan Biscuits: Use a plant-based milk alternative like soy or almond milk. Ensure your margarine is also vegan.
FAQs (Frequently Asked Questions)
Q: Why are my biscuits tough?
A: Overmixing the dough develops gluten, resulting in tough biscuits. Mix the dough until just combined, leaving some streaks of flour if necessary.
Q: My biscuits are flat. What did I do wrong?
A: Your baking powder might be old and ineffective. Make sure your baking powder is fresh. Also, make sure your skillet is hot enough before adding the biscuits.
Q: Can I make the dough ahead of time?
A: Yes, you can make the dough ahead of time and store it in the refrigerator for up to 24 hours. However, the biscuits may not rise as much.
Q: Can I freeze the cooked biscuits?
A: Yes, you can freeze the cooked biscuits. Let them cool completely before wrapping them tightly in plastic wrap and placing them in a freezer bag.
Q: My biscuits are burning on the bottom before they are cooked through. What should I do?
A: Reduce the heat to low and continue cooking the biscuits until they are cooked through. You may also need to flip them more frequently.
Final Thoughts
These stove top biscuits are a testament to simple ingredients and straightforward techniques yielding incredible results. Give them a try, and you might just find yourself reaching for the skillet instead of the oven more often. Whether you are a seasoned baker or a novice in the kitchen, these biscuits are sure to become a family favorite. Don’t hesitate to experiment with variations and find your perfect biscuit recipe. And please, share your experience – I’d love to hear how they turn out! Consider pairing them with a steaming bowl of chili or a hearty breakfast scramble for a truly satisfying meal. Happy cooking!