
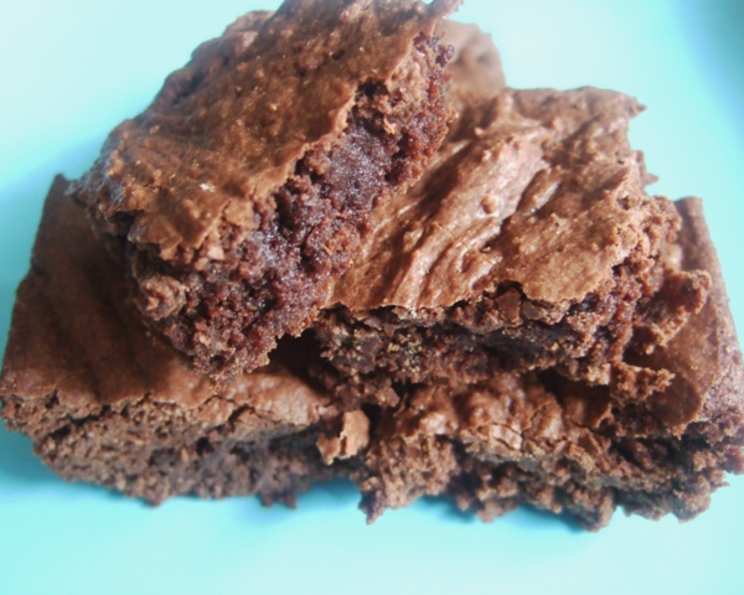
Stove-Top Sensations: The Easiest Brownies You’ll Ever Make
Brownies have always been my go-to comfort bake, a little square of chocolatey happiness that can turn any day around. I remember one rainy afternoon, stuck inside with nothing to do, I decided to bake a batch. The problem? Every bowl in the kitchen was dirty. Impatient and craving that fudgy goodness, I realized I could melt the butter right in a saucepan and build the batter from there. The result was surprisingly delicious and ridiculously easy, proving that sometimes, the best recipes are born out of necessity (and a slight aversion to dishwashing!).
Recipe Overview
- Prep Time: 15 minutes
- Cook Time: 20 minutes
- Total Time: 35 minutes
- Servings: 8-10
- Yield: One 8×8 inch pan of brownies
- Dietary Type: Not specified
Ingredients
- 5 tablespoons butter
- ¾ cup cocoa
- 1 ¼ cups granulated sugar
- 2 eggs
- 1 cup all-purpose flour
- 1 teaspoon baking powder
- ½ teaspoon cinnamon
Equipment Needed
- 8×8 inch baking pan
- Saucepan
- Spatula or wooden spoon
- Measuring cups and spoons
Instructions
-
Preheat your oven to 350°F (175°C). While the oven is preheating, grease and flour an 8×8 inch baking pan. This prevents the brownies from sticking and makes them easier to remove later.
-
In a saucepan (medium heat), melt the butter. Keep a close eye on it so it doesn’t burn. Once melted, remove the saucepan from the heat.
-
Stir in the cocoa into the melted butter until well combined. The mixture will be thick and pasty. This step is important for achieving that rich, chocolatey flavor.
-
Add the granulated sugar to the cocoa-butter mixture and stir until everything is well incorporated. Don’t worry if it looks a bit grainy at this point; the eggs will help smooth it out.
-
Add the eggs, one at a time, making sure each egg is fully incorporated into the batter before adding the next. This helps create a smooth and emulsified batter, which leads to a better texture in the final brownies.
-
In a separate bowl, whisk together the flour, baking powder, and cinnamon. This ensures that the baking powder is evenly distributed throughout the flour, which helps the brownies rise properly. The cinnamon adds a subtle warmth and complexity to the flavor.
-
Gradually add the dry ingredients (flour mixture) to the wet ingredients (saucepan mixture), one small addition at a time, making sure everything is well blended after each addition. Be careful not to overmix; overmixing can lead to tough brownies. Mix until just combined, with no streaks of flour remaining.
-
Pour the batter into the prepared 8×8 inch baking pan and spread it evenly.
-
Bake for 20 minutes, or until a toothpick inserted into the center comes out with fudgy crumbs. Keep a close eye on the brownies, as baking times can vary depending on your oven. If you prefer a more firm brownie, bake for an additional 2 minutes.
-
Let the brownies cool completely in the pan before cutting them into squares. This allows the brownies to set properly, making them easier to slice and serve. If you’re impatient, you can chill them in the refrigerator for a faster cooling process.
Expert Tips & Tricks
- For extra fudgy brownies: Slightly underbake them. The center should still be a little soft when you take them out of the oven. They will continue to set as they cool.
- Blooming the cocoa: Melting the butter and then stirring in the cocoa, allowing it to “bloom” in the heat, intensifies the chocolate flavor.
- Add-ins: Feel free to customize these brownies with your favorite mix-ins. Chocolate chips, nuts, dried fruit, or even a swirl of peanut butter can add extra flavor and texture.
- Pan preparation: Use parchment paper to line the baking pan. This makes it incredibly easy to lift the brownies out of the pan, resulting in cleaner cuts. Simply lift the parchment paper “sling” to remove the entire slab of brownies.
- Even baking: Rotate the pan halfway through baking to ensure even browning. Ovens often have hot spots, which can cause uneven cooking.
- Adjusting sweetness: Taste the batter before baking. If you prefer less sweet brownies, reduce the amount of sugar slightly. If you love a sweeter brownie, add an extra tablespoon or two of sugar.
Serving & Storage Suggestions
These brownies are delicious served warm or at room temperature. For an extra decadent treat, top them with a scoop of vanilla ice cream or a dollop of whipped cream. A dusting of powdered sugar or a drizzle of chocolate sauce can also enhance their presentation.
- Storage: Store leftover brownies in an airtight container at room temperature for up to 3 days, or in the refrigerator for up to a week.
- Freezing: Brownies can be frozen for up to 2 months. Wrap them individually in plastic wrap and then place them in a freezer-safe bag or container. Thaw at room temperature before serving.
- Reheating: To reheat brownies, warm them in the microwave for a few seconds or in a preheated oven at 300°F (150°C) for about 5-10 minutes.
Nutritional Information
| Nutrient | Amount per Serving | % Daily Value |
|---|---|---|
| Calories | 290 kcal | N/A |
| Calories from Fat | 83 g | 29% |
| Total Fat | 9.3 g | 14% |
| Saturated Fat | 5 g | 24% |
| Cholesterol | 65.6 mg | 21% |
| Sodium | 127.1 mg | 5% |
| Total Carbohydrate | 48 g | 16% |
| Dietary Fiber | 2 g | 8% |
| Sugars | 31.3 g | 125% |
| Protein | 4.8 g | 9% |
Note: Nutritional information is an estimate and may vary based on specific ingredients and portion sizes.
Variations & Substitutions
- Nut-Free Brownies: Omit any nuts and ensure all ingredients are processed in a nut-free facility.
- Gluten-Free Brownies: Substitute the all-purpose flour with a gluten-free flour blend. Look for blends that are designed for baking. You might need to add a little extra liquid to the batter, as gluten-free flours tend to be drier.
- Vegan Brownies: Replace the butter with a vegan butter alternative and the eggs with flax eggs (1 tablespoon ground flaxseed mixed with 3 tablespoons of water per egg, let sit for 5 minutes to thicken).
- Peanut Butter Swirl: Before baking, drop dollops of peanut butter over the batter and swirl them in with a knife or toothpick.
- Espresso Brownies: Add a teaspoon of instant espresso powder to the dry ingredients for a mocha flavor.
- Spiced Brownies: Adjust the spices! Try adding a pinch of nutmeg or ground cloves along with the cinnamon.
FAQs (Frequently Asked Questions)
Q: Can I use unsweetened chocolate instead of cocoa powder?
A: Yes, you can substitute unsweetened chocolate, but you will need to adjust the amount of butter and sugar accordingly. A general rule is to use 1 ounce of unsweetened chocolate for every 3 tablespoons of cocoa powder, and reduce the sugar by about ¼ cup.
Q: My brownies came out dry. What did I do wrong?
A: Overbaking is the most common cause of dry brownies. Make sure you are not baking them for too long. Also, ensure you are measuring your flour correctly; too much flour can also lead to dry brownies.
Q: Can I double the recipe?
A: Yes, you can easily double this recipe. Just double all of the ingredients and bake in a larger pan, such as a 9×13 inch pan. You may need to increase the baking time slightly.
Q: How do I get that shiny, crackly top on my brownies?
A: This is often achieved by whisking the sugar and eggs vigorously for a few minutes until the mixture is light and fluffy. This creates a meringue-like effect that results in the shiny top.
Q: Can I use a different type of sugar?
A: While granulated sugar works best for this recipe, you can experiment with other types of sugar, such as brown sugar. Brown sugar will give the brownies a slightly chewier texture and a more molasses-like flavor.
Final Thoughts
These stove-top brownies are proof that you don’t need fancy equipment or a lot of time to create a delicious, homemade treat. They are quick, easy, and incredibly satisfying. Whether you’re a seasoned baker or a complete novice, I encourage you to give this recipe a try. Don’t be afraid to experiment with different add-ins and variations to create your own signature brownie. And most importantly, enjoy the process and the delicious results! Share your creations and feedback – I’d love to see what you come up with!