
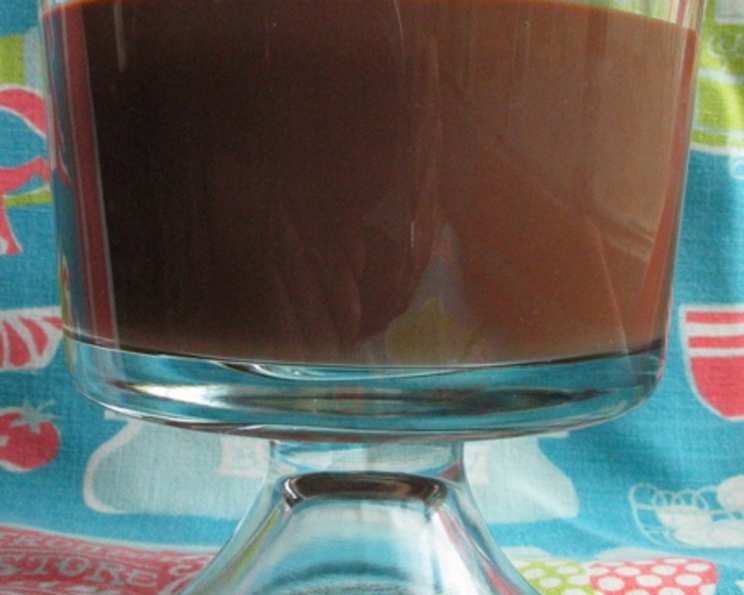
Stove Top Chocolate Pudding: A Nostalgic Treat
The memory is etched in my mind: a rainy afternoon, the comforting scent of cocoa wafting from the kitchen, and my grandmother patiently stirring a pot on the stove. It wasn’t just any pot; it was her special saucepan, reserved for making her famous chocolate pudding. As a child, that pudding was pure magic—a warm, silky escape from the gray world outside. Even now, decades later, the simple act of making stove top chocolate pudding brings back a flood of comforting memories and a taste of pure, unadulterated joy.
Recipe Overview
- Prep Time: 5 minutes
- Cook Time: 5-10 minutes
- Total Time: 10-15 minutes
- Servings: 2
- Dietary Type: Vegetarian
Ingredients
- 2 cups chocolate milk (we like Wawa brand, a local chain)
- ¼ cup cocoa powder
- ⅓ cup sugar
- 2 tablespoons cornstarch
- 1 pinch salt
- ½ ounce semisweet baking chocolate (one half square)
Equipment Needed
- Small saucepan
- Whisk
- Ramekins or small bowls
Instructions
-
In a small saucepan, combine the cocoa powder, sugar, cornstarch, and salt. Ensure these dry ingredients are well mixed before adding any liquid. This step helps to prevent clumps from forming later on.
-
Grate the semisweet baking chocolate into the mixture. Grating ensures even melting and distribution of the chocolate flavor throughout the pudding. Don’t use chocolate chips as the cornstarch will stick to them and your pudding will have a gritty texture.
-
Make a well in the center of the dry ingredients. This little trick helps with incorporating the chocolate milk smoothly.
-
Slowly mix in the chocolate milk using a whisk. Start from the center of the well and gradually incorporate the dry ingredients, whisking constantly to avoid any lumps. Ensure the mixture is completely smooth before proceeding.
-
Heat the mixture over low-medium heat for 5-10 minutes, stirring constantly with the whisk. It’s crucial to stir continuously to prevent the pudding from sticking to the bottom of the pan and scorching. Continue stirring until the pudding reaches your desired thickness. Remember that it will thicken slightly more as it cools.
-
Once the pudding has reached the desired consistency, quickly pour it into two small ramekins or bowls. Try not to scrape the sides of the saucepan too much, as this can introduce small chunks of cooked pudding into the mixture.
-
Chill the pudding in the refrigerator for at least 30 minutes to allow it to set properly, or serve it warm if you prefer.
Expert Tips & Tricks
-
Preventing Lumps: The key to perfectly smooth pudding is constant whisking and ensuring the dry ingredients are well combined before adding the liquid. If lumps do form, you can try using an immersion blender to smooth them out after cooking.
-
Chocolate Intensity: Adjust the amount of cocoa powder or add a few extra squares of semi-sweet chocolate for a richer, more intense chocolate flavor.
-
Vanilla Extract: Add a teaspoon of vanilla extract right at the end of cooking for a subtle but noticeable enhancement of the flavor profile.
-
Temperature Control: Low and slow is the name of the game. Rushing the cooking process by turning up the heat can lead to scorching and uneven thickening.
-
Stirring Technique: Use a whisk rather than a spoon. A whisk does a better job of incorporating the dry ingredients into the wet ingredients and preventing lumps from forming.
Serving & Storage Suggestions
Serve the chocolate pudding chilled or warm, depending on your preference. Garnish with a dollop of whipped cream, a sprinkle of chocolate shavings, or a few fresh berries for an elegant presentation.
Leftover pudding can be stored in an airtight container in the refrigerator for up to 3 days. To prevent a skin from forming on top, press a piece of plastic wrap directly onto the surface of the pudding before refrigerating.
While freezing is not recommended, it is best enjoyed fresh.
Nutritional Information
| Nutrient | Amount per Serving | % Daily Value |
|---|---|---|
| Calories | 425.4 kcal | N/A |
| Calories from Fat | 108g | 26% |
| Total Fat | 12.1 g | 18% |
| Saturated Fat | 7.4 g | 36% |
| Cholesterol | 30 mg | 10% |
| Sodium | 231.3 mg | 9% |
| Total Carbohydrate | 76.8 g | 25% |
| Dietary Fiber | 6.1 g | 24% |
| Sugars | 61.2 g | 244% |
| Protein | 10.3 g | 20% |
Variations & Substitutions
-
Dairy-Free Pudding: Substitute the chocolate milk with a plant-based alternative like almond milk, soy milk, or oat milk. You may need to adjust the amount of sugar to taste, as some plant-based milks are sweeter than others.
-
Vegan Pudding: In addition to using plant-based milk, ensure that the semi-sweet baking chocolate is also vegan-friendly.
-
Spiced Pudding: Add a pinch of cinnamon, nutmeg, or cardamom to the dry ingredients for a warm, spiced twist.
-
Peanut Butter Chocolate Pudding: Swirl in a tablespoon of peanut butter at the end of cooking for a decadent peanut butter chocolate flavor.
-
Mint Chocolate Pudding: Add a few drops of peppermint extract along with the vanilla extract for a refreshing mint chocolate flavor.
FAQs (Frequently Asked Questions)
Q: Can I use regular milk instead of chocolate milk?
A: Yes, you can use regular milk, but you may want to increase the amount of cocoa powder and sugar to compensate for the lack of chocolate flavor and sweetness in the milk.
Q: How do I know when the pudding is done?
A: The pudding is done when it has thickened to your desired consistency and coats the back of a spoon. It should also be smooth and glossy.
Q: Can I make this pudding ahead of time?
A: Absolutely! This pudding is perfect for making ahead of time. Simply store it in an airtight container in the refrigerator for up to 3 days.
Q: What if my pudding is too thick?
A: If your pudding becomes too thick, you can thin it out by whisking in a little extra chocolate milk until it reaches your desired consistency.
Q: Can I use a different type of chocolate?
A: Yes, you can experiment with different types of chocolate, such as milk chocolate or dark chocolate, to create a unique flavor profile. Just be sure to adjust the amount of sugar accordingly.
Final Thoughts
Stove top chocolate pudding is more than just a dessert; it’s a warm hug in a bowl, a comforting reminder of simpler times. I encourage you to try this recipe and experience the joy of creating a homemade treat from scratch. Feel free to experiment with different variations and substitutions to make it your own. And don’t forget to share your creations and feedback! Perhaps pair it with a cup of freshly brewed coffee or a scoop of vanilla ice cream for an extra touch of indulgence. Happy cooking!