
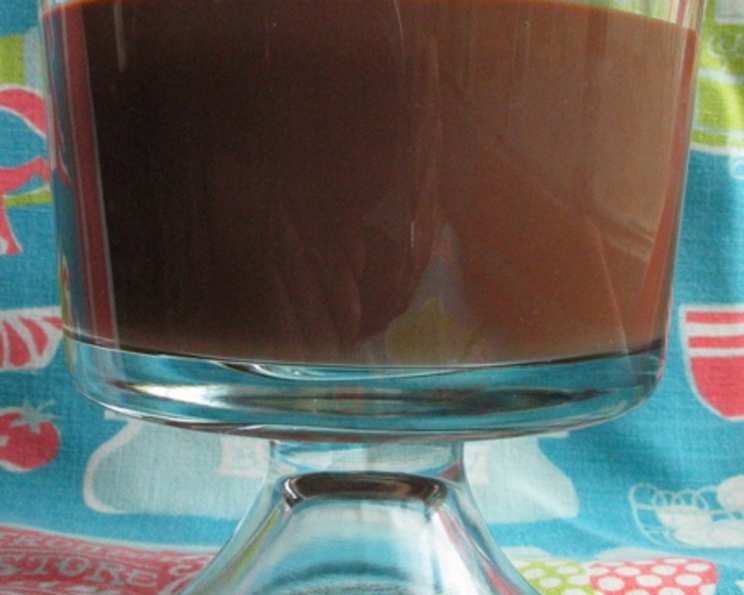
The Comfort of Simplicity: Homemade Stove Top Chocolate Pudding
My grandmother, bless her heart, wasn’t a fancy baker. Elaborate cakes and intricate pastries were foreign concepts in her kitchen. But she had a repertoire of simple, comforting desserts that she made with such love, they tasted like pure magic. Among these was her chocolate pudding. It wasn’t from a box; it was stirred together on the stovetop, the aroma of cocoa and warm milk filling the air. To this day, the scent of it transports me back to her cozy kitchen, to the feeling of being utterly, completely loved.
Recipe Overview
- Prep Time: 5 minutes
- Cook Time: 5-10 minutes
- Total Time: 10-15 minutes
- Servings: 2
- Dietary Type: Vegetarian (can be made dairy-free, see Variations)
Ingredients
- 2 cups chocolate milk (we like Wawa brand, a local chain)
- ¼ cup cocoa powder
- ⅓ cup sugar
- 2 tablespoons cornstarch
- 1 pinch salt
- ½ ounce semisweet baking chocolate (one half square)
Equipment Needed
- Small saucepan
- Whisk
- Two small ramekins or bowls
Instructions
- In a small saucepan, thoroughly combine the dry ingredients: cocoa powder, sugar, cornstarch, and salt. Make sure there are no lumps of cocoa or cornstarch.
- Grate the semisweet baking chocolate into the mixture. This helps it melt evenly and distribute throughout the pudding. If you don’t have a grater, finely chop the chocolate instead.
- Create a well in the center of the dry ingredients. Gradually mix in the chocolate milk using a whisk. Start by incorporating a small amount of milk to form a paste, then slowly add the rest, whisking continuously to prevent lumps from forming. Ensure the grated chocolate is evenly distributed.
- Place the saucepan over medium-low heat. It’s crucial to use low to medium heat to prevent the pudding from scorching.
- Cook for 5-10 minutes, stirring constantly with the whisk. Do not stop stirring! This is vital to prevent sticking and ensure a smooth, creamy texture. The mixture will gradually thicken.
- Continue cooking and stirring until the pudding reaches your desired thickness. It should coat the back of a spoon. Keep in mind that it will thicken further as it cools.
- Once the pudding has reached the desired consistency, immediately pour it into two small ramekins or bowls.
- When pouring, try not to scrape the sides or bottom of the saucepan too much. This will help prevent any small bits of cooked-on pudding from ending up in the finished product.
- Chill the pudding in the refrigerator for at least 30 minutes, or eat it warm, depending on your preference.
Expert Tips & Tricks
- Preventing Lumps: The key to avoiding lumps is to whisk constantly and thoroughly. Make sure the dry ingredients are completely combined before adding the wet ingredients.
- Choosing Chocolate Milk: The quality of the chocolate milk significantly impacts the final flavor. Experiment with different brands to find your favorite. Whole milk chocolate milk will result in a richer pudding.
- Adjusting Sweetness: Taste the pudding as it cooks and adjust the sugar level to your liking. You can also add a touch of vanilla extract for extra flavor.
- Salvaging Scorched Pudding: If the pudding does scorch slightly, immediately transfer it to a clean saucepan, avoiding scraping the bottom of the burnt pan. The flavor may be slightly affected, but you can still salvage most of it.
- Adding Depth of Flavor: For a more intense chocolate flavor, try using Dutch-processed cocoa powder. It has a darker color and a smoother, less acidic taste.
Serving & Storage Suggestions
Serve the chocolate pudding chilled or warm, depending on your preference. For a more elegant presentation, top with a dollop of whipped cream, a sprinkle of chocolate shavings, or a few fresh berries.
Leftover pudding can be stored in an airtight container in the refrigerator for up to 3 days. To prevent a skin from forming on the surface, press a piece of plastic wrap directly onto the pudding before refrigerating.
Reheat chilled pudding gently in a saucepan over low heat, stirring constantly, or in the microwave in short intervals, stirring in between, until warmed through. Avoid overheating, as this can cause the pudding to become watery.
Nutritional Information
Note: Nutritional information is an estimate and may vary based on specific ingredients used.
| Nutrient | Amount per Serving | % Daily Value |
|---|---|---|
| Calories | 425 kcal | 21% |
| Total Fat | 12 g | 18% |
| Saturated Fat | 7 g | 35% |
| Cholesterol | 30 mg | 10% |
| Sodium | 231 mg | 10% |
| Total Carbohydrate | 77 g | 26% |
| Dietary Fiber | 6 g | 24% |
| Sugars | 61 g | N/A |
| Protein | 10 g | 20% |
Variations & Substitutions
- Dairy-Free Pudding: Use your favorite non-dairy chocolate milk alternative, such as almond, soy, or oat milk. Ensure the baking chocolate is also dairy-free.
- Vegan Pudding: In addition to using non-dairy chocolate milk and chocolate, ensure the sugar you are using is vegan. Some refined sugars are processed using bone char.
- Peanut Butter Chocolate Pudding: Swirl in a tablespoon or two of peanut butter after the pudding has thickened for a delicious twist.
- Mint Chocolate Pudding: Add a few drops of peppermint extract along with the baking chocolate for a refreshing flavor.
- Mexican Chocolate Pudding: Incorporate a pinch of cinnamon and a dash of cayenne pepper for a warm, spicy kick.
- Individual Pudding Parfaits: Layer the chocolate pudding with crushed cookies, fruit, or whipped cream in parfait glasses for a visually appealing dessert.
FAQs (Frequently Asked Questions)
Q: Can I use regular milk instead of chocolate milk?
A: Yes, you can. However, you’ll need to increase the amount of cocoa powder and sugar to achieve the desired chocolate flavor and sweetness. Start with an additional tablespoon of cocoa powder and a tablespoon of sugar, then adjust to taste.
Q: How do I know when the pudding is thick enough?
A: The pudding is ready when it coats the back of a spoon and leaves a clear line when you run your finger through it. Remember that it will thicken further as it cools.
Q: Can I make this pudding ahead of time?
A: Absolutely! This pudding is perfect for making ahead. Just store it in an airtight container in the refrigerator for up to 3 days.
Q: My pudding is too thick. What can I do?
A: Whisk in a small amount of milk or cream until it reaches your desired consistency. Do this over low heat if the pudding is cold.
Q: Can I freeze this pudding?
A: While you can freeze the pudding, the texture may change slightly upon thawing. It might become a bit grainy. If you do freeze it, thaw it in the refrigerator overnight and whisk it well before serving.
Final Thoughts
Homemade stove top chocolate pudding is a simple pleasure, a comforting treat that anyone can make. It’s a reminder that the best things in life are often the most uncomplicated. So, gather your ingredients, whisk up a batch, and experience the pure joy of this classic dessert. Don’t be afraid to experiment with variations and make it your own. And, most importantly, share it with someone you love. Perhaps a scoop alongside a warm brownie? Or simply enjoyed on its own while curled up with a good book. Whatever you choose, I hope this pudding brings you as much comfort and happiness as it has brought me over the years.