
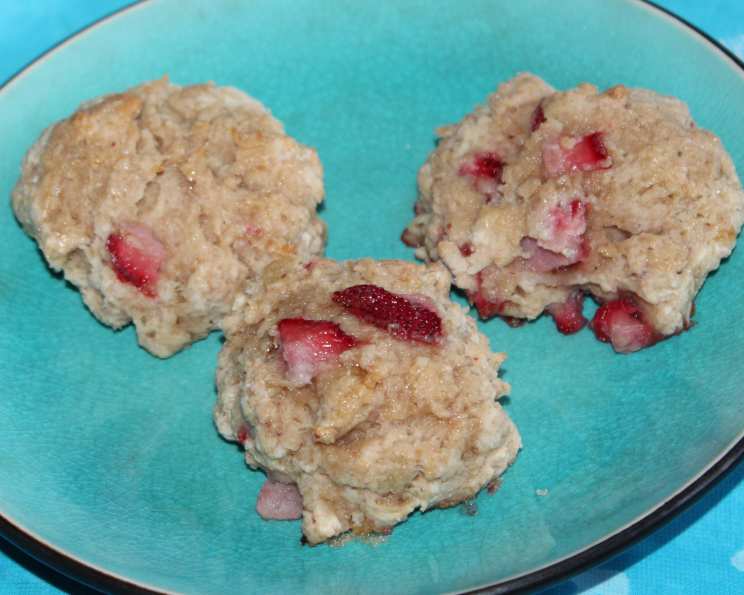
Strawberry and Cream Scones: A Taste of Sunshine
The scent of freshly baked scones always transports me back to my grandmother’s sun-drenched kitchen. I can almost feel the warmth of the oven on my face as I watched her nimble hands work the dough, her apron dusted with flour. These Strawberry and Cream Scones capture that very essence – a simple, comforting treat elevated by the bright burst of fresh strawberries and a unique, crunchy sugar glaze. They’re more than just a pastry; they’re a memory, a feeling, a slice of pure happiness.
Recipe Overview
- Prep Time: 20 minutes
- Cook Time: 15-20 minutes
- Total Time: 35-40 minutes
- Servings: 8-18 scones
- Yield: 8-18 scones, depending on size
- Dietary Type: Not specified
Ingredients
Scones:
- ½ cup diced fresh strawberries (for blending)
- ¼ cup half-and-half or ¼ cup light cream
- 2 cups King Arthur Unbleached All-Purpose Flour or 2 cups Mellow Pastry Blend
- ½ teaspoon salt
- ¼ cup granulated sugar
- 1 tablespoon baking powder
- 6 tablespoons cold butter, cut into pieces
- 1 large egg
- 2 teaspoons vanilla extract
- ⅔ cup diced fresh strawberries (for mixing in)
Topping:
- 3 tablespoons granulated sugar
- 1 ½ teaspoons water
- 1 ½ teaspoons vanilla extract
Equipment Needed
- Blender or Food Processor
- Large Bowl
- Small Bowl
- Whisk
- Baking Sheets (2) or Scone Pan (full-size or mini)
- Parchment Paper (optional, for lining baking sheets)
- Microwave-Safe Bowl (small)
Instructions
-
Preheat your oven to 375°F (190°C). Lightly grease (or line with parchment paper) two baking sheets, or a full-size or mini-scone pan. Preparing your pan ahead of time ensures the scones release easily and prevents sticking.
-
Prepare the Strawberry Cream: In a blender or food processor, process ½ cup of the strawberries with the half-and-half or cream until the mixture is smooth. This strawberry cream adds a subtle sweetness and beautiful pink hue to the scones. Set it aside.
-
Combine Dry Ingredients: In a large bowl, whisk together the flour, salt, sugar, and baking powder. Whisking ensures the baking powder is evenly distributed, leading to a more consistent rise.
-
Cut in the Butter: Cut in the cold butter using your fingertips, a fork, or a pastry blender. The goal is to create small, pea-sized pieces of butter within the flour mixture. This creates pockets of fat that, when melted in the oven, produce a flaky, tender scone. Work quickly to keep the butter cold.
-
Combine Wet Ingredients: In a separate bowl, whisk together the strawberry/half-and-half mixture, the egg, and the vanilla extract.
-
Combine Wet and Dry: Stir the wet ingredients into the dry ingredients. Add the ⅔ cup diced strawberries and stir just until everything is well-combined. Be careful not to overmix! Overmixing develops gluten, resulting in tough scones. The dough will be wet and sticky, which is exactly what you want for a tender drop scone.
-
Shape and Bake: Drop the dough by heaping tablespoonfuls onto the prepared baking sheets; each scone should be about the size of a golf ball. A tablespoon cookie scoop is exactly the right size for this task. Or divide the dough among the compartments of the scone pan of your choice.
-
Bake the scones until they’re golden brown, 15 to 16 minutes (on a baking sheet or in a mini-scone pan), or 18 to 20 minutes (in a standard scone pan). Keep a close eye on them during the last few minutes of baking, as oven temperatures can vary.
-
Check for Doneness: Remove the scones from the oven when they’re beginning to brown around the edges. Break one open, just to be sure; they should be moist, but not gummy, at the center.
-
Prepare the Topping: As soon as you remove the scones from the oven, make the topping. Combine the sugar and water in a very small (e.g., ¼- to ⅓-cup size) microwave-safe bowl, stirring until the sugar is moistened.
-
Microwave the Topping: Heat in the microwave for 20 to 30 seconds, until the mixture is bubbly. Carefully remove from the microwave (sugar syrup is very hot!), and stir in the vanilla. Stir until the mixture smoothes out.
-
Glaze the Scones: Drizzle or brush the topping over the hot scones. The heat from the scones will help the sugar topping adhere and create a beautiful, crunchy glaze.
Expert Tips & Tricks
- Keep Ingredients Cold: Cold butter is key to flaky scones. Consider chilling your flour and even your mixing bowl for the best results.
- Don’t Overmix: Overmixing develops gluten and leads to tough scones. Mix just until the ingredients are combined. A few streaks of flour are perfectly fine.
- Freeze for Later: Unbaked scones can be frozen on a baking sheet and then transferred to a freezer bag. Bake directly from frozen, adding a few minutes to the baking time.
- Even Baking: If using a baking sheet, rotate the baking sheet halfway through baking for even browning.
Serving & Storage Suggestions
Serve these Strawberry and Cream Scones warm, ideally within a few hours of baking. They are divine with a dollop of clotted cream, a spoonful of strawberry jam, or even a drizzle of honey. Leftover scones can be stored in an airtight container at room temperature for a day or two. For longer storage, freeze them. To reheat, wrap the scones in foil and warm them in a 350°F (175°C) oven for about 10 minutes, or until heated through.
Nutritional Information
| Nutrient | Amount per Serving | % Daily Value |
|---|---|---|
| Calories | 264.2 kcal | N/A |
| Calories from Fat | 94g | 36% |
| Total Fat | 10.5 g | 16% |
| Saturated Fat | 6.3 g | 31% |
| Cholesterol | 49 mg | 16% |
| Sodium | 370.6 mg | 15% |
| Total Carbohydrate | 37.5 g | 12% |
| Dietary Fiber | 1.3 g | 5% |
| Sugars | 12.3 g | 49% |
| Protein | 4.5 g | 8% |
Note: Nutritional information is an estimate and may vary based on specific ingredients and portion sizes.
Variations & Substitutions
- Gluten-Free: Use a gluten-free all-purpose flour blend. You may need to add a binding agent like xanthan gum for best results.
- Vegan: Substitute the egg with a flax egg (1 tablespoon ground flaxseed mixed with 3 tablespoons water, let sit for 5 minutes). Use a plant-based milk alternative for the half-and-half, and ensure your butter is vegan.
- Lemon Zest: Add the zest of one lemon to the dry ingredients for a bright, citrusy flavor.
- Other Berries: Substitute the strawberries with other berries like blueberries, raspberries, or blackberries.
- Herbs: Infuse the scones with subtle herbaceous notes by adding a teaspoon of finely chopped fresh rosemary or thyme to the dry ingredients.
FAQs (Frequently Asked Questions)
Q: Why are my scones dry?
A: Overbaking is a common cause of dry scones. Ensure you check for doneness and remove them from the oven as soon as they are golden brown around the edges. Also, avoid overmixing the dough, as this can develop gluten and result in a tougher, drier scone.
Q: Can I make the dough ahead of time?
A: Yes, you can prepare the dough ahead of time. Wrap it tightly in plastic wrap and store it in the refrigerator for up to 24 hours. Bake as directed when ready.
Q: What is the best way to reheat scones?
A: Wrap the scones in foil and warm them in a 350°F (175°C) oven for about 10 minutes, or until heated through. This helps to retain moisture and prevent them from drying out. You can also microwave them for a few seconds, but they may become slightly soft.
Q: Can I use frozen strawberries?
A: Yes, you can use frozen strawberries. Thaw them slightly and pat them dry before dicing and adding them to the dough. Be aware that frozen strawberries may release more moisture, so you may need to add a tablespoon or two of flour to the dough to compensate.
Q: Why is my sugar topping not crunchy?
A: The sugar topping needs to be applied to the scones immediately after they come out of the oven, while they are still very hot. This allows the sugar to melt and then recrystallize as it cools, creating a crunchy texture.
Final Thoughts
These Strawberry and Cream Scones are a delightful treat, perfect for a weekend brunch, afternoon tea, or simply a sweet indulgence. Don’t be intimidated by the process; it’s simpler than you might think. Embrace the joy of baking, experiment with variations, and share your creations with loved ones. And if you have any questions or feedback, please don’t hesitate to share them! Happy baking!