
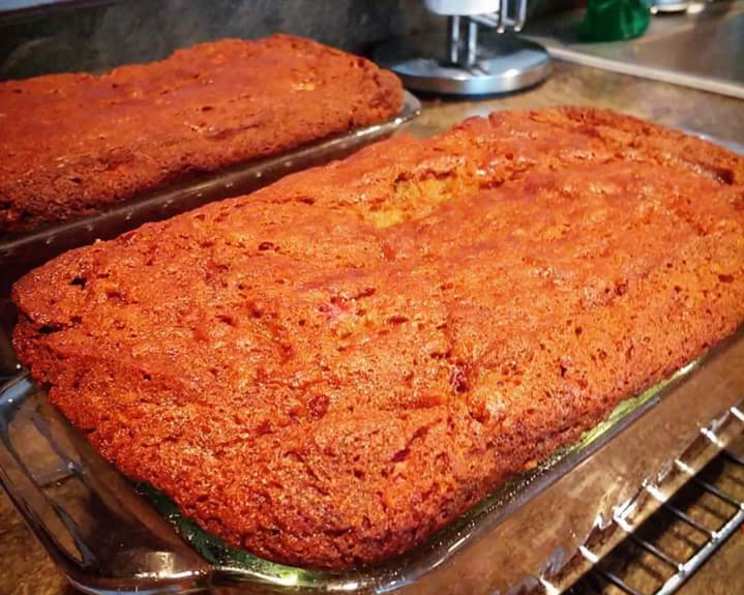
Strawberry Banana Bread – A Disney Dream Come True
The scent of warm banana bread always transports me back to childhood. But this isn’t just any banana bread; it’s Strawberry Banana Bread, and it whispers tales of sunny days spent at Disney World. I remember grabbing a slice from the Whispering Canyon Cafe at Wilderness Lodge, the aroma of ripe bananas and sweet strawberries mingling in the air. Each bite was a burst of sunshine, a perfect blend of comforting familiarity and vacation indulgence that etched itself into my memory. It’s a little bit of Disney magic I can recreate in my own kitchen, and now, you can too.
Recipe Overview
- Prep Time: 20 minutes
- Cook Time: 60-75 minutes
- Total Time: 1 hour 20 minutes – 1 hour 35 minutes
- Servings: Approximately 20 slices (2 loaves)
- Yield: 2 loaves
- Dietary Type: Not specified, but can be adapted to be dairy-free
Ingredients
- 1 cup butter, softened
- 2 cups granulated sugar
- 2 cups ripe bananas, mashed (about 6 medium-size)
- 4 eggs
- 1 teaspoon salt
- 2 teaspoons baking soda
- 3 cups flour
- 1 1⁄2 lbs frozen sliced strawberries, thawed
Equipment Needed
- Two 9- by 5-inch loaf pans
- Large mixing bowl
- Small mixing bowl
- Electric mixer (stand or hand mixer)
- Spatula
- Measuring cups and spoons
- Cooling rack
- Toothpick
Instructions
-
Begin by preparing your loaf pans. Grease two 9- by 5-inch loaf pans thoroughly with butter or cooking spray. This will ensure that the bread releases cleanly after baking.
-
Preheat your oven to 325 degrees Fahrenheit (160 degrees Celsius). Maintaining a consistent oven temperature is vital for even baking.
-
In a large mixing bowl, cream together the softened butter and granulated sugar using an electric mixer until the mixture is light and fluffy. This process incorporates air into the batter, resulting in a tender crumb.
-
Incorporate the mashed bananas into the butter and sugar mixture. Use a spatula to scrape down the sides of the bowl to ensure everything is evenly combined. The riper the bananas, the sweeter and more flavorful your bread will be.
-
Add the eggs one at a time, mixing thoroughly after each addition. Ensure each egg is fully incorporated before adding the next. This helps emulsify the mixture and contributes to the bread’s structure.
-
In a separate, smaller bowl, whisk together the salt, baking soda, and flour. This ensures that the dry ingredients are evenly distributed throughout the batter, preventing pockets of saltiness or baking soda.
-
Gradually add the flour mixture to the butter mixture, stirring until just fully incorporated. Be careful not to overmix, as this can develop the gluten in the flour and result in a tough bread.
-
Gently fold in the thawed strawberries. Do not overmix at this stage, as it can cause the strawberries to break down and bleed their color into the batter. A marbled effect is perfectly fine, but avoid creating a homogenous pink batter.
-
Pour the batter evenly into the prepared loaf pans. Use a spatula to spread the batter to the corners of each pan.
-
Bake for 60 to 75 minutes, or until a toothpick inserted into the center comes out clean. Baking times can vary depending on your oven, so start checking for doneness around the 60-minute mark. If the top of the bread is browning too quickly, you can loosely tent it with foil during the last 15-20 minutes of baking.
-
Cool the loaves completely on a wire rack before inverting them onto a plate. Allowing the bread to cool in the pans for about 10-15 minutes before transferring them to a wire rack will help prevent them from breaking.
Expert Tips & Tricks
- Banana ripeness is key: The riper your bananas, the sweeter and more flavorful your bread will be. Use bananas that are heavily speckled or even black for the best results.
- Don’t overmix: Overmixing the batter after adding the flour will result in a tough bread. Mix just until the ingredients are combined.
- Thaw strawberries thoroughly: Ensure the strawberries are fully thawed and gently drained before adding them to the batter. This will prevent excess moisture from making the bread soggy. Patting them dry with a paper towel before adding them is also helpful.
- Room temperature ingredients: Using room-temperature butter and eggs helps them emulsify more easily, resulting in a smoother batter and a more tender bread.
- Prevent sticking: Even with greased pans, sometimes the bread can stick. Try lining the pans with parchment paper, leaving an overhang on the sides for easy removal.
- Freezing for later: Wrap the cooled loaves tightly in plastic wrap and then in aluminum foil. They can be frozen for up to 2-3 months. Thaw overnight in the refrigerator before serving.
Serving & Storage Suggestions
This Strawberry Banana Bread is delicious served warm or at room temperature. You can enjoy it plain, or try spreading it with a little butter, cream cheese, or a drizzle of honey. For a special treat, toast a slice and top it with a scoop of vanilla ice cream.
Leftover bread can be stored in an airtight container at room temperature for up to 3 days, or in the refrigerator for up to a week. For longer storage, wrap individual slices tightly in plastic wrap and freeze them for up to 2 months.
To reheat, microwave individual slices for 15-20 seconds, or toast them in a toaster oven until warmed through.
Nutritional Information
Note: Nutritional information is an estimate and may vary based on specific ingredients and serving sizes.
| Nutrient | Amount per Serving (approx. 1 slice) | % Daily Value* |
|---|---|---|
| Calories | 250-300 kcal | 13-15% |
| Total Fat | 12-15 g | 18-23% |
| Saturated Fat | 7-9 g | 35-45% |
| Cholesterol | 50-60 mg | 17-20% |
| Sodium | 150-200 mg | 7-9% |
| Total Carbohydrate | 30-35 g | 10-12% |
| Dietary Fiber | 1-2 g | 4-8% |
| Sugars | 18-22 g | N/A |
| Protein | 3-4 g | 6-8% |
*Percent Daily Values are based on a 2,000 calorie diet.
Variations & Substitutions
- Dairy-Free: Substitute the butter with a vegan butter alternative.
- Gluten-Free: Use a gluten-free flour blend, but be aware that the texture may be slightly different. Add 1 teaspoon of xanthan gum for better binding.
- Nutty Addition: Add 1/2 cup of chopped walnuts or pecans to the batter for extra texture and flavor.
- Spice it up: Add 1/2 teaspoon of ground cinnamon or nutmeg to the dry ingredients for a warm, comforting flavor.
- Chocolate Chips: Fold in 1/2 cup of chocolate chips (dark, milk, or white) for a sweeter treat.
- Other Berries: Substitute the strawberries with other berries like blueberries, raspberries, or a mixed berry blend.
FAQs (Frequently Asked Questions)
Q: Can I use fresh strawberries instead of frozen?
A: Yes, you can use fresh strawberries. However, frozen strawberries tend to hold their shape better during baking and release less moisture. If using fresh, slice them and pat them dry with a paper towel before adding them to the batter.
Q: Why is my banana bread dense and gummy?
A: Overmixing the batter is a common cause of dense banana bread. Avoid overmixing once you add the flour. Also, ensure your baking soda is fresh, as expired baking soda will not provide enough leavening.
Q: How do I prevent the top of my banana bread from burning?
A: If the top of your bread is browning too quickly, loosely tent it with aluminum foil during the last 15-20 minutes of baking.
Q: Can I make this recipe into muffins?
A: Yes, you can bake this batter in muffin tins. Fill each muffin cup about 2/3 full and bake for 18-22 minutes, or until a toothpick inserted into the center comes out clean.
Q: Can I reduce the amount of sugar in this recipe?
A: You can reduce the sugar slightly (by about 1/4 cup) without significantly affecting the texture of the bread. However, reducing it too much may result in a drier bread. You can also compensate by using extra ripe bananas, which will naturally add sweetness.
Final Thoughts
Now that you have all the insider secrets to creating this delightful Strawberry Banana Bread, it’s time to whisk yourself away to your kitchen and start baking! This recipe is more than just a list of ingredients and instructions; it’s a journey back to cherished memories and a chance to create new ones. Don’t be afraid to experiment with variations and make it your own. And most importantly, enjoy the process and share the love with friends and family. Let me know what you think. Happy baking!