
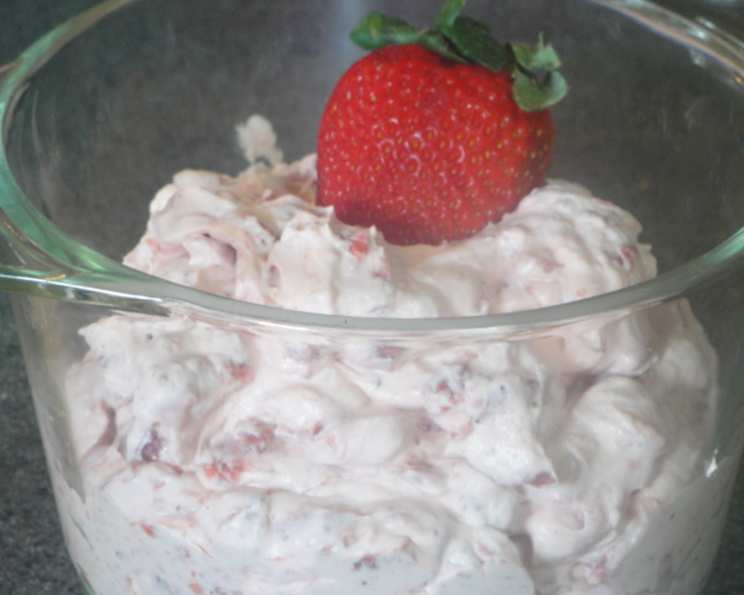
Luscious Strawberry Filling: The Secret to Showstopping Cakes
I still remember the first cake I ever made from scratch – a simple vanilla sponge, slightly lopsided, but filled with the most vibrant, intensely strawberry-flavored filling imaginable. It was my grandmother’s secret recipe, whispered down through generations. The star of that cake, and the memory I cherish most, was that glistening, ruby-red strawberry filling. It wasn’t just a flavor; it was sunshine bottled into a jar, a burst of summer on every bite. This recipe is my take on that timeless classic, perfect for cakes, cake rolls, and any dessert that needs a touch of strawberry magic.
Recipe Overview
- Prep Time: 15 minutes
- Cook Time: 5 minutes
- Total Time: 20 minutes (plus refrigeration time)
- Servings: Varies based on cake size
- Yield: Approximately 3 cups of filling
- Dietary Type: Can be adapted to be gluten-free (see variations)
Ingredients
- 4 cups strawberries, chopped fine
- 3 ounces strawberry Jell-O gelatin dessert
- 2-3 tablespoons cornstarch
- ½ cup sugar
- 2 teaspoons strawberry extract
Equipment Needed
- Medium saucepan
- Whisk
- Measuring cups and spoons
- Refrigerator
Instructions
- In a medium saucepan, combine the chopped strawberries, strawberry Jell-O gelatin dessert, sugar, and cornstarch. Make sure the strawberries are finely chopped to release their juices properly and create a smooth filling.
- Whisk all the ingredients together in the saucepan until the strawberry Jell-O gelatin dessert and cornstarch are well distributed among the chopped strawberries. This will prevent clumps from forming during cooking.
- Place the saucepan over medium heat and bring the mixture to a boil, stirring constantly with the whisk. Continuous stirring is crucial to prevent the mixture from sticking to the bottom of the pan and burning.
- Continue to cook and stir the mixture until the sugar is completely dissolved and the filling starts to thicken, approximately 5 minutes. The mixture should become glossy and slightly translucent as it thickens. Adjust the amount of cornstarch based on the juiciness of your strawberries. If they are very ripe and juicy, you may need the full 3 tablespoons; otherwise, start with 2 and add more as needed.
- Remove the saucepan from the heat and stir in the strawberry extract. This will enhance the strawberry flavor and give the filling a vibrant aroma.
- Transfer the hot strawberry filling to a heat-safe bowl or container. Cover the surface of the filling directly with plastic wrap to prevent a skin from forming as it cools.
- Cool the filling in the refrigerator until it is thick and set. This will take several hours, or preferably overnight. The filling should be firm enough to spread easily without being runny.
Expert Tips & Tricks
- Strawberry Selection: The quality of your strawberries greatly affects the filling’s flavor. Use fresh, ripe strawberries for the best taste. However, frozen strawberries can also be used; thaw them completely and drain off any excess liquid before chopping.
- Adjusting Sweetness: Taste the filling while it’s cooking and adjust the amount of sugar to your preference. If your strawberries are very sweet, you may need to reduce the sugar slightly.
- Preventing Lumps: Whisk the cornstarch thoroughly with the other dry ingredients before adding the strawberries. This will help prevent lumps from forming in the filling.
- Controlling Thickness: The amount of cornstarch determines the thickness of the filling. For a thicker filling, use 3 tablespoons of cornstarch. For a thinner filling, use 2 tablespoons.
- Enhancing Flavor: For an even more intense strawberry flavor, consider adding a tablespoon of strawberry liqueur or a pinch of citric acid along with the extract.
- Make-Ahead Magic: This filling can be made up to 3 days in advance and stored in the refrigerator. This is a great way to break down the cake-making process and ensure everything is perfectly chilled before assembly.
Serving & Storage Suggestions
This luscious strawberry filling is perfect for layering in cakes, spreading in cake rolls, or using as a topping for cupcakes. It can also be used as a filling for pastries, tarts, and even waffles or pancakes.
- Serving: For cakes, allow the filling to come to room temperature for about 15-20 minutes before spreading it. This will make it easier to spread evenly.
- Storage: Store leftover strawberry filling in an airtight container in the refrigerator for up to 5 days.
- Freezing: While not ideal, you can freeze the filling for up to 1 month. Thaw it in the refrigerator overnight and whisk well before using. Note that the texture may be slightly altered after freezing.
Nutritional Information
Please note that these values are estimates and may vary based on specific ingredients and serving size.
| Nutrient | Amount per Serving | % Daily Value |
|---|---|---|
| Calories | 150 kcal | 8% |
| Total Fat | 0.5g | 1% |
| Saturated Fat | 0g | 0% |
| Cholesterol | 0mg | 0% |
| Sodium | 50mg | 2% |
| Total Carbohydrate | 35g | 12% |
| Dietary Fiber | 2g | 8% |
| Sugars | 30g | – |
| Protein | 1g | 2% |
Variations & Substitutions
- Gluten-Free: To make this filling gluten-free, ensure that the strawberry Jell-O gelatin dessert is certified gluten-free.
- Other Berries: While this recipe is designed for strawberries, you can easily adapt it for other berries such as raspberries, blueberries, or blackberries. Simply substitute the strawberries with an equal amount of your chosen berry.
- Reduced Sugar: If you’re looking to reduce the sugar content, use a sugar substitute such as stevia or erythritol. Start with half the amount of sugar called for in the recipe and adjust to taste.
- Natural Thickener: If you prefer not to use cornstarch, you can substitute it with tapioca starch or arrowroot powder. Use the same amount as the cornstarch called for in the recipe.
- Pie Filling: Yes, although the creator of this recipe had never tried it, this recipe can easily be converted to pie filling by adding slightly more cornstarch to allow it to set up.
FAQs (Frequently Asked Questions)
Q: Can I use frozen strawberries for this recipe?
A: Yes, you can use frozen strawberries. Thaw them completely and drain off any excess liquid before chopping.
Q: How long does the filling need to chill in the refrigerator?
A: The filling needs to chill for at least 2-3 hours, or preferably overnight, until it is thick and set.
Q: Can I make this filling ahead of time?
A: Yes, you can make this filling up to 3 days in advance and store it in the refrigerator.
Q: My filling is too thick. How can I thin it out?
A: If your filling is too thick, add a tablespoon or two of water or strawberry juice and stir until it reaches the desired consistency.
Q: Can I add other fruits to the filling?
A: Yes, you can add other fruits such as blueberries or raspberries to the filling for a mixed berry flavor.
Final Thoughts
This strawberry filling is more than just a recipe; it’s a taste of sunshine, a burst of summer, and a connection to cherished memories. Whether you’re baking a showstopping cake for a special occasion or simply want to elevate your everyday desserts, this filling is sure to delight. So, go ahead, gather your ingredients, and create something truly special. Don’t be afraid to experiment with different variations and substitutions to make it your own. And most importantly, share your creations with loved ones and spread the joy of homemade goodness! Let me know how it turns out!