
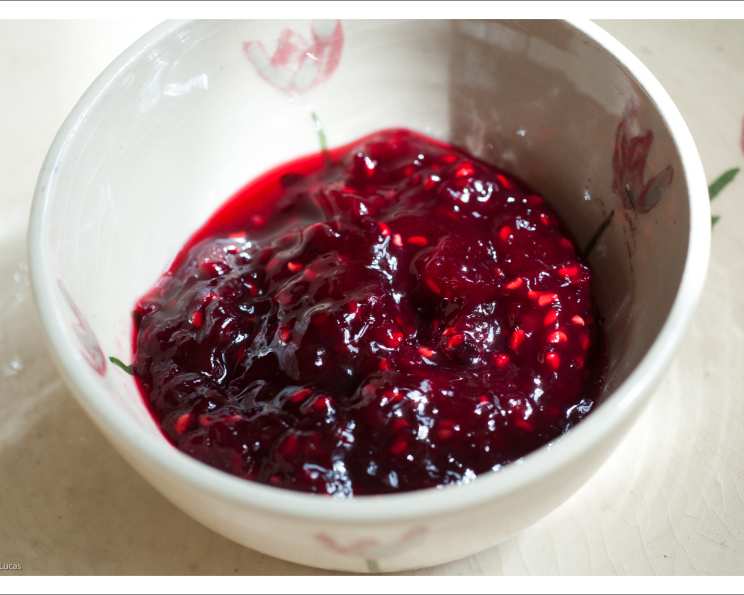
Strawberry Jam (Bread Machine): Effortless Homemade Goodness
The scent of strawberries always transports me back to my grandmother’s kitchen. As a child, I’d spend summer afternoons perched on a stool, watching her transform baskets of sun-ripened berries into jars of glistening ruby-red jam. The gentle hum of her old stove, the rhythmic stirring, and the sweet, fruity aroma are memories I cherish. Now, with this bread machine recipe, I can recreate that nostalgic magic with incredible ease – and you can too!
Recipe Overview
- Prep Time: 5 minutes
- Cook Time: 1 hour (approximately, depending on bread machine cycle)
- Total Time: 1 hour 5 minutes
- Yields: 3 cups
- Dietary Type: Vegetarian
Ingredients
- 2 cups crushed strawberries (fresh or frozen, thawed)
- 3 1/4 cups sugar
- 3 tablespoons Sure-Jell
Equipment Needed
- Bread Machine
- Fork or Potato Masher
- Measuring Cups and Spoons
- Sterilized Jars and Lids (for storing the finished jam)
Instructions
- If using frozen strawberries, ensure they are completely thawed. This step is crucial for consistent jam consistency.
- Crush the strawberries using a fork or potato masher. Avoid pureeing them; you want to retain some texture for that classic jam experience. Gentle crushing is key.
- Place the crushed strawberries and sugar into the bread machine pan. Ensure even distribution of the strawberries.
- Add the Sure-Jell to the pan. The Sure-Jell is essential for proper gelling.
- Follow the directions for your specific bread machine for the jam cycle. Most machines have a pre-programmed jam setting. Consult your user manual if you’re unsure. The jam cycle typically involves a period of heating and stirring.
- Monitor the jam during the cycle. While the bread machine automates the process, keeping an eye on it ensures it’s progressing as expected.
- Once the jam cycle is complete, carefully transfer the hot jam into sterilized jars. Leave about 1/4 inch of headspace at the top of each jar.
- Wipe the rims of the jars clean with a damp cloth. This ensures a proper seal.
- Place the lids on the jars and screw on the bands until fingertip tight. Do not overtighten.
- If desired, process the jars in a boiling water bath for 10 minutes for long-term storage. If not processing, the jam must be refrigerated.
- Let the jars cool completely. As they cool, you should hear a “pop” sound, indicating that the lids have sealed properly.
- Check the seals by pressing down on the center of each lid. If the lid doesn’t flex or pop, it’s properly sealed. Any unsealed jars should be refrigerated and used promptly.
Expert Tips & Tricks
- Berry Selection: Choose ripe, flavorful strawberries for the best results. Overripe berries can sometimes lead to a softer set, so aim for berries that are just perfectly ripe.
- Sugar Ratio: Maintaining the correct sugar ratio is critical for proper gelling and preservation. Don’t be tempted to reduce the sugar.
- Testing for Set: While the bread machine handles the cooking, you can still test the jam’s set by placing a small spoonful on a chilled plate. Let it cool for a minute; if it wrinkles when you push it with your finger, it’s ready.
- Troubleshooting: If your jam doesn’t set properly, it might be due to incorrect ingredient ratios or insufficient cooking time. While unlikely with the bread machine, you can re-cook the jam with a bit more pectin (Sure-Jell) if needed.
- Flavor Boost: For a richer flavor, consider adding a squeeze of lemon juice to the mixture. It brightens the strawberry flavor and can aid in the gelling process. Vanilla extract, added after cooking, also complements the strawberry beautifully.
Serving & Storage Suggestions
Serve your homemade strawberry jam on warm toast, scones, biscuits, or English muffins. It’s also delicious as a filling for pastries, cakes, or thumbprint cookies. Swirl it into yogurt, oatmeal, or ice cream for a sweet treat.
- Storage: Unprocessed jam should be stored in the refrigerator and consumed within 2-3 weeks. Processed jam, properly sealed, can be stored in a cool, dark place for up to a year.
- Freezing: Strawberry jam can be frozen for longer storage. Transfer the jam to freezer-safe containers, leaving some headspace, and freeze for up to 6 months. Thaw in the refrigerator before using.
- Reheating: If the jam becomes too thick after refrigeration, you can gently warm it in a saucepan over low heat or microwave it in short intervals, stirring occasionally.
Nutritional Information
| Nutrient | Amount per Serving | % Daily Value |
|---|---|---|
| Calories | 447 kcal | 22% |
| Total Fat | 0.1 g | 0% |
| Saturated Fat | 0 g | 0% |
| Cholesterol | 0 mg | 0% |
| Sodium | 1 mg | 0% |
| Total Carbohydrate | 115 g | 42% |
| Dietary Fiber | 0.5 g | 2% |
| Sugars | 112 g | – |
| Protein | 0.1 g | 0% |
Note: Nutritional information is an estimate and may vary based on specific ingredients and serving sizes.
Variations & Substitutions
- Berry Blend: Experiment with different berry combinations! Try using half strawberries and half raspberries or blackberries for a unique flavor profile.
- Spice Infusion: Add a pinch of cinnamon, nutmeg, or cardamom to the jam for a warm, spiced twist. A few star anise pods during cooking can also add a subtle licorice note. Remember to remove the pods before jarring.
- Citrus Zest: Incorporate the zest of a lemon, orange, or lime for a bright, citrusy dimension.
- Low-Sugar Option: While this recipe requires a specific sugar ratio for proper gelling, you can explore using a sugar substitute specifically designed for jam making. Follow the instructions on the sugar substitute package carefully.
FAQs (Frequently Asked Questions)
Q: Can I use frozen strawberries if I don’t have fresh ones?
A: Yes, frozen strawberries work perfectly well. Just be sure to thaw them completely before crushing.
Q: Do I need to sterilize the jars?
A: Sterilizing the jars is essential for long-term storage and prevents spoilage. You can sterilize them by boiling them in water for 10 minutes, or by using your dishwasher’s sanitize cycle.
Q: Can I reduce the amount of sugar in the recipe?
A: It’s not recommended to significantly reduce the sugar, as it’s crucial for proper gelling and preservation.
Q: What if my jam doesn’t set properly?
A: Ensure you’ve followed the recipe accurately and used the correct amount of Sure-Jell. If it’s still too runny, you can try re-cooking it with a little more pectin.
Q: How long does homemade strawberry jam last?
A: Unprocessed jam will last for about 2-3 weeks in the refrigerator. Properly processed jam can last up to a year in a cool, dark place.
Final Thoughts
This bread machine strawberry jam recipe is a testament to how easy it can be to create something truly special. The simple ingredients and automated process allow you to enjoy the taste of homemade jam without spending hours in the kitchen. So, gather your strawberries, dust off your bread machine, and get ready to spread some sunshine on your morning toast! Share your creations and variations – I’d love to hear about your jam-making adventures!