
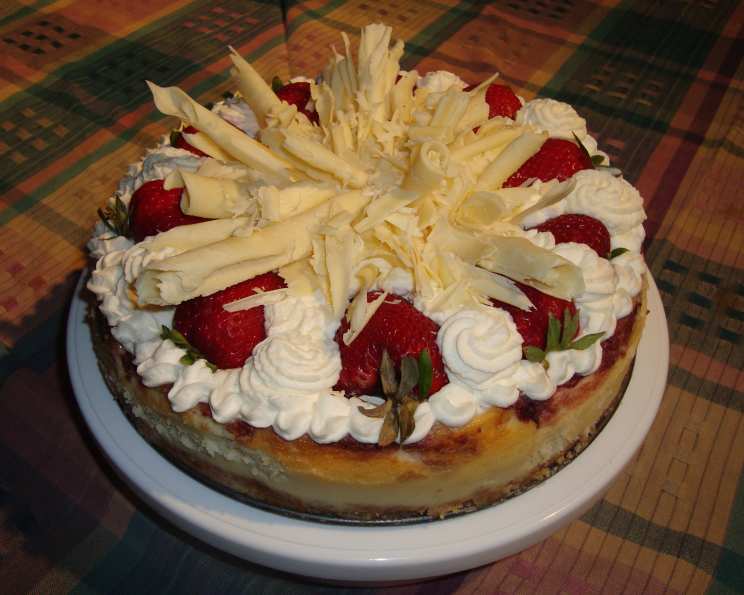
Strawberry Marbled Cheesecake: A Symphony of Flavors
I remember the first time I made a marbled cheesecake. It was for my grandmother’s birthday, and I was terrified. The swirling, the baking time, the sheer pressure of creating something beautiful and delicious – it was all so daunting. But when I pulled that cheesecake from the oven, the strawberry swirls a vibrant counterpoint to the creamy white, I knew I’d created something special. The look on her face when she took that first bite – pure, unadulterated joy – is a memory I’ll always cherish. This Strawberry Marbled Cheesecake isn’t just a dessert; it’s a canvas for flavor, a celebration of textures, and a promise of happiness with every slice.
Recipe Overview
- Prep Time: 30 minutes
- Cook Time: 50-60 minutes
- Total Time: At least 8 hours (including chilling)
- Servings: 8
- Yield: 1 (9-inch) cheesecake
- Dietary Type: Not specified (contains dairy and eggs)
Ingredients
For the Crust:
- 1/4 cup butter, melted
- 1 cup graham cracker crumbs
- 3 tablespoons sugar
For the Cheesecake:
- 24 ounces cream cheese, at room temperature
- 3/4 cup sugar
- 1 teaspoon vanilla
- 3 eggs
- 1 (10-ounce) package frozen sliced strawberries in syrup, thawed
- 1 1/2 teaspoons cornstarch
Equipment Needed
- 9-inch springform pan
- Blender or food processor
- Saucepan
- Mixing bowl
- Electric mixer (handheld or stand)
- Rubber spatula
- Knife or skewer for swirling
Instructions
- Prepare the Strawberry Puree: In a blender or food processor, puree the thawed strawberries (with their syrup) and cornstarch until smooth.
- Thicken the Puree: Pour the strawberry mixture into a saucepan. Heat over medium heat, stirring constantly, until the mixture thickens significantly. This will take approximately 5-7 minutes. It should coat the back of a spoon.
- Cool the Puree: Remove the strawberry puree from the heat and allow it to cool completely. This is crucial to prevent it from melting the cheesecake batter.
- Make the Crust: In a medium bowl, combine the melted butter, graham cracker crumbs, and sugar. Mix well until all the crumbs are moistened.
- Press the Crust: Press the crumb mixture firmly onto the bottom of a 9-inch springform pan. Use the bottom of a measuring cup to help create an even and compact layer.
- Pre-bake the Crust: Bake the crust in a preheated oven at 350 degrees Fahrenheit (175 degrees Celsius) for 10 minutes. This helps to set the crust and prevent it from becoming soggy.
- Prepare the Cheesecake Batter: In a large mixing bowl, combine the cream cheese, sugar, and vanilla. Beat with an electric mixer until smooth and creamy. Ensure the cream cheese is at room temperature to avoid lumps.
- Add the Eggs: Add the eggs one at a time, mixing well after each addition. Be careful not to overmix; overmixing can incorporate too much air and cause the cheesecake to crack.
- Divide the Batter: Pour half of the cheesecake batter over the pre-baked crust in the springform pan.
- Add Strawberry Puree (Part 1): Spoon half of the cooled strawberry mixture evenly over the layer of cheesecake batter.
- Add Remaining Cheesecake Batter: Pour the remaining cheesecake batter into the pan, covering the strawberry layer.
- Add Strawberry Puree (Part 2): Spoon the remaining strawberry mixture over the top of the cheesecake batter.
- Create the Marble Effect: Using a knife or a skewer, gently swirl the strawberry mixture into the cheesecake batter. Avoid over-swirling, as this can muddy the colors. Aim for a beautiful, marbled effect.
- Bake the Cheesecake: Bake the cheesecake in a preheated oven at 300 degrees Fahrenheit (150 degrees Celsius) for 50 to 60 minutes, or until the edges are set but the center still has a slight jiggle. An instant-read thermometer inserted into the center should read about 150°F (65°C).
- Cool the Cheesecake: Turn off the oven and crack the oven door slightly. Allow the cheesecake to cool completely in the oven for at least an hour. This gradual cooling helps prevent cracking.
- Chill the Cheesecake: Once cooled to room temperature, remove the rim of the springform pan. Cover the cheesecake and chill it in the refrigerator overnight (or for at least 6 hours) before serving. This allows the cheesecake to fully set and develop its flavor.
Expert Tips & Tricks
- Water Bath: For an even creamier texture and to further prevent cracking, bake the cheesecake in a water bath. Wrap the bottom of the springform pan tightly in aluminum foil (to prevent water from seeping in) and place it in a larger baking pan. Pour hot water into the larger pan until it reaches about halfway up the sides of the springform pan.
- Room Temperature Ingredients: Ensure that the cream cheese and eggs are at room temperature for a smoother batter.
- Preventing Cracks: Avoid opening the oven door frequently during baking. Sudden temperature changes can cause the cheesecake to crack.
- Strawberry Variation: For a more intense strawberry flavor, add a teaspoon of freeze-dried strawberry powder to the batter.
- Test for Doneness: Gently shake the cheesecake. The edges should be set, and the center should have a slight wobble. It will continue to set as it cools.
Serving & Storage Suggestions
Serve the Strawberry Marbled Cheesecake chilled. For an elegant presentation, garnish with fresh strawberries, a dusting of powdered sugar, or a drizzle of chocolate sauce.
- Storage: Store leftover cheesecake in the refrigerator, covered, for up to 5 days.
- Freezing: Cheesecake can be frozen. Wrap it tightly in plastic wrap and then in aluminum foil. Freeze for up to 2 months. Thaw in the refrigerator overnight before serving.
- Serving Size: A standard serving is about 1/8 of the cheesecake.
Nutritional Information
| Nutrient | Amount per Serving | % Daily Value |
|---|---|---|
| Calories | 541.8 kcal | N/A |
| Calories from Fat | 340 g | 63% |
| Total Fat | 37.8 g | 58% |
| Saturated Fat | 20.8 g | 104% |
| Cholesterol | 178.7 mg | 59% |
| Sodium | 402.2 mg | 16% |
| Total Carbohydrate | 44.9 g | 14% |
| Dietary Fiber | 1 g | 3% |
| Sugars | 38.1 g | 152% |
| Protein | 8.4 g | 16% |
Note: Nutritional information is an estimate and may vary based on specific ingredients and preparation methods.
Variations & Substitutions
- Gluten-Free Crust: Substitute gluten-free graham crackers or use a gluten-free cookie crumb crust.
- Different Fruit: Experiment with other fruit purees, such as raspberry, blueberry, or cherry.
- Chocolate Marble: Swirl in melted dark chocolate for a chocolate-strawberry cheesecake.
- Low-Sugar Option: Use a sugar substitute like erythritol or stevia, but be aware that this may affect the texture.
FAQs (Frequently Asked Questions)
Q: Why did my cheesecake crack?
A: Cracking can be caused by overbaking, sudden temperature changes, or overmixing the batter. Cooling the cheesecake slowly in the oven helps prevent cracks.
Q: Can I use fresh strawberries instead of frozen?
A: Yes, you can use fresh strawberries. However, frozen strawberries tend to release more juice when thawed, which helps create a smoother puree. You may need to add a tablespoon of water if using fresh strawberries.
Q: How do I know when the cheesecake is done?
A: The edges should be set, but the center should still have a slight jiggle. It will continue to set as it cools. An instant-read thermometer inserted into the center should read about 150°F (65°C).
Q: Can I make this cheesecake ahead of time?
A: Absolutely! Cheesecake is a great make-ahead dessert. It actually benefits from chilling overnight, which allows the flavors to meld and the texture to firm up.
Q: My strawberry swirl sank to the bottom. What did I do wrong?
A: This can happen if the strawberry puree is too thin or if you over-swirl the mixture. Make sure to thicken the strawberry puree adequately and avoid over-mixing when creating the marbled effect.
Final Thoughts
I truly hope you’ll give this Strawberry Marbled Cheesecake a try. It’s a showstopper dessert that’s surprisingly easy to make. Don’t be intimidated by the marbling – it’s all part of the fun! Feel free to experiment with different fruit purees or flavor combinations to create your own signature cheesecake. And most importantly, don’t forget to share your creation with friends and family. They’ll thank you for it!