
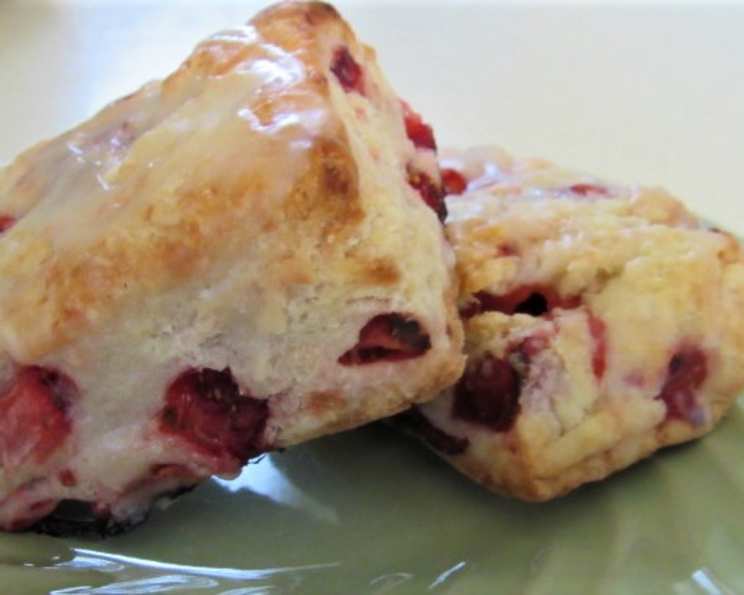
Strawberry Shortcake Scones: A Berry Delicious Twist on a Classic
I remember vividly the first time I truly appreciated the simple pleasure of strawberry shortcake. It wasn’t the meticulously layered creations from fancy bakeries, but a humble version made by my grandmother. The slightly crumbly, homemade biscuits, the bright, macerated strawberries, and the dollop of lightly sweetened whipped cream – it was pure summertime bliss on a plate. It’s that feeling of uncomplicated joy that I wanted to capture in these Strawberry Shortcake Scones.
Recipe Overview
- Prep Time: 20 minutes
- Cook Time: 16-18 minutes
- Total Time: Approximately 38 minutes
- Yields: 12 Scones
- Serves: 12
- Dietary Type: Vegetarian
Ingredients
For the Scones:
- 2 cups all-purpose flour
- 1 tablespoon granulated sugar
- ½ teaspoon salt
- 6 tablespoons unsalted butter, chilled and cut into cubes
- 12 small strawberries, diced
For the Glaze:
- 3 cups powdered sugar
- ¼ cup half-and-half
- ½ teaspoon vanilla
Equipment Needed
- Large mixing bowl
- Pastry blender or your fingertips
- Baking sheet
- Parchment paper
- Sharp knife
- Cooling rack
- Whisk
Instructions
- Begin by preheating your oven to 425°F (220°C). Line a baking sheet with parchment paper. This prevents sticking and makes cleanup a breeze.
- In a large mixing bowl, whisk together the flour, granulated sugar, and salt. This ensures that the dry ingredients are evenly distributed.
- Add the chilled butter cubes to the flour mixture. Using a pastry blender or your fingertips, cut the butter into the flour until the mixture resembles coarse crumbs. The smaller the butter pieces, the more tender your scones will be. Work quickly to prevent the butter from melting.
- Gently toss the diced strawberries with a little of the flour mixture to coat them. This helps prevent them from sinking to the bottom of the scones during baking.
- Add the half-and-half to the bowl and fold the mixture together gently until it just begins to come together and form a soft dough. Be careful not to overmix the dough. Overmixing will develop the gluten in the flour, resulting in tough scones.
- Turn the dough out onto a lightly floured surface and pat it into a 1-inch thick rectangle.
- Using a sharp knife, cut the rectangle into 6 squares, then cut each square on the diagonal to form 12 triangles (scones).
- Place the scones on the prepared baking sheet, spacing them slightly apart.
- Bake for 16-18 minutes, or until the scones are cooked through and golden brown. Keep a close eye on them, as oven temperatures can vary. A toothpick inserted into the center should come out clean.
- Once baked, place a sheet of parchment paper on your work surface and then place a cooling rack over the parchment. Remove the scones from the baking sheet and transfer them to the cooling rack. Allow them to cool for about 10 minutes.
- While the scones are cooling, prepare the glaze. In a medium bowl, whisk together the powdered sugar, vanilla, and half-and-half until smooth. Adjust the consistency of the glaze by adding more half-and-half if it’s too thick, or more powdered sugar if it’s too thin.
- Generously drizzle the glaze over the slightly cooled scones. The glaze will firm up as it cools completely.
Expert Tips & Tricks
- Keep Your Butter Cold: The key to flaky scones is cold butter. If your butter starts to soften, pop it back into the refrigerator for a few minutes.
- Don’t Overmix: Overmixing develops the gluten in the flour, leading to tough scones. Mix only until the dough just comes together.
- Chilling the Dough: For extra tender scones, wrap the dough in plastic wrap and chill it in the refrigerator for 30 minutes before shaping.
- Egg Wash (Optional): For a shinier, more golden crust, brush the scones with a beaten egg before baking.
- Freezing for Later: Unbaked scone triangles can be frozen on a baking sheet until solid, then transferred to a freezer bag for up to 2 months. Bake from frozen, adding a few extra minutes to the baking time.
Serving & Storage Suggestions
These Strawberry Shortcake Scones are best enjoyed fresh, while the scones are still slightly warm and the glaze is soft. Serve them as part of a brunch spread, afternoon tea, or as a sweet treat any time of day. They are, of course, fantastic with a side of fresh strawberries and a dollop of whipped cream to truly capture the shortcake essence.
Store leftover scones in an airtight container at room temperature for up to 2 days. They can also be stored in the refrigerator for up to 4 days. To reheat, warm them in a low oven (around 300°F or 150°C) for a few minutes until heated through.
Nutritional Information
Here’s an approximate nutritional breakdown per scone:
| Nutrient | Amount per Serving | % Daily Value |
|---|---|---|
| Calories | 256.8 kcal | – |
| Total Fat | 6.6 g | 10% |
| Saturated Fat | 4 g | 20% |
| Cholesterol | 17.1 mg | 5% |
| Sodium | 100.9 mg | 4% |
| Total Carbohydrate | 47.7 g | 15% |
| Dietary Fiber | 0.7 g | 2% |
| Sugars | 30.8 g | – |
| Protein | 2.4 g | 4% |
Note: Nutritional information is an estimate and can vary based on specific ingredients and portion sizes.
Variations & Substitutions
- Gluten-Free: Substitute a gluten-free all-purpose flour blend for the regular flour. You may need to add a little extra liquid to achieve the right dough consistency.
- Vegan: Use a vegan butter alternative and plant-based milk (such as almond milk or soy milk) in place of the half-and-half.
- Lemon Zest: Add a teaspoon of lemon zest to the dough for a bright, citrusy flavor.
- Other Berries: Experiment with other berries, such as blueberries, raspberries, or blackberries, in place of the strawberries.
- Spices: Add a pinch of cinnamon or nutmeg to the dough for a warm, comforting flavor.
FAQs (Frequently Asked Questions)
Q: Can I make the dough ahead of time?
A: Yes! You can prepare the dough up to 24 hours in advance. Wrap it tightly in plastic wrap and store it in the refrigerator. Bake as directed when ready.
Q: My scones are dry. What did I do wrong?
A: Overbaking or using too much flour can result in dry scones. Be careful not to overmix the dough and check for doneness a few minutes before the recommended baking time.
Q: Can I freeze the baked scones?
A: Yes, baked scones can be frozen for up to 2 months. Wrap them individually in plastic wrap and then place them in a freezer bag. Thaw at room temperature before reheating.
Q: What if I don’t have half-and-half?
A: You can substitute whole milk or a mixture of milk and cream.
Q: The glaze is too thick/thin. How do I fix it?
A: If the glaze is too thick, add a teaspoon of half-and-half at a time until you reach the desired consistency. If it’s too thin, add a tablespoon of powdered sugar at a time.
Final Thoughts
These Strawberry Shortcake Scones are a delightful twist on a beloved classic. The combination of crumbly, buttery scone, sweet strawberries, and luscious glaze is simply irresistible. Whether you’re a seasoned baker or just starting out, this recipe is sure to impress. So, gather your ingredients, preheat your oven, and get ready to create a batch of these scrumptious scones. I encourage you to try this recipe and would love to hear your feedback! Perhaps serve them with a steaming cup of earl grey tea for a perfectly comforting treat.