
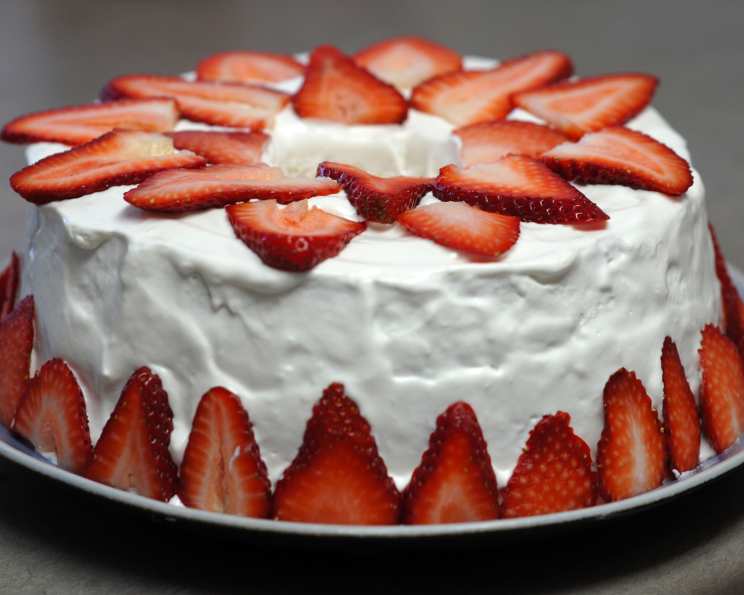
Strawberry Sunshine Cake
The first time I tasted a cake quite like this, I was a child at my grandmother’s farm. Summer was in full bloom, and the air was thick with the scent of sweet clover and freshly mown hay. Grandma, always the queen of effortless elegance in the kitchen, presented this dreamy, cloud-like cake topped with the brightest red strawberries. Its light, airy texture and vibrant berry flavor were pure magic – a memory that still brings a smile to my face every time I think of it. This Strawberry Sunshine Cake is my way of recreating that cherished moment, a slice of pure summertime joy.
Recipe Overview
- Prep Time: 45 minutes
- Cook Time: 50-55 minutes
- Total Time: 1 hour 40 minutes
- Servings: 12-16
- Yield: 1 cake
- Dietary Type: Not specified
Ingredients
For the Cake:
- 1 cup egg whites (about 7)
- ½ teaspoon cream of tartar
- ½ teaspoon salt
- 1 ½ cups sugar, divided
- 5 egg yolks
- 2 tablespoons water
- ½ teaspoon almond extract
- ½ teaspoon lemon extract
- ½ teaspoon vanilla extract
- 1 cup all-purpose flour
For the Filling:
- 1 (3 ounce) package strawberry gelatin
- 1 cup boiling water
- ½ cup ice water
- 1 pint fresh strawberries, sliced
- 1 (8 ounce) carton frozen whipped topping, thawed and divided
- 1 pint fresh strawberries, for garnishment (optional)
Equipment Needed
- Large mixing bowl
- Another mixing bowl
- Electric mixer
- Sifter
- Spatula
- 10-inch tube pan (ungreased)
- Knife
- Serving plate
- Dental floss or serrated knife
Instructions
- Preheat your oven to 325 degrees Fahrenheit. Make sure you have an ungreased 10-inch tube pan ready.
- In a large mixing bowl, beat the egg whites, cream of tartar, and salt using an electric mixer until soft peaks form.
- Gradually add 1 cup of the sugar, a tablespoon at a time, continuing to beat until stiff peaks form. This step is crucial for achieving the light and airy texture of the cake. Set the meringue aside.
- In another bowl, beat the egg yolks until they are slightly thickened, about 5 minutes. They should become pale and creamy.
- Gradually add the remaining sugar to the egg yolks, beating until the mixture is thick and lemon-colored.
- Blend in the water, almond extract, lemon extract, and vanilla extract. The extracts add depth and complexity to the flavor profile of the cake.
- Sift the flour over the egg yolk batter. This ensures that there are no lumps in your batter and contributes to a smoother texture. Beat until just smooth, being careful not to overmix.
- Gently fold in the egg whites into the yolk mixture until just blended. It’s important to fold gently to maintain the air in the meringue. Overmixing will deflate the batter and result in a dense cake.
- Spoon the batter into the prepared ungreased 10-inch tube pan.
- Using a knife, cut through the batter to remove any air pockets that might have formed. This will prevent large holes in your cake. Smooth the top.
- Bake at 325 degrees Fahrenheit for 50-55 minutes, or until the cake springs back when lightly touched. A toothpick inserted into the center should come out clean. Keep an eye on it to prevent over-browning. If the top begins to brown too quickly, tent it loosely with foil.
- Immediately invert the pan onto a wire rack and let the cake cool completely in the pan. This helps prevent the cake from collapsing.
- While the cake is cooling, prepare the filling. In a large bowl, dissolve the strawberry gelatin in the boiling water.
- Add the ice water and stir until the gelatin is fully dissolved.
- Place the bowl in ice water for about 5 minutes, or until the gelatin is slightly thickened. This will help the filling set properly.
- Fold in the sliced strawberries and ½ cup of the thawed whipped topping.
- Once the cake is completely cooled, run a knife around the edges of the pan to loosen the cake.
- Split the cake horizontally into three layers. A long serrated knife works well, or you can use dental floss for a clean cut. Simply wrap the floss around the cake at the desired height, cross the ends, and pull gently to slice through the cake.
- Place the bottom layer of the cake on a serving plate.
- Spread with half of the gelatin mixture.
- Repeat with a layer of cake and then the remaining gelatin mixture.
- Top with the remaining cake layer.
- Frost the top and sides of the cake with the remaining whipped topping.
- Garnish with fresh strawberries (optional).
- Store in the refrigerator until ready to serve. Refrigerate leftovers. The cake is best served cold, as the gelatin filling will soften at room temperature.
Expert Tips & Tricks
- For an even lighter cake, try sifting the flour twice. This incorporates more air and results in a finer crumb.
- Make sure your egg whites are at room temperature before whipping. They will whip up to a greater volume.
- If you are short on time, you can use store-bought angel food cake instead of making one from scratch.
- To prevent the bottom layer from becoming soggy, brush it lightly with melted white chocolate before adding the filling.
- If the gelatin mixture doesn’t thicken enough after 5 minutes in the ice bath, continue chilling it for another few minutes, checking it frequently. You want it to be thick enough to hold the strawberries but not so thick that it’s difficult to spread.
Serving & Storage Suggestions
Serve the Strawberry Sunshine Cake chilled. The bright colors and airy texture make it a perfect centerpiece for any summer gathering. Leftovers should be stored in an airtight container in the refrigerator for up to 3 days. The cake is best enjoyed fresh, as the whipped topping may begin to weep after a few days. Freezing is not recommended, as the whipped topping and gelatin filling can change texture.
Nutritional Information
| Nutrient | Amount per Serving | % Daily Value |
|---|---|---|
| Calories | 264.6 kcal | N/A |
| Calories from Fat | N/A | 23% |
| Total Fat | 6.7 g | 10% |
| Saturated Fat | 4.8 g | 23% |
| Cholesterol | 69.2 mg | 23% |
| Sodium | 173.2 mg | 7% |
| Total Carbohydrate | 46.5 g | 15% |
| Dietary Fiber | 0.9 g | 3% |
| Sugars | 37.1 g | 148% |
| Protein | 5.3 g | 10% |
Note: Nutritional information is an estimate and may vary based on specific ingredients and preparation methods.
Variations & Substitutions
- For a gluten-free version, substitute the all-purpose flour with a gluten-free blend. Be sure to check that all other ingredients are also gluten-free.
- Use different flavors of gelatin for a variety of fruit combinations. Raspberry gelatin with raspberries and blackberries would be delicious.
- Instead of whipped topping, you can use a stabilized whipped cream made with heavy cream and a touch of sugar.
- Add a layer of lemon curd between the cake layers for an extra burst of citrus flavor.
- Garnish with other fresh berries, such as blueberries, raspberries, or blackberries, for a mixed berry cake.
FAQs (Frequently Asked Questions)
Q: Can I make this cake ahead of time?
A: Yes, you can bake the cake a day in advance and store it, well-wrapped, at room temperature. Assemble the cake with the filling and frosting on the day you plan to serve it.
Q: Can I use frozen strawberries instead of fresh?
A: While fresh strawberries are preferred for the best texture and flavor, you can use frozen strawberries in the filling. Be sure to thaw them completely and drain off any excess liquid before adding them to the gelatin mixture.
Q: My cake stuck to the tube pan. What can I do?
A: This cake is designed to be baked in an ungreased tube pan to help it rise properly. If it sticks, try running a thin knife around the edges again. If that doesn’t work, try gently tapping the pan on a countertop.
Q: Can I use a different size pan?
A: It’s best to use a 10-inch tube pan for this recipe. Using a different size pan may affect the baking time and the overall texture of the cake.
Q: How do I prevent the whipped topping from melting?
A: Keep the cake refrigerated until just before serving. If you’re making it ahead of time, you can also stabilize the whipped topping by adding a small amount of gelatin or cornstarch.
Final Thoughts
I hope this Strawberry Sunshine Cake brings as much joy to your kitchen as it has to mine. It’s a versatile recipe that can be adapted to suit your taste and the season. Don’t be afraid to experiment with different flavors and garnishes. Share your creations and feedback – I can’t wait to see your sunshine cakes! Perhaps a glass of chilled Prosecco would be the perfect accompaniment? Happy baking!