
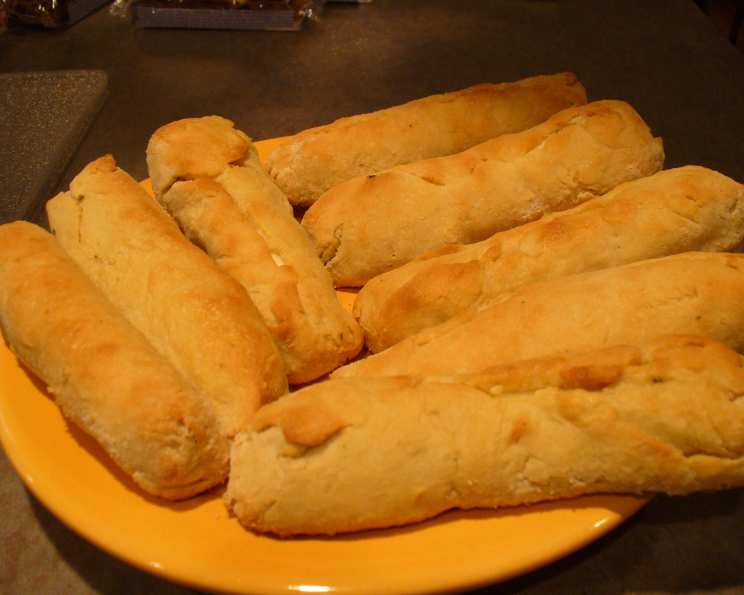
String Cheese Stick Delights: A Nostalgic Bite of Childhood
String cheese. Just the words bring me back to childhood lunchboxes, the satisfying peel as I unwrapped each stick, and the simple joy of pulling it apart into wispy strings. It wasn’t just a snack; it was an edible toy, a canvas for my youthful imagination, and a comforting constant in the whirlwind of elementary school days. Now, taking that familiar ingredient and elevating it into these warm, golden-brown pastries? That’s a bit of magic I can’t wait to share.
Recipe Overview
- Prep Time: 10 minutes
- Cook Time: 8-10 minutes
- Total Time: 20 minutes
- Servings: 8
- Yield: 8 cheese sticks
- Dietary Type: Vegetarian
Ingredients
- 2 1⁄4 cups Bisquick baking mix
- 2⁄3 cup milk
- 8 mozzarella string cheese sticks
- 1 tablespoon butter, melted
- 1⁄4 teaspoon garlic powder
Equipment Needed
- Large mixing bowl
- Spoon
- Flat surface
- Rolling pin
- Knife or pizza cutter
- Baking sheet
- Pastry brush
Instructions
-
Preheat your oven to 450°F (232°C). Ensure that the baking sheet is ungreased.
-
In a large mixing bowl, stir together the Bisquick baking mix and milk until a soft dough forms. Once the dough has come together, beat it for 30 seconds with a spoon. This helps to develop the gluten and create a slightly chewier texture.
-
Lightly sprinkle a flat surface with dry Bisquick mix. This prevents the dough from sticking as you work with it.
-
Place the dough onto the prepared surface. Roll the dough around to coat it lightly in the Bisquick mix, then knead it 10-12 times. This step is important for creating a smooth and pliable dough.
-
Roll the dough out to approximately 1/4 inch (6mm) thickness. Aim for a relatively even thickness to ensure that the cheese sticks bake uniformly.
-
Using a knife or pizza cutter, cut the dough into 8 rectangles, each approximately 6×2 inches (15×5 cm). These rectangles will be used to wrap the mozzarella string cheese sticks.
-
Place one cheese stick onto each dough rectangle. Roll the dough around the cheese stick, ensuring that it is completely encased.
-
Pinch the edges of the dough together to seal the roll. This is crucial to prevent the cheese from leaking out during baking. Then, seal the ends of each roll. To further reinforce the seal, gently roll the cheese stick back and forth on the prepared surface.
-
Carefully place the prepared cheese sticks onto the ungreased baking sheet, leaving a little space between each one.
-
Bake in the preheated oven for 8-10 minutes, or until the cheese sticks are golden brown. Keep a close eye on them, as baking times can vary depending on your oven. The dough should be puffed and lightly browned.
-
While the cheese sticks are baking, prepare the garlic butter. In a small bowl, mix together the melted butter and garlic powder.
-
Once the cheese sticks are removed from the oven, immediately brush them with the garlic butter mixture. This will add a delicious savory flavor and a beautiful sheen.
Expert Tips & Tricks
- Don’t overmix the dough: Overmixing develops too much gluten, resulting in a tough final product. Mix until just combined.
- Keep the cheese cold: Cold cheese will melt slower during baking, preventing it from completely melting and oozing out.
- Seal the edges tightly: A good seal is the key to preventing cheese leakage.
- Use parchment paper: For easy cleanup and to prevent sticking, line the baking sheet with parchment paper.
- Egg wash alternative: If you want an even deeper golden color, brush the dough with an egg wash (1 egg beaten with 1 tablespoon of water) before baking.
Serving & Storage Suggestions
Serve these delicious string cheese sticks warm, immediately after baking, for the best flavor and texture. They are fantastic on their own or with a dipping sauce. Pizza sauce, marinara sauce, salsa, or even a simple ranch dressing all complement the cheesy, garlicky goodness.
Leftovers can be stored in an airtight container in the refrigerator for up to 3 days. Reheat them in the oven at 350°F (175°C) for a few minutes, or in a microwave for a shorter time, until warmed through. Be careful not to overheat them, or the cheese will become rubbery. I don’t recommend freezing them as the dough texture can change upon thawing.
Nutritional Information
| Nutrient | Amount per Serving | % Daily Value |
|---|---|---|
| Calories | 242.5 kcal | N/A |
| Calories from Fat | N/A | 44% |
| Total Fat | 11.9 g | 18% |
| Saturated Fat | 5.6 g | 27% |
| Cholesterol | 25.5 mg | 8% |
| Sodium | 626.4 mg | 26% |
| Total Carbohydrate | 23.2 g | 7% |
| Dietary Fiber | 0.7 g | 2% |
| Sugars | 4.3 g | N/A |
| Protein | 10.3 g | 20% |
Note: Nutritional information is an estimate and may vary based on specific ingredients and portion sizes.
Variations & Substitutions
- Pizza Style: Add a sprinkle of Italian seasoning to the dough or mix a tablespoon of tomato paste into the melted butter for a pizza-flavored twist.
- Spicy Kick: Add a pinch of red pepper flakes to the garlic butter for a little heat.
- Herbaceous Delight: Substitute the garlic powder with your favorite dried herbs, such as oregano, basil, or thyme.
- Different Cheeses: Experiment with different types of string cheese, such as cheddar or a mozzarella blend.
- Gluten-Free Version: Use a gluten-free baking mix in place of the Bisquick. Be sure to check the package instructions for any adjustments needed.
FAQs (Frequently Asked Questions)
Q: Can I make the dough ahead of time?
A: Yes, you can prepare the dough ahead of time, wrap it tightly in plastic wrap, and store it in the refrigerator for up to 24 hours. Let it come to room temperature slightly before rolling it out.
Q: My cheese is leaking out during baking. What am I doing wrong?
A: Ensure the dough is completely sealed around the cheese stick. Pinch the edges and ends tightly. Using cold cheese also helps slow down the melting process.
Q: Can I use regular shredded mozzarella instead of string cheese?
A: String cheese is ideal because it melts more evenly within the dough. Shredded mozzarella could melt too quickly and leak out.
Q: What if I don’t have Bisquick baking mix?
A: You can make a substitute by combining all-purpose flour, baking powder, salt, and shortening. Search online for a “Bisquick substitute” recipe.
Q: Can I freeze these cheese sticks after baking?
A: While technically possible, freezing can affect the texture of the dough. If you do freeze them, wrap them individually and thaw completely before reheating.
Final Thoughts
These homemade string cheese sticks are more than just a snack; they’re a warm embrace of comfort food with a touch of nostalgia. Easy to make and endlessly adaptable, they’re sure to become a favorite for both kids and adults alike. So, gather your ingredients, preheat your oven, and prepare to transform simple string cheese into a golden-brown delight. Share your creations with friends and family, and don’t forget to let me know what variations you try! Enjoy!