
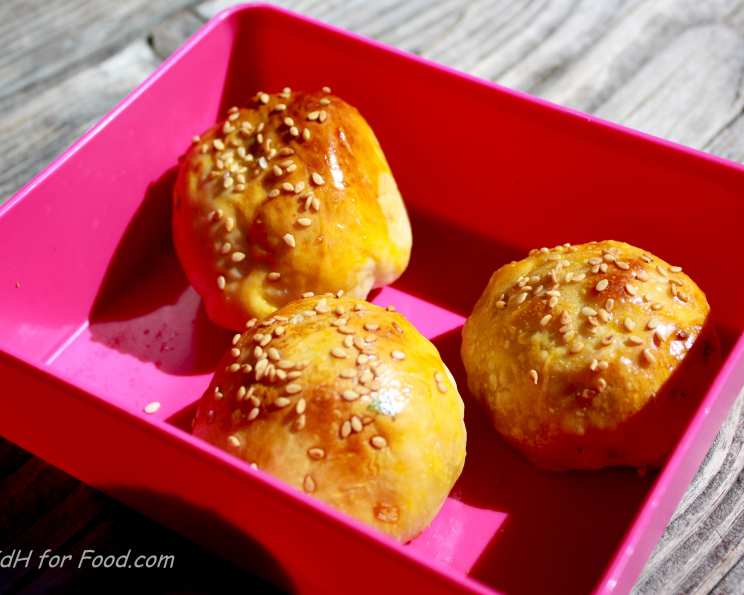
Stuffed Buns: A Taste of Home, Filled with Chicken or Paneer
The aroma of freshly baked bread, warm spices, and savory fillings – it’s a scent that instantly transports me back to my grandmother’s kitchen. I remember watching her nimble fingers expertly kneading dough, her face alight with a quiet joy as she prepared these stuffed buns. They weren’t just food; they were edible hugs, a taste of love that filled our bellies and warmed our hearts. Whether filled with succulent chicken or creamy paneer, these buns were always the highlight of our family gatherings, a delicious reminder of home and togetherness.
Recipe Overview
- Prep Time: 40 minutes
- Cook Time: 12 minutes
- Total Time: 1 hour 40 minutes (includes resting/proving time)
- Yields: 12 buns
- Serves: 6
- Dietary Type: Varies, see notes below
Ingredients
For the Buns:
- 1 tablespoon active dry yeast
- 2 tablespoons warm water
- ½ cup milk
- Salt to taste
- ½ cup vegetable oil
- 2 ¼ cups flour
- 2 tablespoons sugar
- 1 egg, beaten
- 1 egg white
- White sesame seeds, for sprinkling
For the Chicken Filling:
- 1 ½ cups chicken, cooked and shredded
- 1 onion, minced
- 1 teaspoon ginger-garlic paste
- 1 teaspoon red chili powder
- 1 ½ teaspoons coriander powder
- 1 pinch cumin, ground
- 1 pinch garam masala
- Salt to taste
- 2 tablespoons coriander leaves, finely chopped
For the Paneer Filling (Alternative):
- 1 ½ cups paneer, crumbled (substitute for the chicken)
- Follow remaining ingredients and steps as listed for the chicken filling.
Equipment Needed
- Large mixing bowl
- Wooden spoon
- Measuring cups and spoons
- Heavy-bottomed vessel or skillet
- Baking sheet
- Pastry brush (optional)
Instructions
-
Activate the Yeast: In a small bowl, dissolve the active dry yeast in warm water along with ½ tablespoon of sugar and ½ tablespoon of flour. Leave aside for 10 minutes, or until the mixture becomes frothy. This indicates the yeast is active and ready to use.
-
Prepare the Milk Mixture: Boil the milk and then cool it until it is warm to the touch (not hot). In a large mixing bowl, add the remaining sugar, oil, and a pinch of salt to the warm milk.
-
Combine Wet and Dry Ingredients: Mix the milk mixture well with a wooden spoon until the sugar dissolves completely. Add 1 cup of flour and mix to form a smooth paste.
-
Incorporate Yeast and Egg: Add the beaten egg and the yeast mixture to the flour paste and mix well.
-
Form the Dough: Gradually add the remaining flour and mix until a smooth dough forms. You may need to adjust the amount of flour slightly depending on the humidity and flour type.
-
Knead the Dough: Knead the dough on a lightly floured surface for about 10 minutes until it becomes smooth and elastic. This step is crucial for developing the gluten and creating a soft, fluffy bun.
-
First Rise: Place the kneaded dough in a greased bowl, turning to coat. Cover the bowl with a clean kitchen towel or plastic wrap and let it rest in a warm place until it doubles in volume. This may take approximately an hour or two, depending on the temperature.
-
Prepare the Filling (Chicken): While the dough is resting, prepare the chicken filling. Heat a little oil in a heavy-bottomed vessel or skillet over medium heat. Add the minced onion and sauté for about 4 minutes, or until softened and translucent.
-
Add Aromatics: Add the ginger-garlic paste to the sautéed onions and sauté for another 4 minutes, until fragrant. Be careful not to burn the garlic.
-
Incorporate Spices: Reduce the heat to low and add the red chili powder, coriander powder, cumin powder, and garam masala powder. Mix well, ensuring the spices are evenly distributed.
-
Add Chicken and Season: Add the shredded cooked chicken to the spice mixture and mix well. Season with salt to taste. Cook for about 3 minutes, allowing the flavors to meld together.
-
Finish the Filling: Turn off the heat and cool the chicken filling completely. Add the finely chopped coriander leaves and mix.
-
Prepare the Filling (Paneer – Alternative): If using paneer, follow steps 8-10. Then, instead of chicken, add the crumbled paneer to the spice mixture. Adjust seasoning with salt to taste and cook for about 2 minutes. Stir in coriander leaves as the final step.
-
Shape and Fill the Buns: Once the dough has doubled in size, punch down the dough lightly using your palm. Divide the dough equally into 12 portions.
-
Fill the Buns: Flatten each portion of dough into a small disc. Fill each disc with approximately 1 tablespoon of the chicken or paneer filling. Carefully re-shape the dough into a smooth ball, ensuring the filling is completely enclosed.
-
Second Rise: Place the filled buns on a greased baking sheet, leaving some space between each bun. Sprinkle the tops of the buns generously with sesame seeds. Let the buns sit/prove for another 20 minutes, allowing them to rise slightly.
-
Bake the Buns: Preheat your oven to 200 degrees C (392 degrees F). Bake the buns in the preheated oven for 10-12 minutes, or until they are golden brown.
-
Egg Wash (Optional): When the buns start to brown, you can brush the tops with egg white for a glossy finish. This is optional but adds a beautiful sheen to the baked buns.
-
Cool and Serve: Remove the baked buns from the oven and let them cool slightly on a wire rack before serving.
Expert Tips & Tricks
- Yeast Activation: Ensure the water for activating the yeast is not too hot or too cold. Lukewarm is ideal. If the yeast doesn’t froth after 10 minutes, it may be old or inactive, and you should use fresh yeast.
- Kneading: Proper kneading is essential for a soft, fluffy bun. If you have a stand mixer, you can use the dough hook attachment to knead the dough for about 8 minutes.
- Spice Level: Adjust the amount of red chili powder in the filling according to your spice preference. You can also add a pinch of cayenne pepper for extra heat.
- Even Baking: For even baking, rotate the baking sheet halfway through the baking time.
- Dough Consistency: If the dough is too sticky, add a little more flour, one tablespoon at a time, until it becomes manageable. If the dough is too dry, add a little milk or water, one tablespoon at a time.
- Make-Ahead Filling: The chicken or paneer filling can be prepared a day in advance and stored in the refrigerator.
Serving & Storage Suggestions
Serve these stuffed buns warm as a snack, appetizer, or light meal. They pair well with a side of raita (yogurt dip) or a simple salad.
Storage:
- Room Temperature: Stuffed buns can be stored at room temperature for up to 2 days in an airtight container.
- Refrigerator: For longer storage, store the buns in an airtight container in the refrigerator for up to 4 days.
- Freezer: To freeze, wrap the buns individually in plastic wrap and then place them in a freezer-safe bag or container. They can be frozen for up to 2 months.
Reheating:
- Oven: Reheat the buns in a preheated oven at 175 degrees C (350 degrees F) for about 5-10 minutes, or until heated through.
- Microwave: Reheat the buns in the microwave for 30-60 seconds, or until heated through. Be careful not to overheat, as this can make the buns tough.
- Steaming: Steaming is a great way to retain the moisture in the buns. Steam for about 5 minutes or until heated through.
Nutritional Information
Note: Nutritional information is an estimate and can vary based on specific ingredients and portion sizes.
| Nutrient | Amount per Serving | % Daily Value |
|---|---|---|
| Calories | 390 kcal | 20% |
| Total Fat | 20g | 31% |
| Saturated Fat | 3g | 15% |
| Cholesterol | 34mg | 11% |
| Sodium | 40mg | 2% |
| Total Carbohydrate | 44g | 15% |
| Dietary Fiber | 2g | 8% |
| Sugars | 5g | – |
| Protein | 8g | 16% |
Variations & Substitutions
- Gluten-Free: Use a gluten-free flour blend to make gluten-free buns. You may need to add a binding agent like xanthan gum to improve the texture.
- Vegan: Substitute the milk with plant-based milk (almond, soy, or oat milk). Replace the egg with a flax egg (1 tablespoon flaxseed meal mixed with 3 tablespoons water, let sit for 5 minutes). Use a vegan butter substitute instead of oil, if desired. For the paneer filling, use a tofu-based paneer substitute.
- Spicier Filling: Add chopped green chilies or a dash of chili flakes to the filling for extra heat.
- Vegetable Filling: Substitute the chicken or paneer with a mix of vegetables like potatoes, peas, carrots, and cauliflower.
- Herb Variations: Experiment with different herbs in the filling, such as mint, cilantro, or parsley.
- Cheese Filling: Add grated cheese (cheddar, mozzarella, or paneer) to the filling for a cheesy flavor.
- Sweet Buns: Add sweet ingredients to the dough such as brown sugar or cinnamon, and fill with a fruit compote or chocolate spread.
FAQs (Frequently Asked Questions)
Q: Can I make the dough ahead of time?
A: Yes, you can prepare the dough the day before and store it in the refrigerator after the first rise. Punch it down before using.
Q: How do I prevent the buns from drying out?
A: Brushing the buns with egg white or melted butter before baking can help prevent them from drying out. Also, avoid overbaking them.
Q: Can I use instant yeast instead of active dry yeast?
A: Yes, you can use instant yeast. You can add it directly to the flour without activating it in water first.
Q: What is the best way to reheat the buns?
A: The oven is the best way to reheat the buns as it helps to retain their texture. However, the microwave is a quicker option if you’re short on time.
Q: How can I tell if the buns are fully baked?
A: The buns are fully baked when they are golden brown and sound hollow when tapped on the bottom. An internal thermometer should read around 190°F (88°C).
Final Thoughts
These stuffed buns are more than just a recipe; they are a journey back to comforting flavors and cherished memories. Whether you choose to fill them with savory chicken or creamy paneer, the aroma of freshly baked bread and the warmth of spices will fill your kitchen with joy. I encourage you to try this recipe, experiment with different fillings, and create your own unique twist. Share your creations with loved ones, and let the deliciousness of these stuffed buns bring everyone together. Don’t hesitate to share your feedback and variations – I’d love to hear how you made this recipe your own!