
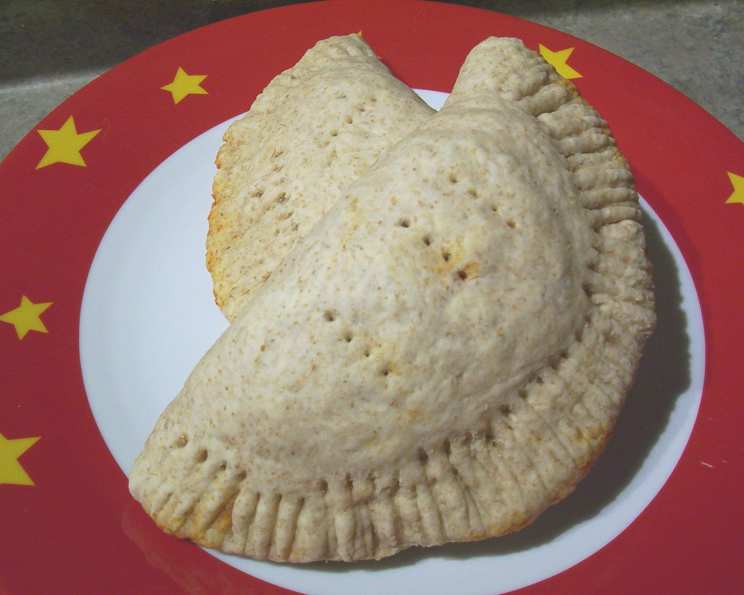
Stuffed Calzones: A Slice of Homemade Heaven
The aroma of baking bread, bubbling cheese, and savory ham always transports me back to my grandmother’s kitchen. I remember her effortlessly tossing pizza dough high in the air, a floury cloud momentarily obscuring her warm smile. While she made traditional pizzas, her calzones were legendary – pockets of pure comfort that made any day feel like a celebration. Every bite was an explosion of flavor, a testament to simple ingredients transformed into something extraordinary. Now, I’m excited to share my version of this beloved classic with you!
Recipe Overview
- Prep Time: 20 minutes
- Cook Time: 18-20 minutes
- Total Time: 40 minutes
- Servings: 4
- Yield: 4 calzones
- Dietary Type: Varies (can be adapted to vegetarian)
Ingredients
- 1 cup shredded cheese (such as mozzarella or a blend)
- 1 (213 ml) can pizza sauce
- 1 lb prepared fresh pizza dough or 1 lb frozen pizza dough, thawed
- 8 ounces sliced baked ham
Equipment Needed
- 2 jellyroll pans
- Lightly floured surface
- Fork
Instructions
-
Begin by preheating your oven to 425°F (220°C). While the oven is heating, lightly grease your two jellyroll pans. This will prevent the calzones from sticking and ensure they bake evenly.
-
Next, prepare your workstation. Lightly flour a clean, flat surface. This is essential to prevent the dough from sticking as you work with it.
-
Place the pizza dough onto the prepared, floured surface. Whether you’re using fresh or thawed frozen dough, this is the starting point for creating your calzones.
-
Divide the dough into four equal pieces. This ensures each calzone is the same size and cooks at the same rate.
-
Shape each piece of dough into a ball, then gently flatten each ball into a 7-inch circle. Aim for an even thickness to ensure even baking. Don’t worry if the circles aren’t perfect; rustic charm is part of the appeal!
-
Evenly divide and spread the pizza sauce over each circle, leaving a ½-inch border around the edge. This border will be crucial for sealing the calzones properly. Don’t over-sauce, as this can make the calzones soggy.
-
Next, evenly distribute the shredded cheese and sliced baked ham between the circles, again leaving that ½-inch border. Ensure the filling is evenly distributed for a balanced flavor in every bite. If your ham slices are large, consider tearing or chopping them into smaller pieces.
-
Now it’s time to fold the circles in half, creating the calzone shape. Carefully lift one side of the dough and fold it over to meet the other side, forming a half-moon shape.
-
Press the edges together firmly to seal the calzones. A good seal is crucial to prevent the filling from leaking out during baking.
-
For an extra secure seal and a decorative touch, press the edges with the tines of a fork. This creates a crimped edge that not only looks appealing but also helps keep the filling contained.
-
Arrange two calzones on each prepared jellyroll pan, giving them enough space to expand slightly during baking.
-
Before baking, prick the top of each calzone with a fork. This allows steam to escape, preventing the calzones from bursting or becoming overly puffy.
-
Bake for 18-20 minutes, switching the pans halfway through. Switching pans ensures even browning. The calzones are done when they are lightly browned and the crust is crispy. Keep a close eye on them, as baking times can vary depending on your oven.
Expert Tips & Tricks
- Dough Matters: If you have the time, consider making your own pizza dough from scratch. The flavor and texture will be noticeably superior. However, store-bought dough is a great shortcut for busy weeknights.
- Cheese Choices: Experiment with different cheeses. Provolone, ricotta, or a blend of Italian cheeses can add depth and complexity to the flavor.
- Preventing Soggy Bottoms: Place a baking stone or pizza stone in your oven while it preheats. This will provide a hot surface for the calzones to bake on, resulting in a crispier crust.
- Egg Wash for Shine: For a beautiful golden-brown finish, brush the tops of the calzones with an egg wash (one egg beaten with a tablespoon of water) before baking.
- Make-Ahead Magic: Assemble the calzones ahead of time and store them in the refrigerator until ready to bake. This makes them perfect for entertaining.
Serving & Storage Suggestions
Serve your freshly baked calzones hot, right out of the oven. They’re delicious on their own or with a side of extra pizza sauce for dipping. A simple green salad complements the richness of the calzones perfectly.
Leftover calzones can be stored in an airtight container in the refrigerator for up to 3 days. To reheat, warm them in a preheated oven at 350°F (175°C) for about 10-15 minutes, or until heated through. You can also reheat them in the microwave, but the crust may become slightly softer. For longer storage, wrap individual calzones tightly in plastic wrap and freeze them for up to 2 months. Reheat from frozen in a preheated oven.
Nutritional Information
| Nutrient | Amount per Serving | % Daily Value |
|---|---|---|
| Calories | 550 kcal | 28% |
| Total Fat | 25g | 38% |
| Saturated Fat | 12g | 60% |
| Cholesterol | 75mg | 25% |
| Sodium | 1200mg | 50% |
| Total Carbohydrate | 50g | 17% |
| Dietary Fiber | 3g | 12% |
| Sugars | 5g | 10% |
| Protein | 30g | 60% |
Variations & Substitutions
- Vegetarian Calzones: Replace the ham with sautéed vegetables like mushrooms, peppers, onions, and spinach. Add a dollop of ricotta cheese for extra flavor and creaminess.
- Spicy Calzones: Add a pinch of red pepper flakes to the pizza sauce or include some sliced pepperoni or jalapeños in the filling for a spicy kick.
- Chicken Calzones: Substitute the ham with cooked and shredded chicken. Consider adding some pesto or sun-dried tomatoes for a Mediterranean twist.
- Gluten-Free Calzones: Use a gluten-free pizza dough. Many supermarkets now offer pre-made gluten-free dough, or you can make your own.
- Different Sauces: Instead of pizza sauce, try using pesto, Alfredo sauce, or even a creamy garlic sauce for a different flavor profile.
FAQs (Frequently Asked Questions)
Q: Can I use pre-shredded cheese?
A: Yes, pre-shredded cheese is convenient, but freshly shredded cheese melts more smoothly and has a better flavor due to the absence of cellulose additives.
Q: Can I freeze the calzones after baking?
A: Absolutely! Allow the baked calzones to cool completely, then wrap them individually in plastic wrap and place them in a freezer-safe bag or container. They can be frozen for up to 2 months.
Q: How do I prevent the filling from leaking out?
A: The key is to ensure the edges are sealed tightly. Use a fork to crimp the edges and press firmly. Avoid overfilling the calzones, as this can also cause leaks.
Q: Can I use different types of dough?
A: Yes, you can experiment with different doughs, such as whole wheat or sourdough, to add different flavors and textures to your calzones.
Q: How do I know when the calzones are done?
A: The calzones are done when the crust is lightly browned and crispy, and the filling is heated through. The internal temperature should reach 165°F (74°C).
Final Thoughts
These stuffed calzones are more than just a meal; they’re an invitation to create warm memories in your own kitchen. The versatility of this recipe makes it perfect for experimenting with different fillings and flavors, allowing you to customize it to your liking. So, gather your ingredients, preheat your oven, and get ready to experience a slice of homemade heaven. Don’t be afraid to share your creations and variations – I can’t wait to hear what delicious combinations you come up with! Buon appetito!