
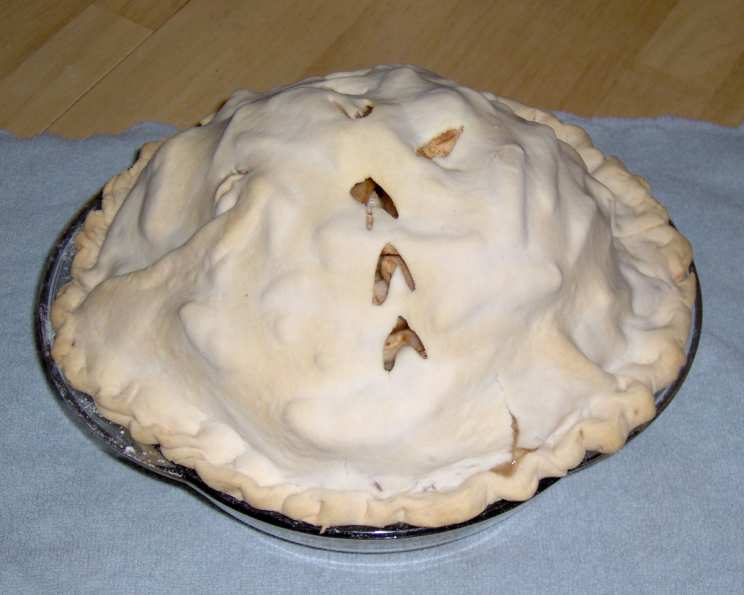
Sugar-Free Apple Pie: A Guilt-Free Slice of Heaven
There’s something undeniably comforting about the aroma of apple pie baking in the oven. My grandmother, bless her heart, always had one ready, its warm, cinnamon-spiced scent filling her cozy kitchen. I remember sneaking a spoonful of the filling while she wasn’t looking, the sweet, tart apples melting on my tongue. Years later, I wanted to recreate that magic, but with a twist: a sugar-free version that everyone could enjoy, especially those watching their sugar intake. This recipe is a tribute to those cherished memories, offering all the flavor without the guilt.
Recipe Overview
- Prep Time: 20 minutes
- Cook Time: 45 minutes
- Total Time: 1 hour 5 minutes
- Servings: 6-8
- Yield: 1 pie
- Dietary Type: Sugar-Free
Ingredients
- 6-8 cups apples (I prefer a mix of Macintosh and Granny Smith)
- 1 cup Splenda granular (sugar substitute)
- 2 tablespoons cornstarch
- Cinnamon (to taste)
- Nutmeg (to taste)
- 2 pre-made pie crusts (or your own favorite crust recipe)
Equipment Needed
- 9-inch pie dish
- Peeler
- Knife
- Large mixing bowl
- Measuring cups and spoons
- Oven
Instructions
- Preheat your oven to 350°F (175°C). Ensuring your oven is properly preheated is crucial for even baking.
- Begin by preparing the apples. Peel, core, and slice the apples. The thickness of the slices is a matter of personal preference, but I find that slices about ¼-inch thick work best. Use as many apples as you like, depending on the size of your pie dish and how high you want your pie filling to be. Don’t be afraid to pack them in!
- In a large mixing bowl, combine the sliced apples with the Splenda, cornstarch, cinnamon, and nutmeg. Mix well, making sure all the apple slices are evenly coated with the spice mixture. The cornstarch will help thicken the juices as the pie bakes. Add cinnamon and nutmeg to your taste. I typically use about 1 teaspoon of cinnamon and ½ teaspoon of nutmeg, but feel free to adjust based on your preference.
- Carefully place one of the pre-made pie crusts into the pie dish, pressing it gently against the bottom and sides. You can crimp the edges for a decorative touch. This will be the bottom crust of your pie.
- Pour the apple mixture into the prepared pie crust, distributing it evenly.
- Cover the apple filling with the second pie crust. Before placing the top crust, consider adding a few dots of butter substitute for extra richness, if desired.
- Crimp the edges of the top crust to seal it to the bottom crust. Cut several slits in the top crust to allow steam to escape during baking. This will prevent the crust from becoming soggy.
- Bake for approximately 45 minutes, or until the crust is golden brown. Keep a close eye on the pie during the last 15 minutes of baking to prevent the crust from burning. If the crust starts to brown too quickly, you can loosely cover it with aluminum foil. Ovens can vary, so make sure to watch your pie carefully. A properly baked pie will have a golden-brown crust and a bubbling filling.
- Remove the pie from the oven and let it cool completely on a wire rack before slicing and serving. This allows the filling to set properly and prevents it from being too runny.
Expert Tips & Tricks
- Apple Variety: Using a mix of apple varieties adds complexity to the flavor. Try combining tart apples like Granny Smith with sweeter varieties like Honeycrisp or Fuji.
- Spice it Up: Experiment with other spices like ginger, cardamom, or allspice for a unique flavor profile. A pinch of ground cloves can also add a warm, comforting note.
- Crust Perfection: For an extra golden-brown crust, brush the top with a beaten egg substitute or milk alternative before baking.
- Thickening Power: If your apples are particularly juicy, you may need to add a little more cornstarch to prevent a soggy pie.
- Make-Ahead Magic: The apple filling can be prepared a day in advance and stored in the refrigerator. This can save time on the day you plan to bake the pie.
- Blind Baking: For a crispier bottom crust, consider blind baking the crust before adding the filling. To do this, line the crust with parchment paper, fill it with pie weights or dried beans, and bake for 15 minutes before removing the weights and adding the filling.
Serving & Storage Suggestions
Serve the sugar-free apple pie warm or at room temperature. A dollop of sugar-free whipped cream or a scoop of sugar-free vanilla ice cream adds a delightful touch.
Leftover apple pie can be stored at room temperature for up to 2 days, or in the refrigerator for up to 5 days. To reheat, simply warm a slice in the microwave for 30-60 seconds, or in a preheated oven at 350°F (175°C) for 10-15 minutes.
For longer storage, you can freeze the baked pie for up to 3 months. Wrap it tightly in plastic wrap and then in aluminum foil to prevent freezer burn. To thaw, place the pie in the refrigerator overnight.
Nutritional Information
| Nutrient | Amount per Serving | % Daily Value |
|---|---|---|
| Calories | 250 kcal | 13% |
| Total Fat | 12g | 15% |
| Saturated Fat | 4g | 20% |
| Cholesterol | 0mg | 0% |
| Sodium | 200mg | 9% |
| Total Carbohydrate | 35g | 12% |
| Dietary Fiber | 3g | 11% |
| Sugars | 5g | – |
| Protein | 2g | 4% |
Note: Nutritional information is an estimate and may vary based on specific ingredients and portion sizes.
Variations & Substitutions
- Gluten-Free Crust: Use a gluten-free pie crust for a gluten-free version. There are many excellent pre-made gluten-free crusts available, or you can make your own from scratch.
- Dairy-Free: Ensure your pie crust is dairy-free. Many pre-made crusts are made with vegetable shortening rather than butter.
- Spice Variations: Try adding a pinch of ground ginger or cardamom to the apple filling for a unique twist.
- Nutty Delight: Add chopped nuts, such as walnuts or pecans, to the apple filling for added texture and flavor.
- Citrus Zest: Grate a bit of lemon or orange zest into the apple filling to brighten the flavor.
- Extracts: Add 1 teaspoon of vanilla extract or almond extract to the apple filling for enhanced flavor.
FAQs (Frequently Asked Questions):
Q: Can I use a different sugar substitute besides Splenda?
A: Yes, you can substitute with your preferred granular sugar substitute, such as erythritol or monk fruit. Keep in mind that the sweetness level may vary, so adjust the amount accordingly.
Q: Can I make my own pie crust?
A: Absolutely! If you have a favorite pie crust recipe, feel free to use it. Just be sure to choose a recipe that aligns with your dietary preferences (e.g., sugar-free, gluten-free).
Q: How do I prevent the crust from burning?
A: If the crust starts to brown too quickly, loosely cover it with aluminum foil during the last 15-20 minutes of baking.
Q: Can I freeze the unbaked pie?
A: Yes, you can freeze the unbaked pie for up to 3 months. Wrap it tightly in plastic wrap and then in aluminum foil. When ready to bake, thaw it in the refrigerator overnight and then bake as directed.
Q: My apple filling is too watery. What can I do?
A: If your apple filling is too watery, you can add an extra tablespoon of cornstarch to help thicken it. You can also try blind-baking the bottom crust for a few minutes before adding the filling to prevent it from becoming soggy.
Final Thoughts
This sugar-free apple pie is a testament to the fact that you don’t have to sacrifice flavor to enjoy a healthier dessert. Whether you’re baking for someone with dietary restrictions or simply looking to cut back on sugar, this recipe is sure to please. So, gather your ingredients, preheat your oven, and get ready to fill your kitchen with the warm, comforting aroma of homemade apple pie. Don’t hesitate to experiment with different variations and spices to create a pie that’s uniquely your own. And please, share your baking adventures and feedback – I’d love to hear how it turns out! Perhaps pair it with a sugar-free vanilla bean ice cream for the perfect guilt-free treat.