
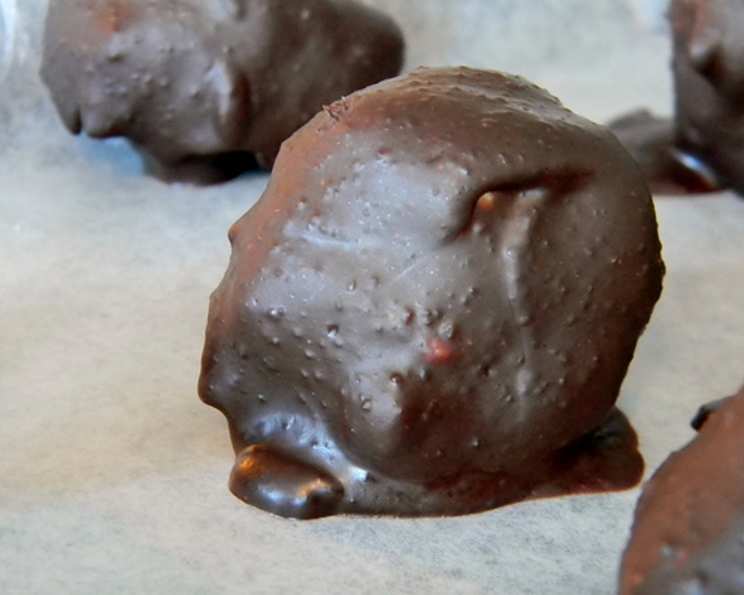
Sugar-Free Coconut Candies: A Guilt-Free Indulgence
I remember being a kid, absolutely mesmerized by the colorful candies displayed in glass jars at the local sweet shop. The coconut candies, with their delicate coconut flakes peeking through a shiny chocolate coating, were always my favorite. But the sugar rush (and subsequent crash!) always left me feeling less than stellar. Years later, as a chef, I yearned to recreate that nostalgic treat, but with a healthier twist. These sugar-free coconut candies are the perfect solution—all the flavor and satisfaction, without the guilt. They’re a delightful reminder that you can have your candy and eat it too, completely guilt-free!
Recipe Overview
- Prep Time: 15 minutes
- Cook Time: 0 minutes (plus freezing and setting time)
- Total Time: 2 hours
- Yields: 15 candies
- Serves: 15
- Dietary Type: Keto, Sugar-Free, Gluten-Free
Ingredients
- 1 cup shredded coconut
- 3 tablespoons coconut oil, melted
- 1 pinch sea salt
- 1/3 cup Xylitol sweetener
- 1/4 teaspoon pure stevia powder (or 1 tsp liquid stevia)
- Sugar-free dark chocolate, to coat
Equipment Needed
- Stand Mixer (or mixing bowl and spoon)
- Baking Sheet
- Parchment Paper or Silicone Baking Mat
- Double Boiler or Microwave-Safe Bowl
- Fork or Dipping Tools
Instructions
-
Begin by gathering your ingredients. Make sure your coconut oil is melted but not too hot. Prepare your baking sheet by lining it with parchment paper or a silicone baking mat. This will prevent the candies from sticking.
-
In the bowl of a stand mixer, or in a large mixing bowl if mixing by hand, combine the shredded coconut, melted coconut oil, sea salt, Xylitol sweetener, and stevia powder (or liquid stevia).
-
Process the ingredients in the stand mixer on medium speed for about 3-5 minutes. If mixing by hand, thoroughly combine all the ingredients using a spoon, ensuring everything is evenly distributed. You’re looking for the mixture to come together into a slightly “doughy” consistency. The coconut should be well coated, and the mixture should hold its shape when pressed. If it seems too dry, add a teaspoon of melted coconut oil at a time until the correct consistency is achieved.
-
Once the mixture is ready, use a small cookie scoop or your hands to form it into small balls, about 1-inch in diameter. Place the coconut balls onto the prepared baking sheet, spacing them evenly apart.
-
Place the baking sheet with the coconut balls in the freezer until they are solid. This usually takes about 1-2 hours. Freezing is crucial because it allows the chocolate to set quickly and evenly, preventing the candies from flattening out.
-
While the coconut balls are freezing, prepare your sugar-free dark chocolate for dipping. You can use a double boiler or a microwave-safe bowl. If using a double boiler, bring a pot of water to a simmer and place a heat-safe bowl on top, ensuring the bottom of the bowl doesn’t touch the water. Add the chocolate to the bowl and stir occasionally until it is completely melted and smooth. If using a microwave, heat the chocolate in 30-second intervals, stirring in between, until melted. Be careful not to overheat the chocolate, as it can seize up.
-
Once the coconut balls are frozen solid and the chocolate is melted, remove the coconut balls from the freezer. Using a fork or dipping tools, dip each frozen coconut ball into the melted chocolate, ensuring it is fully coated. Gently tap off any excess chocolate.
-
Place the chocolate-covered candies back onto the lined baking sheet. If desired, you can sprinkle the candies with extra shredded coconut or a pinch of sea salt while the chocolate is still wet.
-
Allow the chocolate to set completely. You can speed up the process by placing the baking sheet in the refrigerator for about 15-20 minutes. Once the chocolate is set, the candies are ready to enjoy!
-
Store the finished candies in the refrigerator to maintain their firmness.
Expert Tips & Tricks
- Sweetness Adjustment: Taste the coconut mixture before forming the balls. Adjust the amount of Xylitol or stevia to your liking. Remember that stevia is very potent, so start with a small amount and add more gradually.
- Chocolate Tempering (Optional): For a shinier, snappier chocolate coating, temper your sugar-free chocolate. This involves carefully heating and cooling the chocolate to specific temperatures. However, for simple candies like these, it is not essential.
- Batch Size: If you are making a large batch, work in smaller increments. Take a few coconut balls out of the freezer at a time to prevent them from softening while you are dipping them.
- Preventing Seizing: To avoid seizing, ensure no water comes into contact with the melted chocolate. Use a completely dry bowl and utensils. If the chocolate does seize, try adding a teaspoon of coconut oil and stirring vigorously.
- Nut Butter Variation: Mix a tablespoon of sugar-free almond butter or peanut butter into the coconut mixture for added flavor and richness.
Serving & Storage Suggestions
These sugar-free coconut candies are perfect as a guilt-free treat anytime you crave something sweet. They are also a wonderful addition to a keto or sugar-free dessert platter.
- Serve chilled or at room temperature.
- Store in an airtight container in the refrigerator for up to 2 weeks.
- For longer storage, freeze the candies for up to 2 months. Thaw in the refrigerator before serving. They are best enjoyed cold directly from the fridge or freezer as they do soften at room temperature.
Nutritional Information
| Nutrient | Amount per Serving | % Daily Value |
|---|---|---|
| Calories | 54.5 kcal | N/A |
| Calories from Fat | 44 kcal | 81% |
| Total Fat | 4.9 g | 7% |
| Saturated Fat | 4.3 g | 21% |
| Cholesterol | 0 mg | 0% |
| Sodium | 55 mg | 2% |
| Total Carbohydrate | 3 g | 0% |
| Dietary Fiber | 0.3 g | 1% |
| Sugars | 2.7 g | 10% |
| Protein | 0.2 g | 0% |
Note: Nutritional information is an estimate and may vary based on specific ingredients used.
Variations & Substitutions
- Extracts: Add a drop or two of vanilla extract, almond extract, or peppermint extract to the coconut mixture for a different flavor profile.
- Nuts and Seeds: Fold in chopped almonds, walnuts, pecans, or chia seeds for added crunch and nutritional value.
- Spice it Up: A pinch of cinnamon or cardamom can add warmth and complexity to the coconut mixture.
- White Chocolate Option: Use sugar-free white chocolate for a different coating.
- Coconut Flakes Topping: Use toasted coconut flakes as a decorative topping.
- Liquid Sweetener: If you only have liquid stevia, use 1 tsp instead of the powder. Be careful as liquid stevia is very potent.
FAQs (Frequently Asked Questions)
Q: What is the best way to melt sugar-free chocolate?
A: The best method is using a double boiler or heating in the microwave in short intervals, stirring in between. Be careful not to overheat the chocolate, as it can seize up.
Q: Can I use a different sugar substitute instead of Xylitol and Stevia?
A: Yes, you can substitute with erythritol or monk fruit sweetener, but the sweetness level may vary, so adjust to your preference.
Q: Why do I need to freeze the coconut balls before dipping them in chocolate?
A: Freezing the coconut balls helps the chocolate set quickly and evenly, preventing the candies from flattening out and creating a nice, crisp coating.
Q: My chocolate seized up. What can I do?
A: Try adding a teaspoon of melted coconut oil and stirring vigorously. This can sometimes help to smooth out the chocolate. Make sure no water comes into contact with the chocolate.
Q: How long will these candies last?
A: Stored in an airtight container in the refrigerator, these candies will last for up to 2 weeks. For longer storage, freeze them for up to 2 months.
Final Thoughts
These sugar-free coconut candies are a delightful way to satisfy your sweet tooth without compromising your health goals. They’re easy to make, customizable, and incredibly delicious. I encourage you to give this recipe a try and experience the joy of a guilt-free indulgence. Feel free to experiment with different flavors and toppings to create your own unique version. Don’t be shy about sharing your creations and feedback! Pair these candies with a cup of herbal tea or sugar-free coffee for a truly satisfying treat. Happy candy-making!