
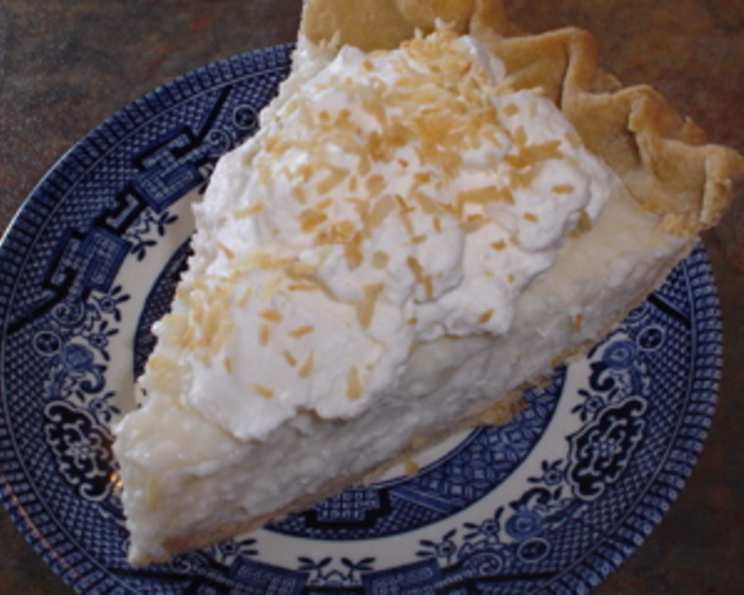
Sugar-Free Coconut Cream Pie: A Guilt-Free Slice of Paradise
My grandmother, Nana Elsie, was a queen of coconut cream pie. Every family gathering seemed incomplete without her signature dessert gracing the table. The aroma of toasted coconut alone could transport me back to her sun-drenched kitchen, filled with laughter and the clatter of baking utensils. Now, with dietary restrictions a reality for many, including myself, I’ve set out to recreate that nostalgic joy, but without the sugar overload. This sugar-free coconut cream pie captures the essence of Nana Elsie’s masterpiece while embracing a healthier approach. Prepare for a taste of paradise, completely guilt-free!
Recipe Overview
- Prep Time: 20 minutes
- Cook Time: 5 minutes
- Total Time: 25 minutes (plus chilling)
- Servings: 8
- Yield: 1 pie
- Dietary Type: Diabetic-Friendly
Ingredients
- 3/4 teaspoon liquid stevia or 1/2 teaspoon pure stevia
- 1/4 cup cornstarch
- 1/4 teaspoon salt
- 3 1/4 cups milk (dairy or unsweetened almond milk work well)
- 1 cup unsweetened coconut, shredded
- 1 (9 inch) baked pie shell (sugar-free recipe follows)
- Whipped cream, sugar-free (for topping)
- Toasted coconut (for garnish)
Sugar-Free Pie Crust Recipe:
- 1 1/2 cups almond flour
- 1/4 cup coconut flour
- 1/4 cup powdered erythritol
- 1/4 teaspoon salt
- 6 tablespoons cold unsalted butter, cut into cubes
- 1 large egg, beaten
Equipment Needed
- Saucepan
- Whisk
- Measuring cups and spoons
- 9-inch pie dish
- Oven
- Cooling rack
Instructions
-
Prepare the Sugar-Free Pie Crust (if making from scratch): Preheat your oven to 350°F (175°C). In a large bowl, whisk together the almond flour, coconut flour, powdered erythritol, and salt. Cut in the cold butter using a pastry blender or your fingers until the mixture resembles coarse crumbs. Stir in the beaten egg until the dough comes together. Press the dough evenly into a 9-inch pie dish. Prick the bottom of the crust with a fork to prevent it from puffing up during baking. Bake for 15-20 minutes, or until lightly golden brown. Let cool completely on a wire rack before filling.
-
Prepare the Coconut Cream Filling: In a medium saucepan, thoroughly whisk together the stevia, cornstarch, and salt. This is crucial to prevent any lumps from forming in the finished pie.
-
Gradually Add the Milk: Slowly stir in the milk to the dry ingredients, whisking constantly to ensure a smooth mixture. Continue whisking until all the milk is incorporated.
-
Add the Coconut: Stir in the unsweetened coconut.
-
Cook the Filling: Place the saucepan over medium heat, stirring constantly. Continue stirring until the mixture comes to a boil. Once boiling, continue to boil for 1 minute, stirring constantly to prevent sticking or burning. The mixture should thicken considerably.
-
Remove from Heat and Add Vanilla: Remove the saucepan from the heat. Blend in the vanilla extract.
-
Cool and Pour: Let the filling cool for 10 minutes. This allows the mixture to thicken slightly further. Pour the cooled filling into the baked pie shell.
-
Refrigerate: Cover the pie with plastic wrap, pressing it gently onto the surface of the filling to prevent a skin from forming. Refrigerate for at least 4 hours, or preferably overnight, to allow the filling to set completely.
-
Garnish and Serve: Once the pie is chilled and firm, top with sugar-free whipped cream and toasted coconut before serving.
Expert Tips & Tricks
- Preventing Lumps: Whisking the cornstarch with the sweetener and salt before adding the milk is the key to a smooth, lump-free filling.
- Coconut Flavor Boost: For a more intense coconut flavor, consider using coconut milk instead of regular milk in the filling. Be sure to use unsweetened coconut milk.
- Toasting Coconut: Toasting the shredded coconut enhances its flavor and adds a delightful crunch. Spread the coconut on a baking sheet and bake at 350°F (175°C) for 5-7 minutes, or until golden brown, watching carefully to prevent burning. Alternatively, toast it in a dry skillet over medium heat, stirring constantly.
- Preventing a Soggy Crust: If you’re making your pie crust from scratch, blind-baking it (baking the crust before adding the filling) will help prevent it from becoming soggy.
- Making it Ahead: The filling can be made up to 2 days in advance and stored in the refrigerator. Assemble the pie just before serving for the best texture.
Serving & Storage Suggestions
Serve your sugar-free coconut cream pie chilled. A dollop of sugar-free whipped cream and a generous sprinkle of toasted coconut make for an elegant presentation. Leftover pie should be stored in the refrigerator, covered, for up to 3 days. The crust may soften slightly over time. This pie is best enjoyed within a day or two for optimal texture. It’s not recommended to freeze this pie, as the filling may become watery upon thawing.
Nutritional Information
Note: Nutritional information is an estimate and may vary based on specific ingredients used, especially the choice of milk and sweetener.
| Nutrient | Amount per Serving | % Daily Value |
|---|---|---|
| Calories | 250 kcal | 13% |
| Total Fat | 18g | 28% |
| Saturated Fat | 12g | 60% |
| Cholesterol | 45mg | 15% |
| Sodium | 150mg | 7% |
| Total Carbohydrate | 15g | 5% |
| Dietary Fiber | 3g | 12% |
| Sugars | 2g | N/A |
| Protein | 5g | 10% |
Variations & Substitutions
- Gluten-Free Crust: Use a store-bought gluten-free pie crust or make your own using a gluten-free flour blend.
- Dairy-Free: Substitute the milk with unsweetened almond milk or coconut milk. Ensure the whipped cream is also dairy-free.
- Sweetener Options: While the recipe calls for stevia, you can experiment with other sugar-free sweeteners like erythritol or monk fruit. Adjust the amount according to the sweetener’s sweetness level.
- Extract Variations: Try adding a few drops of coconut extract to the filling for an even more intense coconut flavor.
- Chocolate Coconut Cream Pie: Add 2 tablespoons of unsweetened cocoa powder to the dry ingredients for a chocolatey twist.
FAQs (Frequently Asked Questions)
Q: Can I use regular sugar instead of stevia?
A: Yes, you can. However, this will no longer be a sugar-free recipe. You’ll need to adjust the amount to your desired sweetness level, starting with about 1/2 cup of sugar.
Q: My filling isn’t thickening. What did I do wrong?
A: Ensure you’re using fresh cornstarch and that you’re cooking the filling over medium heat, stirring constantly. The mixture needs to come to a full boil for the cornstarch to activate and thicken the filling.
Q: Can I use sweetened coconut instead of unsweetened?
A: It’s not recommended, as the recipe is designed to be sugar-free. Using sweetened coconut will add unnecessary sugar and may make the pie overly sweet, even with the sugar substitute.
Q: How long will the pie keep in the refrigerator?
A: The pie will keep for up to 3 days in the refrigerator, covered. However, the crust may soften over time.
Q: Can I make this pie without a pre-baked crust?
A: While possible, pre-baking the crust is highly recommended to prevent it from becoming soggy. If you skip this step, be sure to watch the pie carefully during the final chill time to ensure the crust doesn’t absorb too much moisture from the filling.
Final Thoughts
This sugar-free coconut cream pie is more than just a dessert; it’s a testament to the fact that you can enjoy delicious, comforting foods without compromising your health or dietary needs. I encourage you to try this recipe and experience the joy of a guilt-free indulgence. Feel free to experiment with different variations and substitutions to make it your own. And most importantly, share it with loved ones and spread the sweetness (minus the sugar!). I would love to hear your feedback and see your creations.