
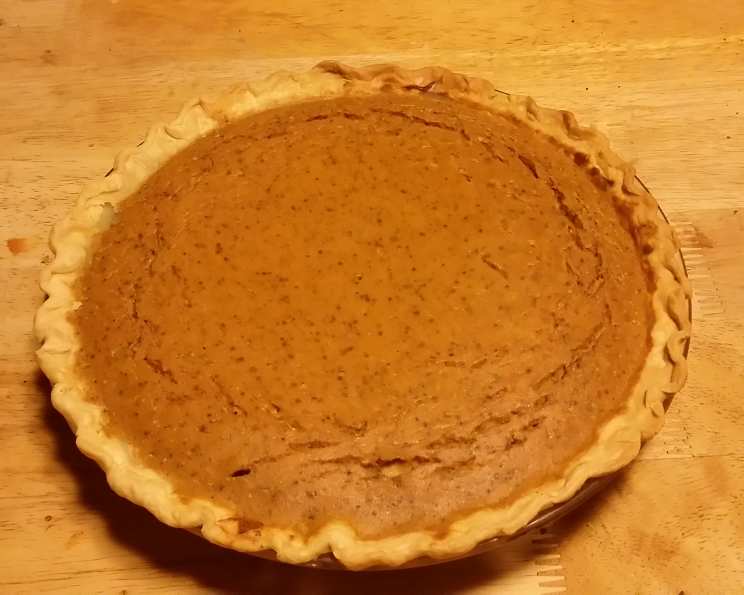
Sugar-Free Pumpkin Pie: A Guilt-Free Thanksgiving Classic
For me, pumpkin pie isn’t just dessert; it’s a time machine. One bite instantly transports me back to childhood Thanksgivings, gathered around my grandmother’s enormous oak table. The aroma of cinnamon and nutmeg would fill the air, competing with the tantalizing scent of roasting turkey. While I’ve learned to tweak and refine many of my family’s recipes over the years, that familiar pumpkin pie flavor is something I never want to sacrifice, even when cutting back on sugar. This sugar-free version allows you to enjoy all the nostalgic goodness without the guilt.
Recipe Overview
- Prep Time: 10 minutes
- Cook Time: 1 hour
- Total Time: 1 hour 10 minutes
- Servings: 8
- Yield: 1 pie
- Dietary Type: Sugar-Free
Ingredients
-
For the Filling:
- 2 large eggs
- 1 (15 ounce) can pumpkin puree (not pumpkin pie filling)
- ¾ cup Splenda granular sweetener
- ½ teaspoon salt
- 1 teaspoon cinnamon
- ½ teaspoon ginger
- ¼ teaspoon clove
- 1 (12 ounce) can evaporated milk
-
For the Crust:
- 1 9-inch unbaked pie shell (store-bought or homemade sugar-free recipe)
Equipment Needed
- Large mixing bowl
- Whisk
- Measuring cups and spoons
- 9-inch pie plate
- Oven
Instructions
- Begin by preheating your oven to 425 degrees Fahrenheit (220 degrees Celsius). Ensuring the oven is properly heated is crucial for a well-baked pie.
- In the large mixing bowl, combine all the filling ingredients. This includes the 2 eggs, the entire can of pumpkin puree, ¾ cup of Splenda granular sweetener, ½ teaspoon of salt, 1 teaspoon of cinnamon, ½ teaspoon of ginger, ¼ teaspoon of clove, and the can of evaporated milk.
- Use a whisk to thoroughly mix all the ingredients until they are completely combined and the mixture is smooth. This ensures that the spices are evenly distributed throughout the pumpkin filling.
- Carefully pour the pumpkin mixture into the unbaked 9-inch pie shell. Make sure the filling is evenly distributed within the crust.
- Bake the pie at 425 degrees Fahrenheit for 15 minutes. This initial high-temperature bake helps to set the crust and give it a nice golden color.
- After 15 minutes, reduce the oven temperature to 350 degrees Fahrenheit (175 degrees Celsius). Continue baking for an additional 45 minutes. This lower temperature will allow the filling to cook through without burning the crust.
- To check for doneness, insert a knife into the center of the pie. If the knife comes out clean, the pie is ready. If the filling is still liquid, continue baking for a few more minutes, checking frequently.
- Once the pie is done, remove it from the oven and let it cool completely on a wire rack. Cooling the pie allows the filling to set completely.
- Garnish with sugar-free whipped cream (optional) before serving.
Expert Tips & Tricks
-
Prevent a Soggy Crust: To prevent a soggy crust, you can blind bake the pie crust for about 10 minutes before adding the filling. This involves pre-baking the crust weighted down with pie weights or dried beans. This helps to set the crust and prevent it from absorbing moisture from the filling.
-
Spice It Up: Feel free to adjust the spices to your preference. If you prefer a stronger spice flavor, you can add a pinch more of cinnamon, ginger, or clove. You can also experiment with other warm spices like nutmeg or allspice.
-
Sweetener Adjustment: Taste the filling before pouring it into the crust. If you prefer a sweeter pie, you can add a little more Splenda, but be careful not to overdo it.
-
Homemade vs. Store-Bought Crust: For the absolute best flavor and sugar control, consider making a homemade sugar-free pie crust. Many recipes use almond flour or other alternative flours to keep the sugar content low. However, a store-bought crust is perfectly acceptable for convenience.
-
Prevent Cracking: To prevent the pie from cracking while baking, you can place a pan of water on the bottom rack of the oven. The steam will help to keep the pie moist and prevent it from drying out and cracking.
Serving & Storage Suggestions
For an elegant presentation, serve each slice of sugar-free pumpkin pie with a dollop of sugar-free whipped cream or a sprinkle of cinnamon. A scoop of sugar-free vanilla ice cream also complements the flavors beautifully.
Leftovers should be stored in the refrigerator, covered, for up to 3-4 days. For longer storage, the pie can be frozen. To freeze, wrap the cooled pie tightly in plastic wrap and then in foil. It can be stored in the freezer for up to 2-3 months. Thaw the pie in the refrigerator overnight before serving.
While it’s best served chilled, you can gently warm individual slices in the microwave for a few seconds if desired.
Nutritional Information
(Note: Nutritional information is an estimate and will vary based on specific ingredients and serving size.)
| Nutrient | Amount per Serving | % Daily Value |
|---|---|---|
| Calories | 150 kcal | 8% |
| Total Fat | 8g | 10% |
| Saturated Fat | 4g | 20% |
| Cholesterol | 60mg | 20% |
| Sodium | 250mg | 11% |
| Total Carbohydrate | 15g | 5% |
| Dietary Fiber | 1g | 4% |
| Sugars | 2g | – |
| Protein | 5g | 10% |
Variations & Substitutions
- Dairy-Free: Substitute the evaporated milk with coconut milk or almond milk for a dairy-free version. Note that this will alter the flavor slightly.
- Gluten-Free: Use a gluten-free pie crust. You can find pre-made gluten-free crusts in most grocery stores, or you can make your own using a gluten-free flour blend.
- Spice Variations: Add a pinch of nutmeg or allspice to the filling for a slightly different flavor profile. A dash of cardamom can also add a unique warmth.
- Crustless Pumpkin Pie: For a truly sugar-free and crustless option, bake the filling in individual ramekins. This makes for an elegant and portion-controlled dessert. Reduce baking time by about 10-15 minutes.
FAQs (Frequently Asked Questions)
Q: Can I use pumpkin pie filling instead of pumpkin puree?
A: No, pumpkin pie filling already contains sugar and spices. Using pumpkin puree allows you to control the sweetness and spices.
Q: Can I use a different sugar substitute?
A: Yes, you can substitute the Splenda with other sugar substitutes like erythritol or monk fruit sweetener. Adjust the amount according to the sweetener’s conversion ratio.
Q: How do I know when the pie is done?
A: The pie is done when a knife inserted into the center comes out clean or with just a slight jiggle. The edges should be set, but the very center may still be a little soft.
Q: My pie cracked! What did I do wrong?
A: Cracking can occur if the pie bakes too quickly or dries out. Try reducing the oven temperature slightly and adding a pan of water to the bottom rack of the oven next time.
Q: Can I make this pie ahead of time?
A: Absolutely! Pumpkin pie is a great make-ahead dessert. It can be made 1-2 days in advance and stored in the refrigerator.
Final Thoughts
This sugar-free pumpkin pie is a testament to the fact that you don’t have to sacrifice flavor to enjoy a healthier dessert. Whether you’re managing your sugar intake or simply looking for a lighter option, this recipe delivers all the classic pumpkin pie goodness without the guilt. I encourage you to give it a try and share your feedback! Serve it with a warm cup of spiced cider for the ultimate autumn treat. And don’t hesitate to put your own twist on it – a dash of bourbon in the filling, perhaps? The possibilities are endless!