
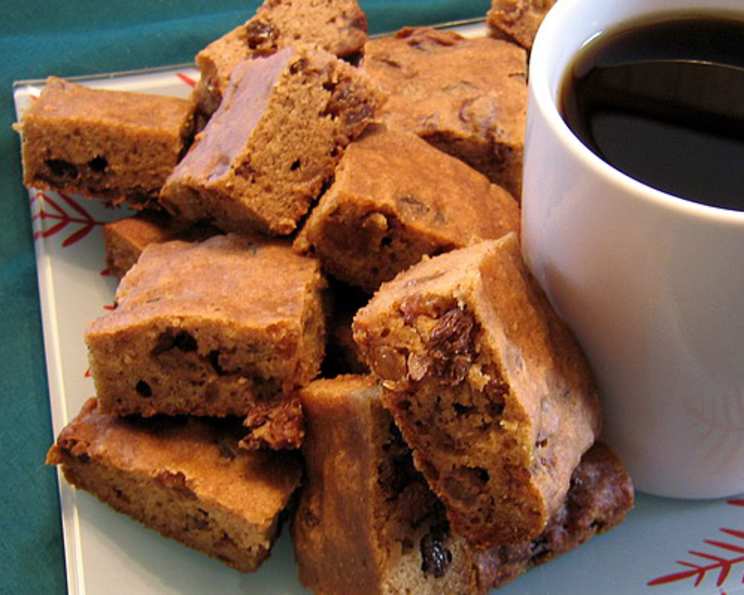
Sugar-Free Raisin Bars: A Blue Ribbon Treat
The scent of cinnamon and warm raisins instantly transports me back to my grandmother’s kitchen. She always had a batch of raisin bars cooling on the counter, a comforting presence amidst the bustle of family gatherings. I remember sneaking bites while she wasn’t looking, the chewy texture and spiced sweetness a perfect afternoon treat. When I started exploring sugar-free baking, I knew I had to recreate that nostalgic flavor, but with a healthier twist. These Sugar-Free Raisin Bars are the result—a delicious and guilt-free way to enjoy a classic favorite.
Recipe Overview
- Prep Time: 15 minutes
- Cook Time: 20-25 minutes
- Total Time: 40 minutes
- Servings: 16
- Yield: 1 (8-inch square) pan
- Dietary Type: Sugar-Free
Ingredients
- 1 cup raisins
- ½ cup water
- ¼ cup margarine
- 1 teaspoon cinnamon
- ½ teaspoon ground nutmeg
- 1 cup all-purpose flour
- 1 large egg, lightly beaten
- ¾ cup unsweetened applesauce
- Artificial sweetener, equivalent to 1 tablespoon sugar (ensure it’s suitable for baking; options include erythritol, stevia, or sucralose)
- 1 teaspoon baking soda
- ¼ teaspoon vanilla extract
Equipment Needed
- Saucepan
- Mixing bowl
- 8-inch square baking pan
- Nonstick cooking spray
- Measuring cups and spoons
Instructions
- Preheat your oven to 350°F (175°C). Lightly coat an 8-inch square baking pan with nonstick cooking spray. This will prevent the bars from sticking and make them easier to remove.
- In a medium saucepan over medium heat, combine the raisins, water, margarine, cinnamon, and nutmeg.
- Cook, stirring occasionally, until the margarine is completely melted.
- Continue cooking for an additional 3 minutes, allowing the flavors to meld together and the raisins to plump up slightly.
- Remove the saucepan from the heat and let the mixture cool slightly. This is important to prevent the heat from cooking the egg in the next step.
- In a large mixing bowl, add the cooled raisin mixture, flour, lightly beaten egg, applesauce, artificial sweetener, baking soda, and vanilla extract.
- Mix all the ingredients thoroughly until well combined. Ensure there are no lumps of flour remaining. The batter will be fairly thick.
- Pour the batter into the prepared 8-inch square pan and spread it evenly.
- Bake in the preheated oven for 20-25 minutes, or until the bars are lightly browned and a toothpick inserted into the center comes out clean. Begin checking at 20 minutes to avoid overbaking, which can lead to dry bars.
- Once baked, remove the pan from the oven and let the bars cool completely in the pan before cutting into squares. Cooling allows the bars to set properly, making them easier to handle.
Expert Tips & Tricks
- Raisin Preparation: For extra plump and juicy raisins, soak them in hot water for 15 minutes before adding them to the saucepan. Drain well before using.
- Sweetener Selection: Different artificial sweeteners have varying levels of sweetness. Adjust the amount to your taste preference, keeping in mind the baking suitability of the chosen sweetener. Experiment with liquid stevia or erythritol blends for best results.
- Applesauce Substitute: If you don’t have unsweetened applesauce, you can use pureed prunes or mashed banana as a substitute. These will add a slightly different flavor profile but will still provide the necessary moisture.
- Spice Customization: Feel free to adjust the amount of cinnamon and nutmeg to your liking. A pinch of ground cloves or allspice can also add a warm, complementary flavor.
- Preventing Stickiness: Ensure your baking pan is well-greased or lined with parchment paper to prevent the bars from sticking.
- Texture Enhancement: Adding ¼ cup of chopped walnuts or pecans to the batter will provide a delightful crunch and enhance the overall texture.
Serving & Storage Suggestions
These Sugar-Free Raisin Bars are best enjoyed at room temperature. Cut them into squares and serve as a snack, dessert, or part of a packed lunch. They pair well with a glass of unsweetened almond milk, a cup of herbal tea, or a dollop of sugar-free whipped cream.
To store, keep the bars in an airtight container at room temperature for up to 3 days. For longer storage, refrigerate them for up to a week. You can also freeze them for up to 2 months. Thaw frozen bars in the refrigerator overnight before serving. Reheating is not necessary, but if desired, you can warm them slightly in a microwave for a few seconds.
Nutritional Information
| Nutrient | Amount per Serving | % Daily Value* |
|---|---|---|
| Calories | 91 kcal | N/A |
| Total Fat | 3.3g | 5% |
| Saturated Fat | 0.6g | 3% |
| Cholesterol | 13.2mg | 4% |
| Sodium | 118mg | 4% |
| Total Carbohydrate | 14.6g | 4% |
| Dietary Fiber | 0.8g | 3% |
| Sugars | 5.4g | N/A |
| Protein | 1.5g | 3% |
- Percent Daily Values are based on a 2000 calorie diet. Your daily values may be higher or lower depending on your calorie needs. The sugar content is the natural sugar from the raisins and applesauce.
Variations & Substitutions
- Gluten-Free: Substitute the all-purpose flour with a gluten-free blend. Ensure the blend contains xanthan gum for binding.
- Dairy-Free: Use a dairy-free margarine or coconut oil in place of regular margarine.
- Nut-Free: Omit the nuts or seeds, or replace them with sunflower seeds for a similar texture.
- Spice Variations: Experiment with different spice combinations. Try adding a pinch of cardamom, ginger, or cloves for a unique flavor profile.
- Fruit Additions: Incorporate other dried fruits, such as chopped dates, apricots, or cranberries, for added texture and flavor.
- Citrus Zest: Adding the zest of an orange or lemon can brighten the flavor of the bars.
FAQs (Frequently Asked Questions)
Q: Can I use a different type of sweetener?
A: Yes, you can use any artificial sweetener that is suitable for baking. Adjust the amount according to the sweetener’s sweetness level and your personal preference.
Q: Can I make these bars ahead of time?
A: Absolutely! These bars can be made a day or two in advance. Store them in an airtight container at room temperature or in the refrigerator.
Q: Can I freeze these raisin bars?
A: Yes, you can freeze them for up to 2 months. Wrap them individually in plastic wrap or place them in a freezer-safe container. Thaw in the refrigerator overnight before serving.
Q: Why are my bars dry?
A: Overbaking is the most common cause of dry raisin bars. Reduce the baking time or lower the oven temperature slightly. Also, ensure you’re using enough applesauce or other moistening ingredients.
Q: Can I add nuts or seeds to this recipe?
A: Yes, adding chopped nuts or seeds can enhance the texture and flavor of the bars. Walnuts, pecans, almonds, or sunflower seeds are all great options.
Final Thoughts
These Sugar-Free Raisin Bars are more than just a healthy snack; they’re a connection to comforting memories and a reminder that delicious treats can be enjoyed without compromising your well-being. I encourage you to try this recipe and share your own variations and feedback. Perhaps you’ll discover a new family favorite that brings joy to your kitchen, just as it has to mine. Enjoy!