
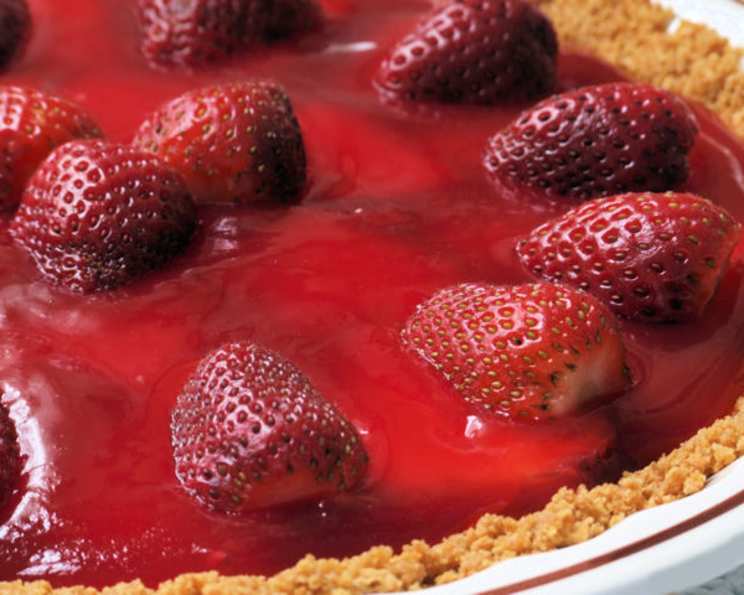
Sugar-Free Strawberry Pie: A Guilt-Free Delight
The aroma of fresh strawberries always takes me back to summer days spent at my grandmother’s farm. Her strawberry patch was legendary, a vibrant carpet of red jewels hidden beneath a canopy of green leaves. We’d spend hours picking berries, our fingers stained red with juice, and always, always, a strawberry pie would appear on the table. While my grandmother’s version was definitely not sugar-free, this recipe captures the essence of that summery joy, but with a lighter, healthier twist. It’s a delightful reminder that deliciousness doesn’t always have to come with a sugar rush.
Recipe Overview
- Prep Time: 15 minutes
- Cook Time: 5 minutes
- Total Time: 4 hours 20 minutes (includes cooling & refrigeration)
- Servings: 8
- Yield: 1 pie
- Dietary Type: Sugar-Free
Ingredients
- 1 pie shell, baked
- 1 (3 ounce) package sugar-free strawberry gelatin
- 1 (3 1/2 ounce) package sugar-free vanilla pudding (cooked type)
- 2 1/2 cups cold water
- 1 quart strawberries, washed and hulled
Equipment Needed
- Medium saucepan
- Whisk
- Measuring cups and spoons
- Stove top
- Refrigerator
Instructions
- In a medium saucepan, thoroughly mix the dry sugar-free vanilla pudding and sugar-free strawberry gelatin. This ensures an even distribution of ingredients and prevents clumping when the water is added.
- Gradually whisk in the cold water, ensuring no lumps remain. The cold water helps the dry ingredients dissolve smoothly.
- Place the saucepan over medium heat. Stir continuously with a whisk to prevent scorching or sticking.
- Continue stirring until the mixture comes to a gentle boil. The boiling activates the gelatin and pudding, allowing them to thicken properly. This should take approximately 3-5 minutes.
- Once boiling, immediately remove the saucepan from the heat. This is crucial to prevent overcooking and a rubbery texture.
- Allow the mixture to cool until it is slightly thickened. This usually takes about 30-45 minutes at room temperature. Stir occasionally to prevent a skin from forming on the surface.
- While the mixture is cooling, prepare the strawberries. Wash them thoroughly and remove the green hulls. You can arrange them whole, halved, or sliced, depending on your preference and the size of the berries. If the strawberries are very large, slicing them will make the pie easier to cut and serve.
- Arrange the prepared strawberries attractively in the baked pie shell. Get creative with your arrangement! You can create concentric circles, a swirling pattern, or simply scatter them evenly.
- Once the gelatin mixture has cooled and slightly thickened, carefully pour it over the strawberries in the pie shell. Ensure the berries are evenly coated with the mixture.
- Refrigerate the pie until the filling is completely set. This usually takes at least 4 hours, but overnight is even better to ensure a firm and stable pie.
- Slice and serve chilled. Enjoy your guilt-free strawberry pie!
Expert Tips & Tricks
- Preventing a Soggy Crust: To avoid a soggy crust, consider brushing the baked pie shell with a thin layer of melted sugar-free chocolate or a simple egg wash before adding the strawberry filling. This creates a barrier that prevents moisture from seeping into the crust.
- Enhancing Strawberry Flavor: For an extra burst of strawberry flavor, consider macerating the strawberries in a tablespoon of sugar-free strawberry jam or a few drops of strawberry extract for about 15 minutes before arranging them in the pie shell.
- Controlling Sweetness: Taste the gelatin mixture before pouring it into the pie shell. If you prefer a sweeter pie, you can add a few drops of liquid stevia or another sugar-free sweetener to adjust the sweetness to your liking.
- Achieving the Perfect Set: The key to a perfectly set pie is patience. Avoid the temptation to cut into the pie before it has completely chilled and set in the refrigerator. If the filling seems too runny, you can add a teaspoon of agar-agar powder to the gelatin mixture while it’s cooking to help it set more firmly.
- Using Fresh vs. Frozen Strawberries: While fresh strawberries are ideal for this pie, you can also use frozen strawberries in a pinch. Thaw the frozen strawberries completely and drain any excess liquid before arranging them in the pie shell. Keep in mind that frozen strawberries may release more liquid, so the filling might be slightly softer.
Serving & Storage Suggestions
This Sugar-Free Strawberry Pie is best served chilled, straight from the refrigerator. You can garnish each slice with a dollop of sugar-free whipped topping or a sprinkle of chopped nuts for added flavor and visual appeal. The pie can be stored in the refrigerator for up to 3 days. Cover it tightly with plastic wrap or store it in an airtight container to prevent it from drying out. While freezing is not recommended due to the gelatin-based filling, you can store individual slices in the freezer for up to a month if necessary. Thaw them in the refrigerator before serving.
Nutritional Information
Here’s an estimate of the nutritional information per serving, but remember that this can vary based on specific brands and ingredient choices.
| Nutrient | Amount per Serving | % Daily Value |
|---|---|---|
| Calories | 150 kcal | 8% |
| Total Fat | 5g | 6% |
| Saturated Fat | 2g | 10% |
| Cholesterol | 0mg | 0% |
| Sodium | 250mg | 11% |
| Total Carbohydrate | 25g | 9% |
| Dietary Fiber | 2g | 7% |
| Sugars | 3g | N/A |
| Protein | 3g | 6% |
Variations & Substitutions
- Crust Variations: For a gluten-free option, use a gluten-free pie crust. You can also make a crust using almond flour or a combination of almond flour and coconut flour. A crushed nut crust (like walnuts or pecans) also adds a nice textural contrast.
- Gelatin Flavor Alternatives: While strawberry gelatin complements the fresh strawberries beautifully, you can experiment with other sugar-free gelatin flavors like raspberry or cherry.
- Dairy-Free Version: Use a dairy-free baked pie crust. You can also substitute the sugar-free vanilla pudding with a sugar-free coconut cream pudding mix (ensure it is the ‘cook and serve’ type) and use coconut milk instead of water for an extra creamy, tropical twist.
- Berry Medley Pie: Combine strawberries with other berries like blueberries, raspberries, or blackberries for a mixed berry pie.
FAQs (Frequently Asked Questions)
Q: Can I use unflavored gelatin instead of strawberry gelatin?
A: Yes, you can use unflavored gelatin. Add a few drops of strawberry extract and a touch of red food coloring to achieve a similar flavor and color.
Q: What if my pie filling doesn’t set properly?
A: Make sure you follow the cooking instructions carefully and allow the mixture to cool slightly before pouring it over the strawberries. If it still doesn’t set, you can try adding a teaspoon of agar-agar powder to the mixture while it’s cooking.
Q: Can I use a store-bought graham cracker crust instead of a baked pie shell?
A: Yes, a store-bought graham cracker crust is a convenient option. Just make sure to choose one that is sugar-free.
Q: How can I prevent the strawberries from floating to the top of the pie?
A: To prevent the strawberries from floating, allow the gelatin mixture to cool and thicken slightly before pouring it over the berries. This will help suspend the strawberries more evenly throughout the filling.
Q: Is this pie suitable for people with diabetes?
A: This pie is sugar-free, making it a potentially suitable option for people with diabetes. However, it’s always best to consult with a doctor or registered dietitian to ensure it fits within their individual dietary needs and blood sugar management plan.
Final Thoughts
This Sugar-Free Strawberry Pie is more than just a dessert; it’s a celebration of simple pleasures and the joy of creating something delicious and wholesome. I encourage you to try this recipe and experience the delightful combination of fresh strawberries and a creamy, sugar-free filling. Feel free to experiment with variations and substitutions to create your own unique twist on this classic treat. And most importantly, don’t forget to share your creations with friends and family! Bon appétit!