
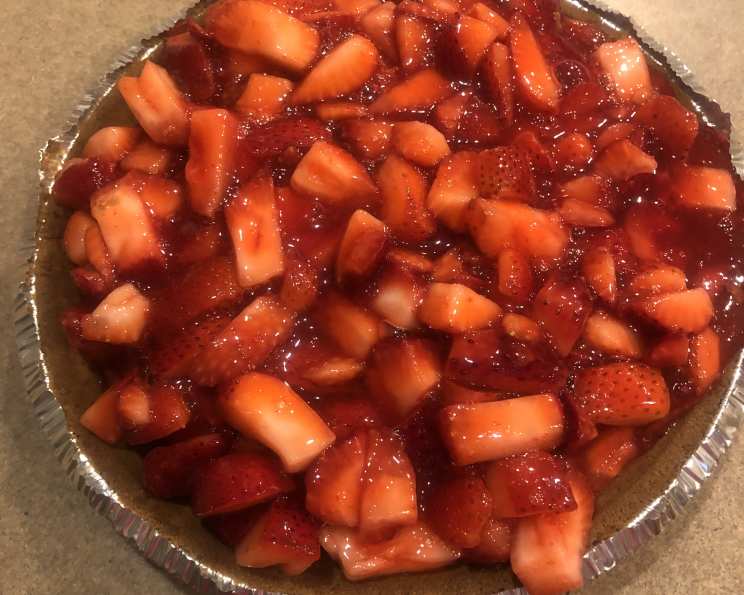
Sugar-Free Strawberry Pie: A Guilt-Free Slice of Summer
There’s something undeniably magical about strawberry pie. I remember as a kid, my grandmother’s strawberry patch was legendary. Each summer, the aroma of sun-ripened berries filled her kitchen, culminating in the most amazing pies. I would watch, mesmerized, as she carefully arranged the glistening red slices in a pre-baked crust, knowing a slice of pure, summery bliss was just hours away. Now, years later, I wanted to recreate that simple joy without the guilt of added sugar. This sugar-free version captures the essence of that memory, allowing you to savor a sweet slice of nostalgia without compromising your health goals.
Recipe Overview
- Prep Time: 15 minutes
- Cook Time: 1 minute
- Total Time: 2 hours 16 minutes (includes chilling time)
- Servings: 8
- Yield: 1 pie
- Dietary Type: Sugar-Free
Ingredients
- 1 baked 9-inch pie shell
- 1 1/2 cups water
- 2 tablespoons cornstarch
- 1 package sugar-free strawberry gelatin
- 6 tablespoons Splenda sugar substitute or 4 packets Equal sugar substitute (Splenda preferred)
- 3 cups sliced strawberries
- 1 (8 ounce) container Cool Whip or 1 package Dream Whip topping (Kraft)
Equipment Needed
- Small saucepan
- Wire whisk
- Measuring cups and spoons
- Mixing bowl
- Refrigerator
Instructions
-
Begin by ensuring your 9-inch pie shell is already baked and cooled. This step can be done ahead of time to save on prep time. If you’re making your own crust, follow your favorite recipe, bake, and let it cool completely.
-
In a small saucepan, combine the water and cornstarch. Use a wire whisk to thoroughly mix them together until the cornstarch is fully dissolved. This prevents lumps from forming during cooking.
-
Place the saucepan over medium heat. Bring the mixture to a boil, stirring constantly with the whisk. Continue boiling for 1 minute, still stirring, until the mixture thickens slightly and becomes translucent. This step is crucial for creating a smooth and stable filling.
-
Remove the saucepan from the heat. Allow the mixture to cool slightly for a few minutes before proceeding. This prevents the heat from melting the gelatin too quickly and ensures even distribution.
-
Stir in the sugar-free strawberry gelatin and your chosen sugar substitute (either 6 tablespoons of Splenda or 4 packets of Equal). Mix well with the whisk until the gelatin and sweetener are completely dissolved. Make sure no granules remain.
-
Gently fold in the sliced strawberries. Be careful not to mash the berries. You want them to remain intact for a beautiful presentation and a burst of fresh flavor in every bite.
-
Pour the strawberry mixture into the prepared baked pie shell. Spread it evenly to ensure a uniform filling.
-
Refrigerate the pie for at least 2 hours, or until the filling is firm and set. This chilling time is essential for the pie to hold its shape and develop its flavor.
-
Just before serving, top the pie with Cool Whip or Dream Whip topping. You can use a piping bag to create a decorative design or simply spread it evenly over the filling.
-
Garnish with additional fresh strawberries, if desired, for an extra touch of elegance.
Expert Tips & Tricks
- Baking the Pie Shell: For a truly crisp and flaky crust, try “blind baking” your pie shell. This involves pre-baking the crust before adding the filling. Line the crust with parchment paper and fill it with pie weights or dried beans to prevent it from puffing up during baking.
- Sweetener Choice: The type of sugar substitute you use can affect the final flavor. I find that Splenda tends to have a more neutral taste, while Equal can sometimes leave a slight aftertaste. Experiment to find your preferred sweetener.
- Strawberry Quality: Use the freshest, ripest strawberries you can find. Their natural sweetness will enhance the overall flavor of the pie.
- Preventing a Soggy Crust: To prevent the crust from becoming soggy, brush the inside of the baked pie shell with a thin layer of melted sugar-free chocolate before adding the filling. This creates a moisture barrier.
- Make-Ahead Tip: The filling can be made a day ahead and stored in the refrigerator. Just assemble the pie right before serving to prevent the crust from becoming soggy.
- Thickening Issues: If your filling seems too thin after cooling slightly, you can add an extra teaspoon of cornstarch dissolved in a tablespoon of cold water to the saucepan and cook for another minute, stirring constantly, until thickened.
Serving & Storage Suggestions
Serve the Sugar-Free Strawberry Pie chilled. A slice of this pie pairs perfectly with a dollop of extra whipped cream or a scoop of sugar-free vanilla ice cream.
To store leftovers, cover the pie tightly with plastic wrap or place it in an airtight container. It will keep in the refrigerator for up to 3 days. The crust may soften slightly over time.
Freezing is not recommended as the texture of the filling and whipped topping may change upon thawing. It’s best enjoyed fresh.
Nutritional Information
Note: Nutritional information is an estimate and may vary based on specific ingredients and serving size.
| Nutrient | Amount per Serving | % Daily Value |
|---|---|---|
| Calories | 180 kcal | 9% |
| Total Fat | 9g | 14% |
| Saturated Fat | 7g | 35% |
| Cholesterol | 5mg | 2% |
| Sodium | 120mg | 5% |
| Total Carbohydrate | 25g | 8% |
| Dietary Fiber | 1g | 4% |
| Sugars | 5g | – |
| Protein | 1g | 2% |
Variations & Substitutions
- Gluten-Free Crust: Use a gluten-free pie crust recipe or a store-bought gluten-free crust.
- Other Berries: Substitute some of the strawberries with other berries like blueberries, raspberries, or blackberries for a mixed berry pie.
- Dairy-Free Topping: Use a non-dairy whipped topping like coconut whipped cream or almond milk whipped cream.
- Different Gelatin Flavor: Experiment with different sugar-free gelatin flavors like raspberry or cherry.
- Crustless Pie: For a lighter option, skip the crust altogether and serve the filling as a strawberry mousse.
FAQs (Frequently Asked Questions)
Q: Can I use frozen strawberries?
A: Yes, but thaw them completely and drain any excess liquid before using. Frozen strawberries may release more water than fresh ones, which could affect the consistency of the filling.
Q: Can I use a different sugar substitute?
A: Yes, you can use your preferred sugar substitute, but be sure to adjust the amount to match the sweetness level of Splenda or Equal. Refer to the sweetener’s packaging for conversion guidelines.
Q: Why is my pie filling runny?
A: This could be due to not boiling the cornstarch mixture long enough, using too much water, or not chilling the pie for a sufficient amount of time. Ensure you follow the recipe instructions carefully.
Q: Can I make this pie ahead of time?
A: Absolutely! You can prepare the pie filling a day in advance and store it in the refrigerator. Assemble the pie just before serving to prevent the crust from becoming soggy.
Q: How do I prevent the crust from burning while blind baking?
A: Check the crust during the last few minutes of baking and cover the edges with aluminum foil if they start to brown too quickly. You can also use a pie shield.
Final Thoughts
This Sugar-Free Strawberry Pie is a testament to the fact that you can enjoy delicious desserts without sacrificing your health goals. It’s a delightful treat that’s perfect for summer gatherings, special occasions, or simply satisfying your sweet tooth. So go ahead, gather your ingredients, and embark on a culinary adventure that will transport you back to those cherished summer memories. Don’t hesitate to share your creations and experiences! I’d love to hear how this recipe brings a touch of sweetness to your day. Pair with a nice glass of unsweetened iced tea and enjoy!