
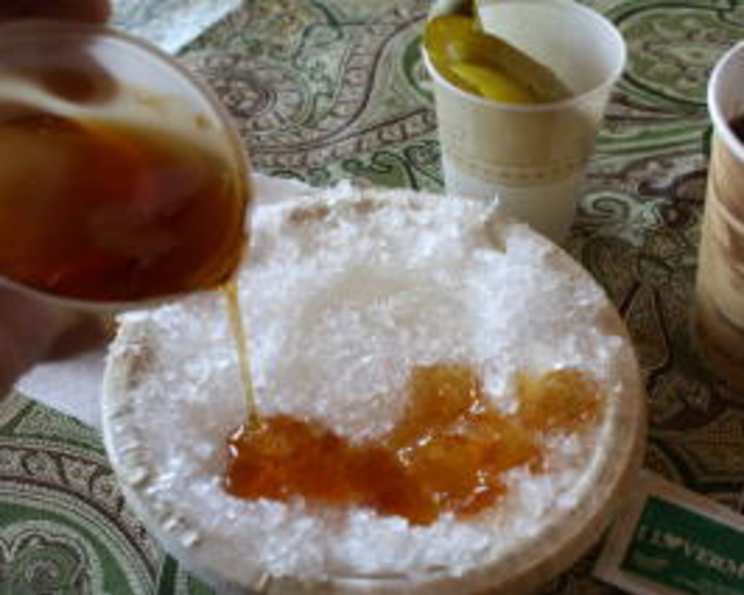
Sugar on Snow: A Taste of Winter’s Magic
The first time I tasted sugar on snow, I was a small child bundled in so many layers I could barely move. My grandfather, a weathered Vermonter with eyes as blue as the winter sky, carefully drizzled the hot, amber syrup onto a mound of fresh snow he’d packed into a bowl. The sweet, almost burnt caramel aroma filled the crisp air. The contrast of the scorching syrup and the icy snow was a revelation, a playful dance of temperatures that delighted my taste buds. That simple treat, eaten under a blanket of stars, remains one of my most cherished winter memories.
Recipe Overview
- Prep Time: 5 minutes
- Cook Time: 5 minutes
- Total Time: 10 minutes
- Servings: 10-20
- Dietary Type: Vegetarian, Gluten-Free
Ingredients
- 1 quart Vermont maple syrup
- ½ teaspoon butter
- Packed snow or well crushed ice
Equipment Needed
- Medium saucepan
- Candy thermometer (optional)
- Spoon
- Bowls
Instructions
- In a medium saucepan, combine the 1 quart of Vermont maple syrup and ½ teaspoon of butter.
- Place the saucepan over medium heat, watching carefully. The syrup can quickly boil over, so be vigilant! If it starts to bubble too vigorously, immediately turn down the heat to medium-low.
- If you’re using a candy thermometer, clip it to the side of the pan, ensuring the bulb is submerged in the syrup but not touching the bottom of the pan.
- Continue heating the syrup until it reaches 234°F (112°C) on a candy thermometer. This is the “soft-ball” stage. If you don’t have a thermometer, proceed to the next step.
- Remove the saucepan from the heat and let the syrup cool slightly for a minute or two. This slight cooling is crucial to achieving the right consistency.
- Test the syrup to see if it’s ready. Spoon a tablespoon of the hot syrup over a small mound of packed snow (or crushed ice).
- Observe what happens. The syrup should sit on top of the snow, solidify slightly, and cling to a fork like taffy. If it spreads out and doesn’t thicken, it needs to be cooked longer. Return the syrup to the heat and continue cooking, testing every minute or so.
- Once the syrup passes the test, immediately pour it in “ribbons” over bowls filled with packed snow. Work quickly, as the syrup will continue to thicken as it cools.
- Serve immediately and enjoy the delightful contrast of hot and cold!
Expert Tips & Tricks
- Use Real Vermont Maple Syrup: The flavor of the maple syrup is the star of this dish, so don’t skimp on quality. Opt for Grade A Dark Color or Grade A Very Dark Color for the most intense maple flavor.
- Control the Heat: Patience is key. Cooking the syrup too quickly can result in a burnt or grainy final product. Keep the heat at a medium to medium-low setting and watch carefully.
- Snow Quality Matters: Use fresh, clean snow that hasn’t been sitting on the ground for too long. Avoid snow that’s been treated with salt or chemicals. Pack the snow tightly into the bowls to create a firm base for the syrup. If fresh snow isn’t available, crushed ice works as a substitute, but the texture won’t be quite the same.
- Butter is Optional (But Recommended): The small amount of butter adds a touch of richness and helps prevent the syrup from crystallizing. However, if you are dairy-free, you can easily omit it.
- The Candy Thermometer is Your Friend: While you can make sugar on snow without a candy thermometer, it takes practice to recognize the correct consistency. A thermometer ensures consistent results every time.
- Adjusting for Humidity: On humid days, the syrup may take longer to reach the soft-ball stage. Be patient and continue cooking until it passes the test.
- Troubleshooting: If the syrup is too thin and doesn’t set up on the snow, return it to the heat and cook it longer. If the syrup becomes too hard and brittle, it’s been overcooked. Unfortunately, there’s no way to salvage overcooked syrup.
Serving & Storage Suggestions
Sugar on snow is best enjoyed immediately after the syrup is poured over the snow. The contrast of temperatures and textures is what makes it so special. It’s a delightful treat to enjoy outdoors on a snowy day.
Unfortunately, sugar on snow doesn’t store well. The snow will melt, and the syrup will harden. It’s best to make it fresh each time you want to enjoy it. Any leftover syrup can be stored in an airtight container at room temperature for several weeks. You can re-heat it to enjoy on pancakes or waffles, or to try making sugar on snow again (though you may need to add a bit of water to thin it slightly after storage).
Nutritional Information
| Nutrient | Amount per Serving | % Daily Value |
|---|---|---|
| Calories | 338 kcal | N/A |
| Total Fat | 0.5g | 1% |
| Saturated Fat | 0.2g | 0% |
| Cholesterol | 0.5mg | 0% |
| Sodium | 12.9mg | 0% |
| Total Carbohydrate | 86.4g | 28% |
| Dietary Fiber | 0g | 0% |
| Sugars | 76.7g | 306% |
| Protein | 0g | 0% |
Note: Nutritional information is an estimate and may vary based on specific ingredients and portion sizes.
Variations & Substitutions
- Flavored Syrup: Infuse the maple syrup with other flavors while it’s heating. Add a cinnamon stick, a vanilla bean, or a few drops of almond extract for a unique twist. Be sure to remove the flavorings before pouring the syrup over the snow.
- Different Snow Textures: Experiment with different textures of snow. Finely shaved ice will create a different sensation than loosely packed snow.
- Complementary Garnishes: Sprinkle a pinch of flaky sea salt over the sugar on snow to enhance the sweetness. A few chopped walnuts or pecans can also add a pleasant crunch. Sour dill pickles are a classic accompaniment, providing a tangy counterpoint to the sweetness.
- Maple Cream: If you accidentally cook the syrup past the soft-ball stage, don’t despair! Let it cool completely, and you’ll likely end up with maple cream, a delicious spread for toast or crackers.
FAQs (Frequently Asked Questions)
Q: Can I use pancake syrup instead of real maple syrup?
A: While you can technically use pancake syrup, the flavor will be significantly different. Real maple syrup is essential for the authentic taste of sugar on snow.
Q: How do I know if the snow is safe to eat?
A: Only use fresh, clean snow that hasn’t been contaminated with salt, chemicals, or dirt. Avoid snow that’s been sitting on the ground for a long time or is located near roads or industrial areas.
Q: What if I don’t have snow?
A: Crushed ice can be used as a substitute for snow, although the texture won’t be quite the same. Make sure the ice is finely crushed to mimic the texture of snow as closely as possible.
Q: Can I make this ahead of time?
A: Unfortunately, sugar on snow is best enjoyed immediately. The snow will melt, and the syrup will harden if you try to make it ahead of time.
Q: Why is my syrup grainy?
A: Grainy syrup is usually a result of overcooking or not using enough butter. Make sure to use real maple syrup and monitor the temperature carefully. A small amount of butter helps prevent crystallization.
Final Thoughts
Sugar on snow is more than just a simple treat; it’s a taste of winter, a connection to tradition, and a reminder of the simple joys in life. Gather your loved ones, embrace the snowy weather (or crush some ice if you must!), and create some sweet memories. Don’t be afraid to experiment with flavors and garnishes to make it your own. And if you have any leftover syrup, well, that’s just an excuse to make pancakes tomorrow! Share your experiences and variations – I’d love to hear how you make this classic treat your own.