
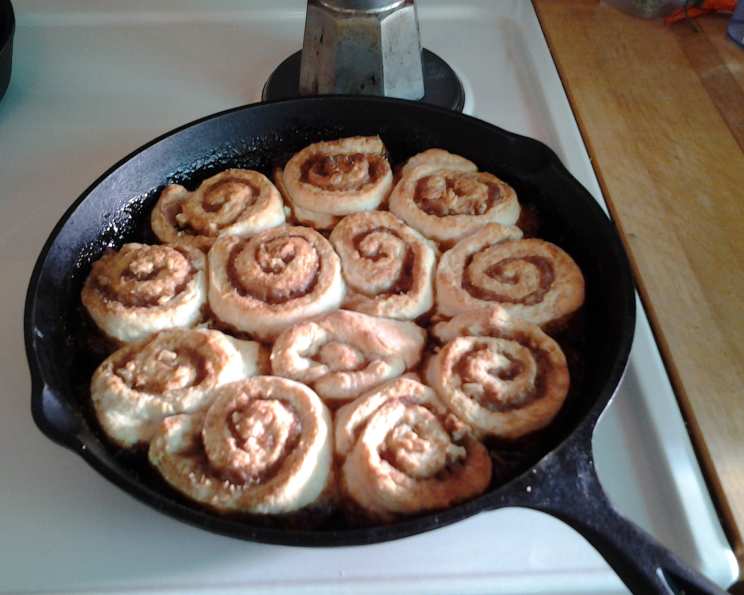
Sugarhouse Maple Sticky Buns: A Taste of Autumn Mornings
I can almost smell the crisp autumn air and feel the warmth of the Sugarhouse Maple Sticky Buns baking in the oven as I write this. My grandmother, bless her heart, used to make these every year when the leaves started turning. I remember watching her, mesmerized, as she transformed simple ingredients into golden, gooey masterpieces. The combination of the earthy walnuts, sweet maple syrup, and warm cinnamon always brought a smile to my face, a feeling I hope to recreate with every batch I bake. Now, it’s my turn to share that tradition with you.
Recipe Overview
- Prep Time: 20 minutes
- Cook Time: 25 minutes
- Total Time: 45 minutes
- Servings: 12
- Yield: 1 pan
- Dietary Type: Vegetarian
Ingredients
- 3/4 cup walnuts, finely chopped
- 3/4 cup brown sugar, packed
- 3/4 teaspoon cinnamon
- 1/2 cup pure maple syrup
- 12 tablespoons butter, divided (that’s 1 1/2 sticks!)
- 2 1/4 cups all-purpose flour
- 1 tablespoon baking powder
- 3/4 teaspoon salt
- 1 cup milk
Equipment Needed
- 10-inch cast iron skillet or heavy oven-safe pan
- Small saucepan
- Large mixing bowl
- Measuring cups and spoons
- Pastry cutter or two knives
- Rolling pin
- Large plate for inverting the buns
Instructions
-
Preheat your oven to 400°F (200°C). This ensures the buns bake evenly and achieve that perfect golden-brown color.
-
In a medium bowl, mix together the walnuts, brown sugar, and cinnamon. This is your delectable sticky bun filling. Set aside.
-
In a small saucepan, combine the maple syrup and 4 tablespoons of the butter. Bring this mixture to a boil over medium heat, stirring constantly to prevent scorching. Once boiling, remove from heat.
-
Pour the maple syrup mixture into an ungreased 10-inch cast iron skillet or heavy oven-safe pan. Top the syrup with 1/3 of the walnut mixture, spreading it evenly across the bottom of the pan. This creates the irresistible sticky base for your buns.
-
In a large mixing bowl, whisk together the flour, baking powder, and salt. This ensures the baking powder is evenly distributed, resulting in light and fluffy buns.
-
Add 7 tablespoons of the butter to the dry ingredients. Using a pastry cutter or two knives, cut the butter into the flour mixture until it resembles coarse crumbs or small peas. This step is crucial for creating a tender, flaky dough.
-
Gradually add the milk while stirring gently, just until the mixture comes together to form a dough. Be careful not to overmix the dough, as this can result in tough buns.
-
Melt the remaining 1 tablespoon of butter in a small bowl. Set aside.
-
Turn the dough out onto a lightly floured surface and knead it gently 5 or 6 times. This helps to bring the dough together and develop its gluten structure.
-
Roll the dough into a 9×12-inch rectangle. Aim for an even thickness to ensure uniform baking.
-
Brush the rolled-out dough with the melted butter. This adds richness and flavor, and it helps the walnut mixture adhere to the dough.
-
Cover the dough with the remaining walnut mixture, patting gently to help it stick. This ensures every bite is packed with nutty sweetness.
-
Roll the dough up tightly to form a 12-inch log, pinching the seam to seal. A secure seam prevents the filling from escaping during baking.
-
Using a sharp knife, cut the log into 12 (1-inch) slices. These are your individual sticky buns.
-
Place the slices into the pan, cut-side up, arranging them evenly over the walnut-maple mixture.
-
Bake in the preheated oven for 25 minutes, or until the buns are golden brown and the syrup is bubbling around the edges. Keep a close eye on them to prevent burning.
-
Remove the pan from the oven and immediately invert it onto a large plate. Do this quickly but carefully – the syrup is very hot! The faster you invert, the better the syrup will release from the pan.
-
Scrape any remaining syrup from the pan and spread it over the buns. This ensures every bun is generously coated in that delicious maple glaze.
-
Serve the Sugarhouse Maple Sticky Buns warm or hot. They’re best enjoyed fresh from the oven.
Expert Tips & Tricks
- Don’t overmix the dough: Overmixing develops the gluten too much, leading to tough buns. Mix until just combined.
- Use high-quality maple syrup: The flavor of the maple syrup is key to this recipe. Opt for pure maple syrup for the best results. Avoid pancake syrup if possible.
- Warm the milk: Slightly warming the milk can help the butter incorporate more easily into the dough.
- Make-ahead tip: You can assemble the sticky buns up to the point of baking, cover tightly, and refrigerate overnight. Add a few minutes to the baking time if baking from cold.
- If the syrup sticks: If the syrup is stubbornly sticking to the pan after baking, gently warm the bottom of the pan on the stovetop for a minute or two to loosen it.
Serving & Storage Suggestions
Serve these Sugarhouse Maple Sticky Buns warm, ideally straight from the oven. A dollop of whipped cream or a scoop of vanilla ice cream complements the flavors perfectly.
Leftover sticky buns can be stored at room temperature for up to 2 days, in the refrigerator for up to 5 days, or in the freezer for up to 2 months. To reheat, warm them in a preheated oven at 350°F (175°C) for about 10 minutes, or microwave them individually for about 30 seconds.
Nutritional Information
| Nutrient | Amount per Serving | % Daily Value |
|---|---|---|
| Calories | 335 kcal | 17% |
| Total Fat | 17 g | 26% |
| Saturated Fat | 8 g | 40% |
| Cholesterol | 33 mg | 11% |
| Sodium | 353 mg | 15% |
| Total Carbohydrate | 42 g | 14% |
| Dietary Fiber | 1 g | 4% |
| Sugars | 21 g | N/A |
| Protein | 4 g | 8% |
Note: Nutritional information is an estimate and may vary based on specific ingredients and preparation methods.
Variations & Substitutions
- Pecans instead of Walnuts: Substitute the walnuts with pecans for a slightly different flavor profile.
- Spice it up: Add a pinch of nutmeg or cardamom to the walnut mixture for a warm, fragrant twist.
- Orange Zest: Incorporate some orange zest into the dough for a citrusy note.
- Gluten-Free: Use a gluten-free all-purpose flour blend to make these sticky buns gluten-free. You may need to add a binder like xanthan gum.
FAQs (Frequently Asked Questions)
Q: Can I use pancake syrup instead of pure maple syrup?
A: While pure maple syrup delivers the best flavor, pancake syrup can be used in a pinch. The flavor will be less complex and potentially sweeter.
Q: Why are my sticky buns dry?
A: Overbaking or using too much flour can result in dry sticky buns. Ensure you measure the flour accurately and bake until just golden brown.
Q: How do I prevent the walnut mixture from burning?
A: Keeping a close eye on the buns during baking and tenting them with foil if they start to brown too quickly will help prevent burning.
Q: Can I freeze the unbaked sticky buns?
A: Yes, you can freeze the unbaked sticky buns after cutting them into slices. Place them on a baking sheet and freeze until solid, then transfer them to a freezer bag. Bake from frozen, adding a few minutes to the baking time.
Q: My sticky buns are sticking to the pan. What should I do?
A: Immediately after removing from the oven, place the pan on the stovetop over low heat for a minute or two. This will help loosen the syrup and make it easier to invert.
Final Thoughts
These Sugarhouse Maple Sticky Buns are more than just a recipe; they’re a comforting taste of home, a reminder of cherished memories, and a delightful way to start your day. I encourage you to gather your ingredients, preheat your oven, and embark on this baking adventure. Share your creations with loved ones, and don’t hesitate to put your own personal spin on the recipe. And if you have any questions or feedback, please don’t hesitate to reach out – I’m always happy to hear from fellow bakers! These sticky buns pair perfectly with a hot cup of coffee or a glass of cold milk. Happy baking!