
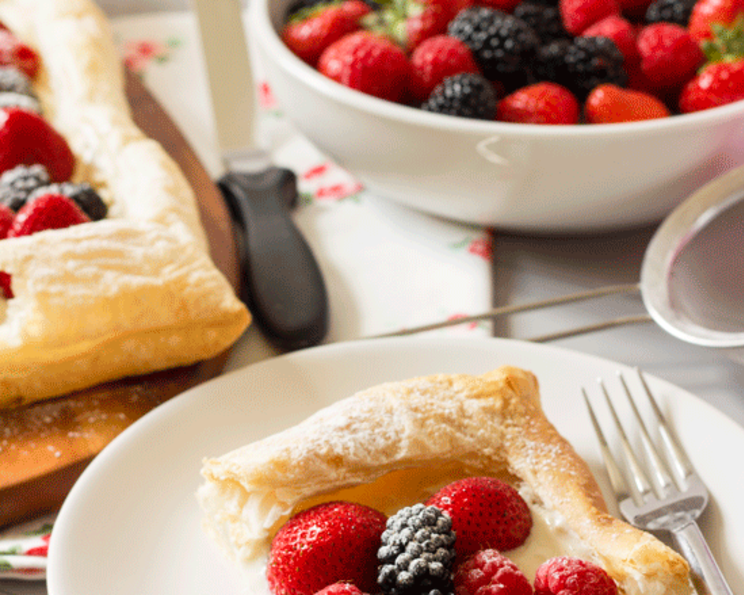
Summer Berry Tart: A Symphony of Flavors
The scent of buttery pastry and ripe berries baking together always transports me back to my grandmother’s sun-drenched kitchen. She had a knack for turning simple ingredients into masterpieces, and this Summer Berry Tart, with its vibrant colors and sweet, tangy flavors, was one of her specialties. I remember watching, mesmerized, as she carefully arranged each berry, creating a mosaic of summer on a golden crust. That image, and that taste, has stayed with me, inspiring me to recreate that magic for my own family.
Recipe Overview
- Prep Time: 15 minutes
- Cook Time: 12-15 minutes
- Total Time: Approximately 30 minutes (including cooling)
- Servings: 12
- Yield: 1 Tart
- Dietary Type: Vegetarian (easily adaptable to vegan – see variations)
Ingredients
- 1 sheet ready rolled puff pastry (approximately 12oz)
- 1 cup light cream cheese, such as Philadelphia
- 1/4 cup icing sugar, sifted
- 1/2 teaspoon vanilla extract
- 3/4 cup fresh blackberries
- 3/4 cup fresh raspberries
- 16 large strawberries (approximately 2 cups), halved or quartered depending on size
- 1 tablespoon powdered sugar (optional)
Equipment Needed
- Baking Tray
- Fork
- Medium Bowl
- Electric Mixer (or whisk)
- Small Spatula
Instructions
-
Preheat your oven to 400°F (200°C) and line a baking tray with parchment paper. This will prevent the tart from sticking and make cleanup a breeze.
-
Carefully unroll the ready rolled puff pastry and place it onto the prepared baking tray. The key to a beautiful tart is to create a defined border. To do this, score a rectangle into the pastry, about 1-2 inches from the edge, using a sharp knife or pizza cutter. Be careful not to cut all the way through the pastry – you only want to score the top layer. This will create a raised edge when baking.
-
Now, use a fork to poke the middle of the pastry (the area inside the scored rectangle) several times. This step is crucial! The fork prevents the pastry from puffing up too much in the center, creating a nice, flat surface for the cream cheese filling and berries.
-
Place the baking tray in the preheated oven and bake for 12-15 minutes, or until the pastry is risen, puffy, and golden brown. Keep a close eye on it – ovens vary, and you want the pastry to be perfectly cooked but not burnt. A beautifully golden crust is part of the charm of this tart.
-
Remove the tart from the oven and leave it to cool completely on the baking tray. It’s tempting to start assembling right away, but the pastry needs to be cool enough to handle without breaking.
-
While the pastry is cooling, prepare the cream cheese filling. In a medium bowl, combine the light cream cheese, sifted icing sugar, and vanilla extract. Beat the mixture with an electric mixer (or a whisk, if you’re feeling energetic!) until it is light and smooth, about 1 minute on medium speed. Sifting the icing sugar ensures a smooth, lump-free filling.
-
Once the pastry is completely cool, spread the cream cheese mixture evenly over the inside rectangle of the pastry, using a small spatula or the back of a spoon. Create a smooth, even layer that will serve as the perfect base for your berry masterpiece.
-
Now for the fun part: cover the cream cheese with fresh berries. You can simply sprinkle them on randomly for a rustic look, or, if you’re feeling a little more organized (like me!), you can line them up symmetrically. Arrange the blackberries, raspberries, and strawberries in a pleasing pattern. The vibrant colors of the berries create a stunning visual contrast against the creamy white background.
-
For an extra touch of elegance, dust the finished tart with powdered sugar, if desired. This adds a delicate sweetness and a beautiful snowy finish.
-
Store the tart in an airtight container in the refrigerator for up to 2 days.
Expert Tips & Tricks
- Puff Pastry Perfection: Use a high-quality puff pastry for the best results. All-butter puff pastry will give you the richest flavor.
- Berry Prep: Ensure your berries are dry before arranging them on the tart. Excess moisture can make the pastry soggy. Gently pat them dry with a paper towel.
- Preventing a Soggy Bottom: While the fork-poking helps, you can also brush the inside of the baked pastry with melted chocolate (dark or white) before adding the cream cheese filling. This creates a waterproof barrier!
- Make-Ahead Tip: The pastry can be baked a day in advance and stored in an airtight container at room temperature. Prepare the cream cheese filling just before assembling to prevent it from becoming watery.
- Adjusting Sweetness: Taste the cream cheese filling and adjust the amount of icing sugar to your liking. If your berries are particularly sweet, you might want to reduce the amount of sugar.
Serving & Storage Suggestions
Serve this Summer Berry Tart chilled for the best flavor and texture. It’s perfect as a dessert after a light summer meal, or as a show-stopping addition to a brunch spread. A scoop of vanilla ice cream or a dollop of whipped cream would be a delightful accompaniment.
Store any leftovers in an airtight container in the refrigerator for up to 2 days. The pastry will soften over time, but the tart will still taste delicious! I don’t recommend freezing the tart, as the berries and cream cheese filling will become watery upon thawing.
Nutritional Information
| Nutrient | Amount per Serving | % Daily Value |
|---|---|---|
| Calories | 186.5 kcal | N/A |
| Calories from Fat | N/A | N/A |
| Total Fat | 12.3 g | 18% |
| Saturated Fat | 4.4 g | 22% |
| Cholesterol | 14 mg | 4% |
| Sodium | 114.7 mg | 4% |
| Total Carbohydrate | 16.1 g | 5% |
| Dietary Fiber | 1.8 g | 7% |
| Sugars | 5.2 g | 20% |
| Protein | 3.6 g | 7% |
Note: Nutritional information is an estimate and may vary based on specific ingredients and portion sizes.
Variations & Substitutions
- Vegan Berry Tart: Substitute the cream cheese with a vegan cream cheese alternative. Many brands offer excellent vegan cream cheese options made from cashews, soy, or other plant-based ingredients.
- Gluten-Free Berry Tart: Use gluten-free puff pastry.
- Different Berries: Feel free to use any combination of berries you like! Blueberries, blackberries, and even sliced peaches or nectarines would be delicious additions.
- Citrus Zest: Add a teaspoon of lemon or orange zest to the cream cheese filling for a bright, citrusy twist.
- Almond Extract: Substitute half of the vanilla extract with almond extract for a delicate almond flavor.
- Chocolate Drizzle: Drizzle melted chocolate over the finished tart for an extra decadent treat.
- Seasonal Fruit: In autumn, try this with sliced apples and pears, or in spring, with rhubarb and strawberries.
FAQs (Frequently Asked Questions)
Q: Can I use frozen berries?
A: While fresh berries are ideal for their flavor and texture, you can use frozen berries in a pinch. Be sure to thaw them completely and drain any excess liquid before using.
Q: Can I make this tart ahead of time?
A: Yes, you can bake the pastry shell a day ahead and store it in an airtight container. Assemble the tart just before serving to prevent the pastry from becoming soggy.
Q: My pastry puffed up too much in the middle. What did I do wrong?
A: Make sure you poke the pastry generously with a fork before baking. This allows steam to escape and prevents excessive puffing.
Q: How do I prevent the berries from bleeding into the cream cheese filling?
A: Ensure your berries are dry before arranging them on the tart. You can also brush the baked pastry with melted chocolate to create a waterproof barrier.
Q: Can I use a different type of pastry?
A: While puff pastry is the traditional choice, you could also use shortcrust pastry or even a graham cracker crust for a different flavor and texture.
Final Thoughts
This Summer Berry Tart is more than just a dessert; it’s a celebration of fresh, seasonal flavors and simple pleasures. Whether you’re a seasoned baker or a kitchen novice, this recipe is easy to follow and guaranteed to impress. So, gather your favorite berries, roll out the pastry, and create a sweet masterpiece that will brighten any day. Don’t be afraid to experiment with different variations and make it your own. And, most importantly, enjoy the process of creating something beautiful and delicious! I’d love to hear how your tart turns out – share your feedback and photos! This tart pairs perfectly with a glass of chilled Prosecco or a cup of herbal tea. Happy baking!