
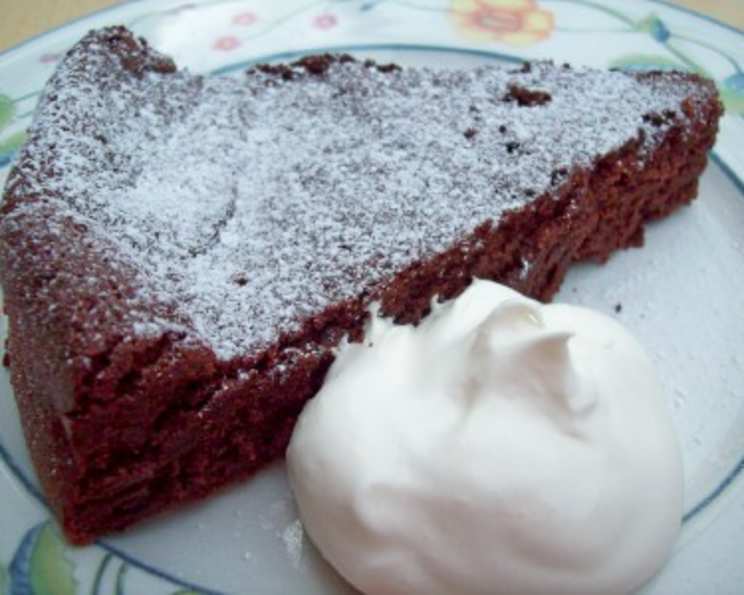
Sunken Chocolate Cake: A Decadent Delight
The first time I tasted Sunken Chocolate Cake, I was a wide-eyed teenager at a local bake sale. Its unassuming appearance – a slightly cracked, dark surface dusted with sugar – belied the intense, fudgy treasure hidden within. One bite, and I was hooked; the rich, bittersweet chocolate melting on my tongue, the slightly gritty texture a delightful surprise. It was unlike any cake I’d ever had, a symphony of textures and flavors that cemented my love for all things chocolate. Now, decades later, I’m excited to share my version of this captivating cake, a recipe that guarantees a deeply satisfying dessert experience.
Recipe Overview
- Prep Time: 20 minutes
- Cook Time: 35-45 minutes
- Total Time: 1 hour 5 minutes
- Servings: 10-12
- Yield: 1 cake
- Dietary Type: Gluten-Free (if using gluten-free brandy)
Ingredients
- 10 ounces good quality bittersweet chocolate, broken into small pieces (such as Lindt)
- 5 large eggs, separated
- 1/2 cup granulated sugar, divided, plus more to sprinkle over baked cake
- 1/2 cup unsalted butter, at room temperature
- 1/3 cup very finely ground almonds
- 2 tablespoons brandy
- Sweetened whipped cream, as garnish (optional)
- Fresh berries, as garnish (optional)
Equipment Needed
- 8-9″ springform pan
- Parchment paper
- Large microwaveable bowl
- Mixing bowls
- Electric mixer
- Rubber spatula
- Toothpick
Instructions
- Position an oven rack to the lowest possible position. Preheat the oven to 300 degrees F (150 degrees C).
- Prepare an 8-9″ springform pan by greasing it thoroughly and lining the bottom with parchment paper. This ensures easy removal of the delicate cake.
- Place the bittersweet chocolate pieces in a large microwaveable bowl. Microwave on HIGH for 1 minute. Stir. Continue cooking in 30-second intervals, stirring each time, until the chocolate is completely smooth and melted. Be patient and avoid overheating, as burnt chocolate is irrecoverable.
- Set the bowl of melted chocolate – still in the microwaveable bowl – over another bowl filled with hot water on the counter. This creates a makeshift double boiler, keeping the chocolate warm and fluid while you prepare the other components. Make sure the bottom of the chocolate bowl doesn’t touch the water.
- In a separate mixing bowl, beat the egg whites with an electric mixer until soft peaks begin to form. Gradually add 1/4 cup of the granulated sugar while continuing to beat until stiff, shiny peaks form. The sugar helps stabilize the egg whites, creating a meringue-like texture that will provide lift to the cake.
- In another mixing bowl, cream the softened butter and the remaining 1/4 cup of granulated sugar with an electric mixer until the mixture is light and fluffy. This step is crucial for creating a tender crumb.
- Add the egg yolks to the butter mixture and beat for 1 minute until well combined.
- Add the very finely ground almonds (they should resemble a slightly gritty powder) and the brandy to the egg yolk mixture. Beat for 2 more minutes. The almonds act as a flour substitute, providing structure and a subtle nutty flavor, while the brandy adds depth and warmth.
- Ensure the melted chocolate is still slightly warm, but not scalding hot. Add the chocolate to the butter mixture a little at a time, stirring with a rubber spatula to combine well after each addition. Be gentle to avoid deflating the mixture.
- Fold just 1/4 of the chocolate-butter mixture into the beaten egg whites. This lightens the egg whites, making it easier to incorporate them into the rest of the batter without losing volume.
- Next, gently pour the chocolatey egg white mixture into the remaining chocolate-butter mixture. Carefully fold everything together until just combined. Avoid overmixing, as this will deflate the egg whites and result in a dense cake. The goal is to create a homogenous batter while preserving as much air as possible. This step is essential to keeping the egg whites from getting crushed and to avoid cooking the eggs into scrambled eggs.
- Pour the batter carefully into the prepared springform pan.
- Bake for 40-45 minutes if using an 8″ pan, or slightly less (about 35-40 minutes) for a 9″ pan. Monitor the cake closely, as baking times can vary depending on your oven.
- The cake is ready when a toothpick inserted into the center comes out with thick, moist but NOT wet crumbs stuck to it – it should NOT come out clean. This is key to achieving the signature “sunken” texture.
- Let the cake cool in the pan for 30 minutes. The cake will sink considerably as it cools, which is perfectly normal and part of its charm.
- Remove the outer ring of the springform pan and invert the cake onto a platter.
- Peel off the parchment paper.
- Sprinkle with additional granulated sugar (or powdered sugar) for a touch of sweetness and visual appeal.
- Serve warm, with a dollop of sweetened whipped cream on top, and a garnish of fresh berries in season.
Expert Tips & Tricks
- Use high-quality bittersweet chocolate. The better the chocolate, the richer and more complex the flavor of the cake.
- Grind the almonds as finely as possible. This will prevent a gritty texture and ensure they blend seamlessly into the batter. A food processor works best for this.
- Room temperature butter is crucial for creaming. If the butter is too cold, it won’t incorporate properly with the sugar, resulting in a lumpy batter.
- Be gentle when folding the egg whites. Overmixing will deflate them and result in a dense cake.
- Don’t overbake the cake. It should be slightly underbaked, with moist crumbs clinging to a toothpick. This is what gives it its signature sunken and fudgy texture.
- If you don’t have brandy, you can substitute with rum or coffee liqueur, or even a strong cup of coffee.
- For an extra layer of flavor, add a pinch of sea salt to the batter. It enhances the sweetness of the chocolate.
Serving & Storage Suggestions
This Sunken Chocolate Cake is best served warm or at room temperature. The warmth enhances the fudgy texture and intensifies the chocolate flavor. A dollop of sweetened whipped cream and fresh berries provide a delightful contrast in textures and flavors.
Leftovers can be stored in an airtight container in the refrigerator for up to 3 days. Bring the cake to room temperature before serving for the best texture. The cake can also be frozen for up to 2 months. Wrap it tightly in plastic wrap and then in foil before freezing. Thaw overnight in the refrigerator.
Nutritional Information
| Nutrient | Amount per Serving | % Daily Value |
|---|---|---|
| Calories | 320 kcal | 16% |
| Total Fat | 22g | 28% |
| Saturated Fat | 13g | 65% |
| Cholesterol | 120mg | 40% |
| Sodium | 40mg | 2% |
| Total Carbohydrate | 25g | 9% |
| Dietary Fiber | 2g | 7% |
| Sugars | 18g | N/A |
| Protein | 6g | 12% |
Note: Nutritional information is an estimate and may vary depending on specific ingredients and portion sizes.
Variations & Substitutions
- Nut-Free: If you have a nut allergy, substitute the ground almonds with equal parts of ground sunflower seeds or oat flour.
- Dairy-Free: Use a dairy-free butter substitute and ensure your chocolate is dairy-free as well.
- Espresso Boost: Add a teaspoon or two of instant espresso powder to the melted chocolate for a richer, more intense flavor.
- Citrus Zest: Grate the zest of an orange or lemon into the batter for a bright, aromatic twist.
- Spice it Up: Add a pinch of cinnamon or cayenne pepper to the batter for a warm, spicy kick.
FAQs (Frequently Asked Questions)
Q: Why does the cake sink in the middle?
A: The sunken center is intentional! It’s due to the high moisture content and the absence of traditional flour, creating a dense, fudgy texture rather than a fluffy cake.
Q: Can I use a different type of chocolate?
A: While bittersweet chocolate is recommended for its depth of flavor, you can experiment with semi-sweet or dark chocolate depending on your preference. Just be mindful of the sugar content, as sweeter chocolate might require adjusting the sugar in the recipe.
Q: My egg whites aren’t forming stiff peaks. What am I doing wrong?
A: Ensure your mixing bowl and beaters are clean and free of any grease or residue. Also, make sure no egg yolk gets into the egg whites, as this can inhibit their ability to whip properly.
Q: Can I make this cake ahead of time?
A: Yes, this cake can be made a day or two in advance. Store it in the refrigerator and bring it to room temperature before serving.
Q: Can I freeze the cake?
A: Yes, wrap the cake tightly in plastic wrap and then in foil before freezing for up to 2 months. Thaw overnight in the refrigerator before serving.
Final Thoughts
This Sunken Chocolate Cake is more than just a dessert; it’s an experience. From the rich, fudgy texture to the intense chocolate flavor, every bite is a celebration of indulgence. Don’t be intimidated by the slightly unconventional method – it’s surprisingly easy to make, and the results are truly unforgettable. So, preheat your oven, gather your ingredients, and prepare to be transported to chocolate heaven. And please, share your creations and any variations you try – I love hearing about your baking adventures! Pair with a glass of chilled red wine or a scoop of vanilla ice cream for the ultimate treat. Happy baking!