
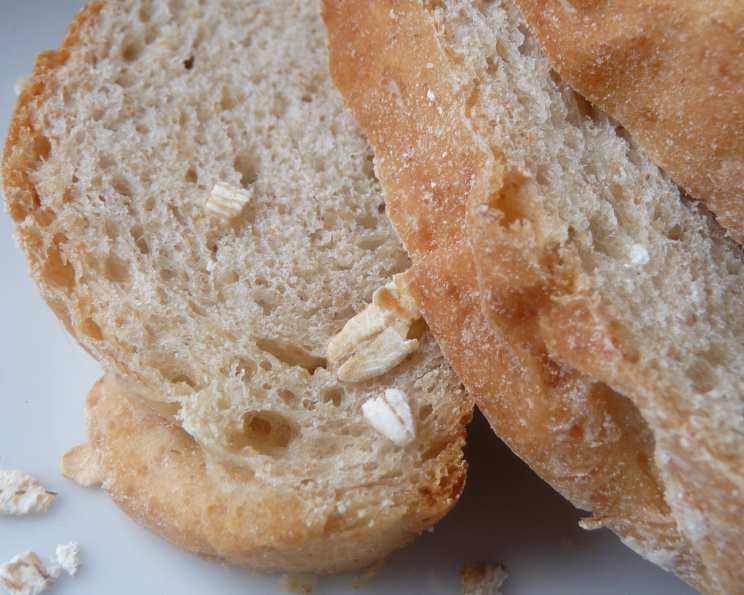
Sunset Magazine’s Irish Oatmeal Bread: A Culinary Embrace
There’s something deeply comforting about the aroma of baking bread filling the kitchen. My grandmother, a true Irish matriarch, always had a loaf of something warm emerging from her oven. While she never explicitly made this Sunset Magazine’s Irish Oatmeal Bread (steel-cut oats weren’t quite as ubiquitous back then!), the essence – that wholesome, nutty, subtly sweet fragrance and the satisfyingly dense yet tender crumb – instantly transports me back to her cozy kitchen. It’s more than just bread; it’s a hug from the past, a reminder of simple pleasures and the love baked into every homemade creation.
Recipe Overview
- Prep Time: 40 minutes (includes soaking and rising)
- Cook Time: 45 minutes
- Total Time: 1 hour 25 minutes
- Servings: 16 slices (2 loaves)
- Yield: 2 loaves
- Dietary Type: Vegetarian
Ingredients
- 2 1⁄4 cups boiling water
- 1 3⁄4 cups steel-cut oats
- 1 tablespoon salt
- 3 tablespoons olive oil
- 3 tablespoons light brown sugar
- 1 dash granulated sugar
- 2 1⁄4 ounces dry yeast (about 2 1/4 teaspoons each)
- 1⁄2 cup warm water (100 to 110°F)
- 5 1⁄4 cups all-purpose flour, divided
- 1 cup whole wheat flour
Equipment Needed
- Stand mixer
- Measuring cups and spoons
- Large mixing bowl
- Clean kitchen towel or plastic wrap
- Floured surface
- Two 9-inch loaf pans
- Wire racks
Instructions
-
Oatmeal Soak: In the bowl of a stand-up mixer, combine the boiling water, steel-cut oats, salt, olive oil, and light brown sugar. Let this mixture stand for 25 minutes. This crucial step allows the oats to soften and release their starches, contributing to the bread’s unique texture.
-
Yeast Activation: While the oats are soaking, dissolve the granulated sugar and dry yeast in the warm water. Let this mixture stand for 5 minutes, or until foamy. This ensures that the yeast is active and ready to leaven the bread.
-
Combining Ingredients: Add the foamy yeast mixture to the oat mixture in the stand mixer.
-
Flour Incorporation: Lightly spoon the all-purpose flour and whole wheat flour into dry measuring cups; level with a knife. Gradually add the flour to the oat mixture, using the stand mixer with the dough hook attachment. Beat at medium speed until well blended.
-
Kneading: Turn the dough out onto a floured surface. Knead until smooth and elastic (about 8 minutes). Add enough of the all-purpose flour, 1 tablespoon at a time, to prevent the dough from sticking to your hands. The dough will still feel slightly sticky, but manageable. Resist the urge to add too much flour, as this can result in a dry loaf.
-
First Rise: Place the dough in a large bowl coated with cooking spray, turning to coat the top. Cover the bowl with a clean kitchen towel or plastic wrap and let rise in a warm place (85°F), free from drafts, for 1 hour, or until doubled in size. To test if the dough has risen enough, gently press two fingers into the dough. If the indentation remains, the dough has risen sufficiently.
-
Punch Down and Rest: Punch the dough down to release the trapped air. Cover the dough and let it rest for 5 minutes. This allows the gluten to relax, making it easier to shape.
-
Shaping the Loaves: Divide the dough in half. Working with one portion at a time (cover the remaining dough to prevent drying), roll each portion into a 14 x 8-inch rectangle on a floured surface.
-
Rolling and Sealing: Roll up each rectangle tightly, starting with a short edge, pressing firmly to eliminate any air pockets. Pinch the seam and ends to seal, ensuring a smooth and even loaf.
-
Second Rise: Place each loaf, seam sides down, in a 9-inch loaf pan coated with cooking spray. Cover the loaf pans and let rise for 30 minutes, or until doubled in size.
-
Baking: Preheat oven to 350ºF (175°C). Bake at 350ºF for 45 minutes, or until the loaves are browned on the bottom and sound hollow when tapped.
-
Cooling: Remove the loaves from the pans and cool on wire racks completely before slicing. This prevents the bread from becoming gummy.
Expert Tips & Tricks
- Temperature Matters: Accurate oven temperature is crucial for even baking. Use an oven thermometer to ensure your oven is properly calibrated.
- Proofing Location: Create a warm environment for rising by placing the dough in a slightly warmed oven (turned off, of course!) or near a warm stovetop.
- Kneading Technique: Proper kneading develops the gluten, creating a chewy texture. If you don’t have a stand mixer, knead vigorously by hand for the full 8 minutes.
- Doneness Test: To check for doneness, insert a wooden skewer into the center of the loaf. If it comes out clean, the bread is done. You can also check by tapping the bottom of the loaf. It should sound hollow.
- Preventing Over-Browning: If the top of the loaves start to brown too quickly, tent them with foil during the last 15 minutes of baking.
Serving & Storage Suggestions
This Irish Oatmeal Bread is delicious served warm with butter, jam, or honey. It also makes excellent toast or sandwiches. For a truly decadent treat, try it grilled with cheese.
To store, wrap the cooled loaves tightly in plastic wrap or store them in an airtight container at room temperature for up to 3 days. For longer storage, freeze the loaves for up to 2 months. Thaw completely before slicing and serving. You can refresh the bread by lightly toasting it or warming it in the oven.
Nutritional Information
| Nutrient | Amount per Serving | % Daily Value |
|---|---|---|
| Calories | 572.7 kcal | N/A |
| Calories from Fat | 82g | 14% |
| Total Fat | 9.2 g | 14% |
| Saturated Fat | 1.4 g | 6% |
| Cholesterol | 0 mg | 0% |
| Sodium | 882.7 mg | 36% |
| Total Carbohydrate | 104.4 g | 34% |
| Dietary Fiber | 9.6 g | 38% |
| Sugars | 5.3 g | N/A |
| Protein | 19.4 g | 38% |
Note: These values are estimates and may vary depending on the specific ingredients used.
Variations & Substitutions
- Sweetness Boost: Add 1/4 cup of raisins or other dried fruit to the dough for a touch of added sweetness.
- Nutty Flavor: Incorporate 1/2 cup of chopped walnuts or pecans for a more pronounced nutty flavor.
- Herbaceous Twist: Add 1 tablespoon of fresh rosemary or thyme to the dough for a savory variation.
- Dairy-Free: The recipe is already naturally dairy-free. Just ensure your yeast is also dairy-free if that is a concern.
- Gluten-Free: While this recipe is specifically designed for all-purpose and whole wheat flour, you could experiment with a gluten-free all-purpose flour blend, but the results will vary and may require adjustments to the liquid and rising times.
FAQs (Frequently Asked Questions)
Q: Why is it important to soak the steel-cut oats?
A: Soaking the oats softens them and releases their starches, contributing to the bread’s moist and tender texture. It also helps to prevent the oats from drawing too much moisture from the dough during baking.
Q: Can I use instant yeast instead of dry active yeast?
A: Yes, you can substitute instant yeast. You can add it directly to the dry ingredients without proofing it in warm water first.
Q: How do I know if my dough has risen enough?
A: Gently press two fingers into the dough. If the indentation remains, the dough has risen sufficiently. If the indentation springs back immediately, let the dough rise for a bit longer.
Q: Can I freeze this bread?
A: Yes, this bread freezes well. Wrap the cooled loaves tightly in plastic wrap or store them in an airtight freezer bag for up to 2 months.
Q: My bread is browning too quickly. What should I do?
A: If the top of the loaves start to brown too quickly, tent them with foil during the last 15 minutes of baking to prevent burning.
Final Thoughts
This Sunset Magazine’s Irish Oatmeal Bread is more than just a recipe; it’s an experience. From the comforting aroma that fills your kitchen to the satisfyingly wholesome taste, this bread is sure to become a new favorite. Don’t be afraid to experiment with variations and make it your own. I encourage you to try this recipe and share your feedback – and perhaps pair it with a bowl of warm Irish stew for a truly heartwarming meal. Happy baking!