
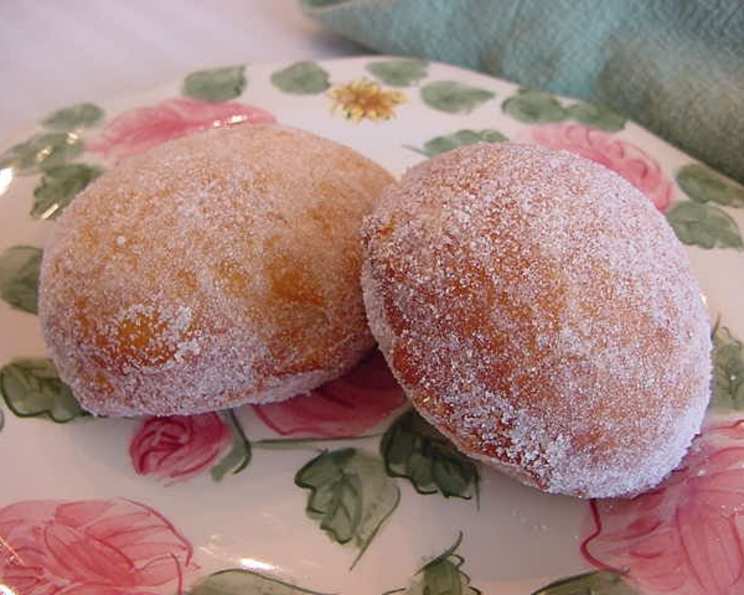
Super Easy Jelly Doughnuts
The memory is still so vivid: my grandmother’s kitchen, filled with the warm, sweet scent of frying dough. It was a chaotic symphony of sizzling oil, excited chatter, and the rhythmic clanging of her well-worn tongs. She wasn’t making fancy, gourmet doughnuts; hers were simple, honest, and utterly irresistible. These jelly doughnuts were a staple of her Sunday breakfasts, and one bite always transported me to a place of pure joy and comfort. While her recipe involved a yeasted dough that required hours of proofing, I’ve found a shortcut that captures that same nostalgic flavor in a fraction of the time.
Recipe Overview
- Prep Time: 5 minutes
- Cook Time: 5 minutes
- Total Time: 10 minutes
- Servings: 10 doughnuts
- Yield: 10 doughnuts
- Dietary Type: Vegetarian
Ingredients
- 20 refrigerated buttermilk biscuits (2 cans)
- ½ cup jelly (any flavor)
- 1 egg
- Oil (for frying)
Equipment Needed
- Large skillet or deep fryer
- Slotted spoon or tongs
- Paper towels
- Small bowl
- Pastry brush or your fingers
Instructions
-
Pour about 2 inches of oil into a large skillet or deep fryer. Heat the oil over medium heat until it reaches approximately 350°F (175°C). You can test the temperature by dropping a small piece of biscuit dough into the oil; it should sizzle and turn golden brown in about a minute.
-
While the oil is heating, prepare the biscuits. Remove the biscuits from the cans. On a clean surface, gently flatten each biscuit. I find that pressing them with the palm of my hand works well, but for a less doughy center, flatten them until they are almost translucent. Be careful not to tear the dough.
-
Spoon about 2 teaspoons of jelly onto 10 of the flattened biscuits, placing it in the center. Avoid overfilling, as the jelly will leak out during frying.
-
In a small bowl, lightly beat the egg. Brush the edges of the jellied biscuits with the egg . This will help the top biscuits adhere properly, preventing the jelly from escaping.
-
Carefully place the remaining 10 flattened biscuits on top of the jellied biscuits, creating little sandwiches. Press firmly around the edges to seal, ensuring that the jelly is completely enclosed. You can use a fork to crimp the edges for a more secure seal and a decorative touch.
-
Once the oil is hot, carefully place the doughnuts into the hot oil, being careful not to overcrowd the pan. Fry the doughnuts for about 1-2 minutes per side, or until they are golden brown and puffed up. Monitor the heat and adjust as needed to prevent burning.
-
Remove the doughnuts from the oil using a slotted spoon or tongs and place them on a plate lined with paper towels to drain excess oil. Allow them to cool slightly before serving.
-
Enjoy!
Expert Tips & Tricks
- Temperature Control is Key: Maintaining the correct oil temperature is crucial for perfectly cooked doughnuts. If the oil is too hot, the outside will burn before the inside is cooked. If it’s too cold, the doughnuts will absorb too much oil and become greasy. Use a thermometer for best results, or test with a small piece of dough.
- Don’t Overcrowd the Pan: Frying too many doughnuts at once will lower the oil temperature, resulting in soggy doughnuts. Fry them in batches to maintain optimal heat.
- Seal the Edges Well: A proper seal is essential to prevent the jelly from leaking out during frying. Use a fork to crimp the edges for an extra layer of security.
- Make-Ahead Option: You can assemble the doughnuts ahead of time and store them in the refrigerator for up to an hour before frying. This is helpful if you’re preparing a large batch.
- Prevent Soggy Doughnuts: After frying, place the doughnuts on a wire rack placed over a baking sheet instead of directly on paper towels. This allows air to circulate around them, preventing the bottoms from becoming soggy.
Serving & Storage Suggestions
These jelly doughnuts are best enjoyed warm and fresh, ideally within a few hours of frying. You can serve them as a delightful breakfast treat, a satisfying afternoon snack, or a fun dessert. Dust them with powdered sugar for an extra touch of sweetness and elegance.
Leftover doughnuts can be stored in an airtight container at room temperature for up to 2 days. They will lose some of their crispness, but they will still be delicious. For longer storage, you can freeze them for up to 2 months. Wrap each doughnut individually in plastic wrap, then place them in a freezer-safe bag or container. To reheat, thaw them at room temperature and warm them in a low oven (around 300°F or 150°C) for a few minutes. Alternatively, you can microwave them for a few seconds, but be careful not to overheat them, as they can become tough.
Nutritional Information
| Nutrient | Amount per Serving | % Daily Value |
|---|---|---|
| Calories | 243 kcal | 12% |
| Total Fat | 9g | 11% |
| Saturated Fat | 2g | 10% |
| Cholesterol | 21mg | 7% |
| Sodium | 676mg | 30% |
| Total Carbohydrate | 38g | 14% |
| Dietary Fiber | 1g | 4% |
| Sugars | 14g | 28% |
| Protein | 4g | 8% |
Note: Nutritional information is an estimate and may vary based on specific ingredients and portion sizes.
Variations & Substitutions
- Different Jelly Flavors: Experiment with different jelly flavors to create a variety of doughnuts. Raspberry, strawberry, grape, and apricot are all excellent choices. You can also use jam or preserves for a more textured filling.
- Cream-Filled Doughnuts: Instead of jelly, fill the doughnuts with pastry cream, whipped cream, or even chocolate ganache for a decadent treat.
- Glazed Doughnuts: After frying, dip the warm doughnuts in a simple glaze made from powdered sugar and milk for a classic glazed doughnut experience.
- Cinnamon Sugar Doughnuts: Toss the warm doughnuts in a mixture of cinnamon and sugar for a warm and comforting flavor.
- Savory Doughnuts: For a savory twist, omit the jelly and fill the doughnuts with cheese, ham, or other savory fillings.
FAQs (Frequently Asked Questions)
Q: Can I use a different type of biscuit dough?
A: While buttermilk biscuits are recommended for their flavor and texture, you can experiment with other types of refrigerated biscuit dough. Keep in mind that the cooking time may vary depending on the thickness and density of the dough.
Q: My jelly is leaking out while frying. What am I doing wrong?
A: This could be due to several factors. Make sure you are not overfilling the doughnuts with jelly, and that you are sealing the edges tightly. Also, ensure that the oil temperature is not too high, as this can cause the dough to burst.
Q: Can I bake these instead of frying?
A: While frying yields the most authentic doughnut texture, you can try baking them. Preheat your oven to 375°F (190°C) and bake for 12-15 minutes, or until golden brown. The texture will be more cake-like than a traditional fried doughnut.
Q: How can I tell if the oil is hot enough without a thermometer?
A: If you don’t have a thermometer, you can test the oil by dropping a small piece of biscuit dough into it. If the dough sizzles and turns golden brown in about a minute, the oil is ready.
Q: Can I use a different type of oil for frying?
A: Yes, you can use any neutral-flavored oil with a high smoke point, such as vegetable oil, canola oil, or peanut oil.
Final Thoughts
These Super Easy Jelly Doughnuts are a testament to the fact that delicious food doesn’t always have to be complicated. With just a handful of ingredients and a few simple steps, you can create a batch of warm, comforting treats that will bring joy to your family and friends. Don’t be afraid to experiment with different flavors and toppings to make them your own. So, gather your ingredients, heat up the oil, and get ready to experience the simple pleasure of homemade jelly doughnuts. I’d love to hear how your doughnuts turn out – share your pictures and variations! Pair these with a strong cup of coffee or a cold glass of milk for the perfect sweet treat.