
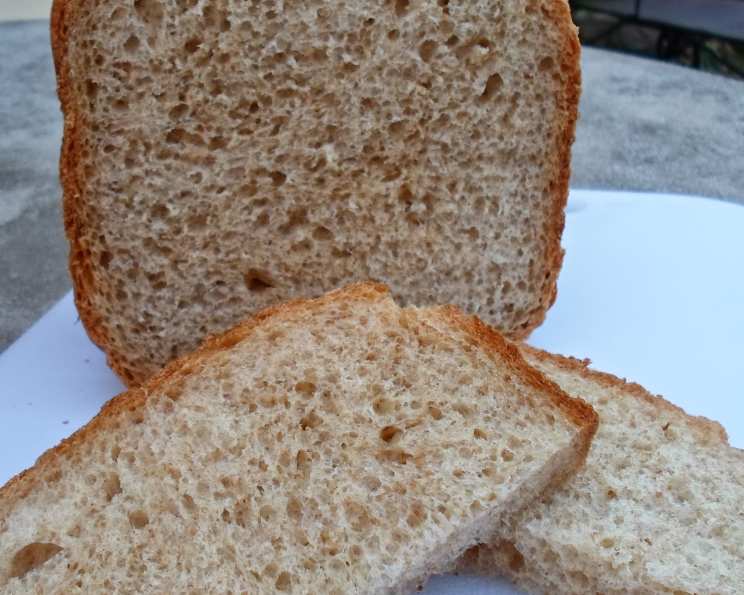
The Softest Embrace: Baking My Way Back to Childhood with Wheat Bread
My grandmother’s kitchen was always a haven, a place where the air hung thick with the scent of warm yeast and possibilities. Her wheat bread, a simple loaf really, was the centerpiece of every family gathering. Its aroma would weave through the house, beckoning us to the table. The slightly crusty exterior gave way to an interior so soft, so yielding, it was like a hug in bread form. To this day, the mere thought of it transports me back to those cherished moments, reminding me of her unwavering love and the simple pleasures of a home-baked loaf.
Recipe Overview
- Prep Time: 25 minutes
- Cook Time: varies
- Total Time: 2 hours
- Servings: 8
- Yield: 1 loaf
- Dietary Type: Vegetarian
Ingredients
- 1 1⁄4 cups warm water (about 105-115°F)
- 2 teaspoons yeast (active dry or instant)
- 3 tablespoons sugar
- 2 cups bread flour
- 1 1⁄2 cups wheat flour
- 2 tablespoons melted butter
- 1 1⁄2 teaspoons salt
Equipment Needed
- Bread machine
Instructions
- Activate the Yeast: In a small bowl, combine the warm water, yeast, and sugar. Gently stir to dissolve the sugar and yeast. Let this mixture sit undisturbed for 10-15 minutes. It should become frothy, indicating that the yeast is active and ready to work its magic. If it doesn’t froth, your yeast might be old and you’ll need to start again with fresh yeast.
- Prepare the Bread Machine Pan: Ensure your bread machine pan is clean and dry.
- Add the Wet Ingredients: Pour the frothy yeast mixture into the bread machine pan.
- Add the Dry Ingredients: Add the bread flour, wheat flour, melted butter, and salt to the bread machine pan, layering them on top of the wet ingredients. It’s important to keep the salt separate from the yeast at this stage, as salt can inhibit yeast activity.
- Select Bread Machine Settings: Close the bread machine lid and select the appropriate settings for a wheat bread loaf. This will typically involve choosing the loaf size (usually 1.5 or 2 pounds), crust color (light, medium, or dark), and the basic wheat bread cycle. Refer to your bread machine’s manual for specific instructions and cycle durations.
- Start the Bread Machine: Press the start button and let the bread machine do its work. The machine will go through a kneading, proofing, and baking process. Be patient! The machine knows what it’s doing.
- Monitor the Dough (Optional): While not usually necessary, you can peek at the dough through the bread machine’s viewing window during the kneading process. If the dough seems too dry, add a teaspoon or two of water. If it seems too wet, add a tablespoon or two of flour. Adjustments should be made gradually.
- Check for Doneness: Each bread machine bakes a little differently, it’s a good idea to check the manufacturer’s instructions for how long the baking process will take.
- Remove the Bread: Once the bread machine cycle is complete, carefully remove the bread machine pan from the machine. Use oven mitts, as the pan will be hot.
- Cool: Use oven mitts to remove the loaf from the bread machine pan, and set it on a cooling rack to cool completely before slicing. This is a very important step, if you cut the bread before it’s cool, the interior will be gummy and less pleasant.
Expert Tips & Tricks
- Temperature Matters: The warm water temperature is crucial for activating the yeast. Too cold, and the yeast won’t activate. Too hot, and you’ll kill the yeast. Aim for 105-115°F (40-46°C).
- Kneading is Key: The bread machine does the kneading for you, but if you were to make this by hand, ensure you knead the dough thoroughly until it becomes smooth and elastic. Proper kneading develops the gluten, which gives the bread its structure and texture.
- The Windowpane Test: If making by hand, the dough is ready when you can stretch a small piece of it into a thin, translucent membrane without it tearing. This is known as the windowpane test.
- Adjusting Flour: The amount of flour required may vary slightly depending on the humidity. Adjust the amount of flour accordingly to achieve a dough that is slightly sticky but not overly wet.
- Enhance the Flavor: For a richer flavor, try adding a tablespoon of honey or molasses along with the sugar. You can also add a teaspoon of vanilla extract for a subtle sweetness.
- Gluten Development: For a lighter, airier loaf, consider adding vital wheat gluten (about 1 tablespoon) to the dry ingredients. This will enhance the gluten development and result in a more open crumb structure.
- Troubleshooting: Bread machine bread not rising? Always check that your yeast hasn’t expired. Bread machine bread collapsing? You may have used too much liquid.
Serving & Storage Suggestions
Serve the super soft wheat bread warm with a pat of butter, a drizzle of honey, or alongside your favorite soup or salad. It’s also delicious toasted and topped with avocado, eggs, or jam.
Storage: Store the cooled bread in an airtight container at room temperature for up to 3 days, or in the refrigerator for up to a week. For longer storage, slice the bread and freeze it in a freezer-safe bag for up to 2 months. Thaw at room temperature before serving. To refresh, you can wrap the bread in foil and reheat it in a warm oven (300°F/150°C) for about 10-15 minutes.
Nutritional Information
| Nutrient | Amount per Serving | % Daily Value |
|---|---|---|
| Calories | 237 kcal | N/A |
| Total Fat | 3.8 g | 5% |
| Saturated Fat | 2 g | 9% |
| Cholesterol | 7.6 mg | 2% |
| Sodium | 464.1 mg | 19% |
| Total Carbohydrate | 45.2 g | 15% |
| Dietary Fiber | 3.5 g | 14% |
| Sugars | 4.9 g | N/A |
| Protein | 6.6 g | 13% |
Note: Nutritional information is an estimate and may vary based on specific ingredients and serving sizes.
Variations & Substitutions
- Honey Wheat Bread: Substitute the sugar with honey for a naturally sweeter flavor.
- Seed-Crusted Bread: Before baking, brush the top of the loaf with an egg wash (or milk for a dairy-free option) and sprinkle with sesame seeds, poppy seeds, or sunflower seeds.
- Herb-Infused Bread: Add a teaspoon of dried rosemary, thyme, or oregano to the dry ingredients for a savory twist.
- Dairy-Free Option: Use a plant-based butter alternative instead of melted butter.
- Whole Wheat Only: Use 3 1/2 cups of wheat flour instead of bread and wheat flour for a more rustic bread.
FAQs (Frequently Asked Questions)
Q: Can I make this bread without a bread machine?
A: Yes, you can. Combine the ingredients, knead the dough, let it rise, shape it into a loaf, and bake in a preheated oven at 350°F (175°C) for about 30-35 minutes, or until golden brown.
Q: Why is my bread dense and not fluffy?
A: This could be due to several factors, including using old yeast, not kneading the dough enough (if making by hand), or using too much flour.
Q: How do I know when the bread is done?
A: If baking in a bread machine, trust the machine’s timer. When baking in the oven, the bread is done when it is golden brown and sounds hollow when tapped on the bottom. An instant-read thermometer inserted into the center should read 190-200°F (88-93°C).
Q: Can I add nuts or dried fruit to this recipe?
A: Absolutely! Add about 1/2 cup of chopped nuts (such as walnuts or pecans) or dried fruit (such as raisins or cranberries) during the last few minutes of kneading.
Q: What is bread flour, and can I substitute it?
A: Bread flour has a higher protein content than all-purpose flour, which helps create a chewier, more structured bread. While all-purpose flour can be used in a pinch, the texture of the bread will be slightly different.
Final Thoughts
There’s something truly magical about baking bread. The simple act of combining flour, water, and yeast transforms into a warm, fragrant loaf that nourishes both body and soul. This super soft wheat bread recipe is more than just a set of instructions; it’s an invitation to create memories, share love, and experience the simple joys of homemade goodness. So, gather your ingredients, preheat your oven (or program your bread machine), and embark on a baking adventure. And who knows? Maybe this loaf will become a beloved tradition in your family too.