
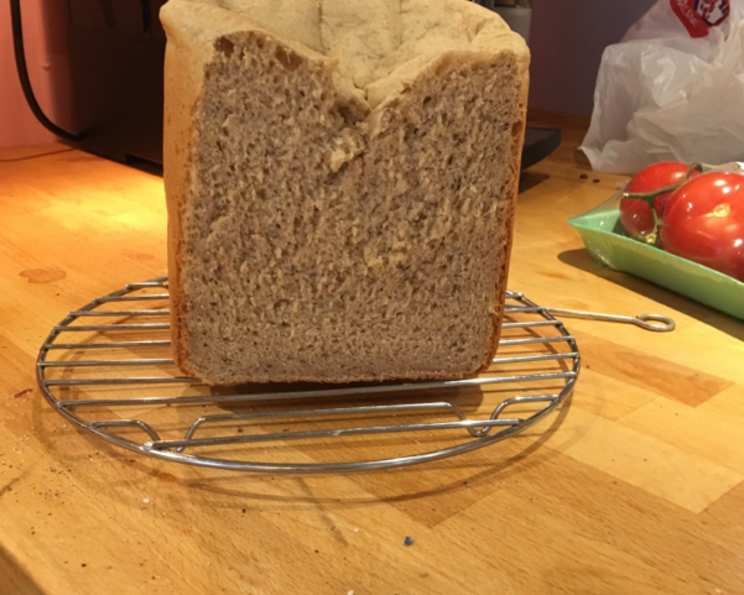
Superb Rye Bread (Bread Machine)
The aroma of rye bread baking always transports me back to my grandmother’s kitchen. She wasn’t much for elaborate dishes, but her rye bread, dense and fragrant, was legendary. It was a staple alongside her hearty soups and the base for open-faced sandwiches piled high with cold cuts. While she baked hers by hand, this bread machine version captures that same comforting flavor with much less effort, filling my kitchen with the same warm, nostalgic scent.
Recipe Overview
- Prep Time: 15 minutes
- Cook Time: 4 hours
- Total Time: 4 hours 15 minutes
- Servings: 12
- Yield: 1 loaf
- Dietary Type: Vegetarian
Ingredients
- 1 cup rye flour
- 2 3/4 cups bread flour
- 1/3 cup brown sugar (granulated)
- 2 teaspoons caraway seeds
- 1 1/2 teaspoons salt (kosher salt preferred)
- 2 tablespoons butter
- 1 1/2 cups warm water (around 110°F/43°C)
- 1 1/2 teaspoons dry yeast
Equipment Needed
- Bread Machine
Instructions
- Ensure all ingredients are at room temperature for optimal yeast activity. This will help the bread rise properly.
- Add the ingredients to the bread machine baking pan in the order suggested by your bread machine manufacturer. A general rule of thumb is to add the wet ingredients first, followed by the dry ingredients, with the yeast going in last, often in a small well on top of the flour. This prevents the yeast from activating prematurely. In this case, start with the warm water, followed by the melted butter, then the rye flour, bread flour, brown sugar, caraway seeds, salt, and finally the yeast.
- Select the basic setting on your bread machine. The suggested settings are: basic setting, medium size, and light crust. However, feel free to adjust the crust setting to your liking. A darker crust will provide a more intense flavor.
- Press the Start button to begin the baking cycle. Most bread machines will go through a kneading, rising, and baking cycle automatically.
- Allow the bread machine to complete its cycle. This usually takes around 4 hours.
- Once the baking cycle is complete, carefully remove the bread pan from the machine using oven mitts, as it will be very hot.
- Turn the bread pan upside down and gently shake or tap it to release the bread. If the bread is stuck, you can use a rubber spatula to loosen the sides.
- Place the loaf on a wire rack to cool completely before slicing. This prevents the bread from becoming soggy. Allow at least 30 minutes for cooling.
Expert Tips & Tricks
- Bloom the yeast: For an extra boost, especially if you’re unsure of your yeast’s freshness, dissolve the yeast in the warm water with a teaspoon of sugar. Let it stand for 5-10 minutes until it foams. This confirms the yeast is active. If it doesn’t foam, your yeast might be old and you’ll need to replace it. Adjust the sugar in the main recipe accordingly.
- Kneading Check: If you have a bread machine with a viewing window, check the dough during the kneading process. It should form a smooth, elastic ball. If it appears too wet, add a tablespoon of bread flour at a time. If it’s too dry and crumbly, add a tablespoon of water at a time.
- Flavor Boost: For a deeper, more complex flavor, try adding a tablespoon of molasses or dark corn syrup to the recipe. This will also contribute to a richer color.
- Gluten Development: Bread flour is crucial for gluten development, which gives the bread its structure and chewiness. Using all-purpose flour will result in a less sturdy loaf.
- Scoring: After the final rise, but before baking (if your bread machine allows), lightly score the top of the loaf with a sharp knife or lame. This controls how the bread expands during baking and prevents unwanted cracking.
- Crust Crispness: For a crispier crust, you can brush the top of the loaf with a little melted butter or an egg wash before baking.
Serving & Storage Suggestions
This rye bread is excellent served warm with butter, cream cheese, or alongside soups and stews. It makes fantastic sandwiches, especially with corned beef, pastrami, or other deli meats.
- Storage: Store leftover rye bread in an airtight container at room temperature for up to 3 days.
- Refrigeration: For longer storage, wrap the bread tightly in plastic wrap and store it in the refrigerator for up to a week.
- Freezing: To freeze, slice the bread and wrap it individually in plastic wrap or freezer bags. Freeze for up to 2 months. Thaw at room temperature or in the microwave.
- Reheating: Reheat slices of bread in a toaster, oven, or microwave. For a larger piece, wrap it in foil and heat it in a 350°F (175°C) oven for 10-15 minutes.
Nutritional Information
| Nutrient | Amount per Serving | % Daily Value |
|---|---|---|
| Calories | 177 kcal | 9% |
| Total Fat | 2.4 g | 4% |
| Saturated Fat | 1.2 g | 6% |
| Cholesterol | 0 mg | 0% |
| Sodium | 311 mg | 13% |
| Total Carbohydrate | 34 g | 11% |
| Dietary Fiber | 2 g | 8% |
| Sugars | 6.1 g | 0% |
| Protein | 4 g | 8% |
Note: Nutritional information is an estimate and may vary based on specific ingredients and serving sizes.
Variations & Substitutions
- Dark Rye Bread: Use dark rye flour instead of light rye flour for a more intense rye flavor and a darker color.
- Pumpernickel: Add 1/4 cup of unsweetened cocoa powder and 1 tablespoon of molasses to the recipe for a pumpernickel-style bread.
- Seeded Rye: In addition to caraway seeds, add other seeds such as sesame, poppy, or sunflower seeds for extra flavor and texture.
- Onion Rye: Add 1/4 cup of dried minced onion to the recipe. You can also sauté fresh onions and add them to the bread machine.
- Beer Rye: Substitute some of the water with beer (such as a dark ale or stout) for a richer, more complex flavor.
- Gluten-Free: While difficult to replicate the exact texture, you can experiment with gluten-free bread flour blends designed for bread machines, keeping in mind that you may need to adjust the liquid content. Ensure your yeast is also certified gluten-free.
FAQs (Frequently Asked Questions)
Q: Can I use instant yeast instead of active dry yeast?
A: Yes, you can. Instant yeast (also called bread machine yeast) can be added directly to the dry ingredients without proofing. Use the same amount as the active dry yeast called for in the recipe.
Q: My bread is sinking in the middle. What went wrong?
A: This could be due to several factors, including too much liquid, too much yeast, or the oven being too hot. Try reducing the amount of water slightly or using a bit less yeast. Also, make sure your bread machine is not in direct sunlight or a drafty area, as this can affect the rising process.
Q: The crust is too hard. How can I soften it?
A: After baking, brush the top of the loaf with melted butter or olive oil. You can also place the bread in a plastic bag while it’s still warm to trap moisture and soften the crust.
Q: Can I add raisins or other dried fruits to this recipe?
A: Yes, you can add about 1/2 cup of raisins or other dried fruits during the kneading cycle. Most bread machines have a dispenser for add-ins, or you can add them manually about halfway through the kneading process.
Q: My bread is too dense. What can I do to make it lighter?
A: Make sure your yeast is fresh and active. Also, avoid using too much rye flour, as rye flour is heavier than bread flour and can make the bread dense. Ensure accurate measurements.
Final Thoughts
There’s something profoundly satisfying about the process of baking, especially when it results in a loaf as comforting and flavorful as this rye bread. It’s a simple recipe, made even easier with a bread machine, that yields a delicious result that rivals bakery-bought loaves. So, gather your ingredients, dust off that bread machine, and prepare to fill your kitchen with the irresistible aroma of homemade rye bread. Share it with friends and family, or simply savor a slice (or two!) yourself. I hope this recipe brings as much joy to your table as it does to mine. Bon appétit!