
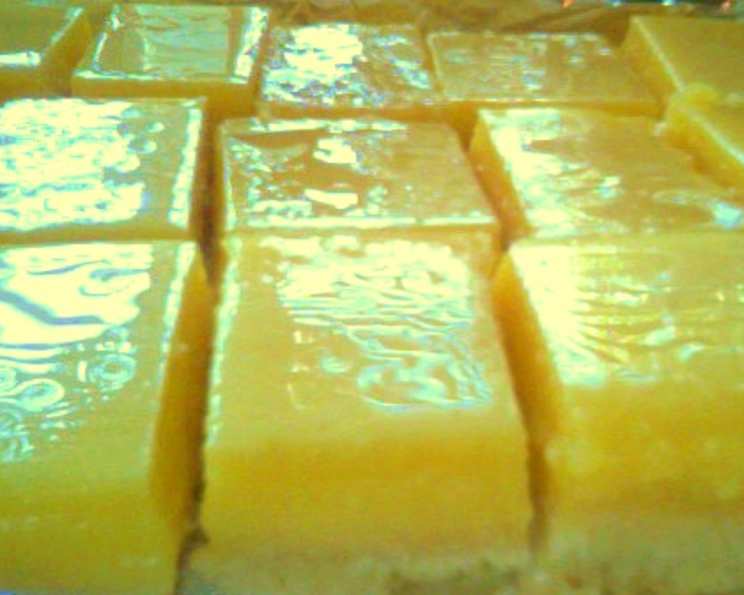
Susan’s Perfect Lemon Bars: A Taste of Sunshine
There’s something magical about a lemon bar, isn’t there? For me, it instantly transports me back to my grandmother’s sun-drenched kitchen. The scent of citrus would fill the air as she carefully arranged these golden squares on a vintage platter. They were always a crowd-pleaser, a guaranteed mood booster, and a tangible expression of her love – a tradition I’m thrilled to share with you.
Recipe Overview
- Prep Time: 1 hour 30 minutes
- Cook Time: 20 minutes (crust) + 20 minutes (filling)
- Total Time: 1 hour 50 minutes
- Yields: 12 bars
- Dietary Type: Vegetarian
Ingredients
Crust:
- 1 ¾ cups all-purpose flour
- ⅔ cup confectioners’ sugar (plus extra to sprinkle over finished bars)
- ¼ cup cornstarch
- ¾ teaspoon salt
- 12 tablespoons sweet unsalted butter, at cool room temperature, cut into 1-inch pieces
- Extra butter, for greasing pan
Lemon Filling:
- 4 large eggs, lightly beaten
- 1 ⅓ cups granulated sugar
- 3 tablespoons all-purpose flour
- 2 teaspoons finely grated lemon zest (from 2 large lemons)
- ⅔ cup fresh lemon juice, strained (from 3-4 large lemons)
- ⅓ cup whole milk
- ⅛ teaspoon salt
Equipment Needed
- 9×13 inch baking dish
- Parchment paper
- Food processor (optional)
- Medium bowl
- Whisk
- Lemon zester
- Fine-mesh sieve or strainer
- Pizza cutter or knife
- Wire rack
Instructions
-
Prepare for Baking: Adjust oven rack to middle position and heat oven to 350°F (175°C). Lightly butter a 9 x 13 inch baking dish and line it with a sheet of parchment paper. Dot the parchment paper with butter, then lay a second sheet of parchment crosswise over the first one, allowing the ends to extend over the top edge of the pan by about 1 inch. This overhang makes it easy to lift the finished lemon bars out of the pan.
-
Make the Crust (Food Processor Method): In a food processor, fitted with the steel blade, pulse together the flour, confectioners’ sugar, cornstarch, and salt to mix well. Add 12 tablespoons of butter and process to blend (about 8 to 10 seconds), then pulse until the mixture is a pale yellow color and resembles a coarse meal (about three 1-second bursts). Be careful not to over-process.
-
Make the Crust (Hand Method): Alternatively, mix flour, confectioners’ sugar, cornstarch, and salt together in a medium bowl. Freeze the butter and grate it on the large holes of a box grater into the flour mixture. This ensures the butter stays cold and creates the right texture. Toss the butter pieces to coat them with the flour. Rub the coated butter pieces between your fingers for a minute, until the flour turns pale yellow and coarse.
-
Press and Chill the Crust: Sprinkle the crust mixture into the parchment-lined pan. Using both hands, firmly press the mixture into an even, 1/4-inch layer over the entire pan bottom and about 1/2-inch up the sides. It’s crucial to pack the crust firmly for a sturdy base. Refrigerate for about 30 minutes. Chilling helps the crust hold its shape during baking.
-
Bake the Crust: Remove the chilled crust and bake at 350°F (175°C) for about 20 minutes, or until golden brown. Keep a close eye on it; you want it to be nicely browned but not burnt.
-
Prepare the Lemon Filling: While the crust is baking, prepare the filling. In a medium bowl, whisk the eggs, sugar, and flour until well combined. This prevents lumps and ensures a smooth filling. Stir in the lemon zest, juice, milk, and salt, stirring to blend well. The zest adds incredible flavor, so don’t skip it.
-
Lower Oven Temperature: Remove the crust from the oven and reduce the oven temperature to 325°F (160°C).
-
Pour and Bake the Filling: Stir the filling mixture to reblend and pour it over the warm crust. It’s essential that the crust is warm when the filling is poured on. Return the bars to the oven and bake for about 20 minutes, or until the filling feels firm when lightly touched. The filling should jiggle slightly, but not be liquid.
-
Cool and Cut: Remove from oven and place the pan on a wire rack to cool until almost room temperature (at least 30 minutes). This cooling period is critical for the filling to set properly. Grasp the edges of the lengthwise parchment paper (long sides of the pan) and lift the lemon bars out of the pan and onto a cutting board or counter. Carefully peel the paper down from the sides. Using a pizza cutter or knife, slice them into serving-size bars, wiping the pizza cutter or knife clean between cuts as necessary. This will give you clean, professional-looking slices.
-
Dust with Sugar: Sieve confectioners’ sugar over the bars, if desired. This adds a beautiful finishing touch and a hint of extra sweetness.
Expert Tips & Tricks
- Don’t Overbake: Overbaking will result in a cracked and dry filling. A slight jiggle in the center is okay when you take them out of the oven. They will continue to set as they cool.
- Fresh Lemon Juice is Key: Bottled lemon juice simply doesn’t have the same bright, fresh flavor. Make sure to use freshly squeezed lemon juice for the best results.
- Zest Matters: Don’t underestimate the power of lemon zest. It adds a concentrated citrus flavor that really elevates the lemon bars.
- Warm Crust is Crucial: Pouring the filling onto a warm crust prevents the crust from becoming soggy.
- Patience is a Virtue: Allowing the lemon bars to cool completely before cutting is essential for clean slices.
Serving & Storage Suggestions
Serve these delightful lemon bars chilled or at room temperature. A dusting of confectioners’ sugar adds an elegant touch.
Storage: Leftover bars can be sealed in plastic wrap or an airtight container and refrigerated for up to 2 days. They are best enjoyed within the first day or two for optimal freshness. While freezing is possible, it can affect the texture of the filling, making it slightly less smooth. If freezing, wrap them individually in plastic wrap and then place them in a freezer-safe container. Thaw in the refrigerator overnight.
Nutritional Information
Please note that this is an estimate and can vary based on specific ingredients used.
| Nutrient | Amount per Serving | % Daily Value |
|---|---|---|
| Calories | 327 kcal | 16% |
| Total Fat | 13.4 g | 20% |
| Saturated Fat | 7.8 g | 39% |
| Cholesterol | 101.1 mg | 33% |
| Sodium | 198 mg | 8% |
| Total Carbohydrate | 48.2 g | 16% |
| Dietary Fiber | 0.6 g | 2% |
| Sugars | 29.6 g | N/A |
| Protein | 4.6 g | 9% |
Variations & Substitutions
- Gluten-Free: Use a gluten-free all-purpose flour blend for the crust and filling. You may need to adjust the baking time slightly.
- Vegan: While this recipe isn’t easily made vegan, you could try using a vegan butter substitute for the crust and a vegan egg replacement for the filling. Be aware the taste and texture will differ.
- Lime Bars: Substitute lime zest and juice for the lemon zest and juice for a zesty lime twist.
- Orange Bars: Substitute orange zest and juice for the lemon zest and juice for a sweet and tangy treat.
- Lavender Lemon Bars: Add 1 teaspoon of culinary lavender to the filling mixture for a floral twist.
FAQs (Frequently Asked Questions)
Q: Why is my lemon bar filling cracked?
A: Overbaking is the most common cause of cracked lemon bar filling. Be sure to check for doneness at the minimum baking time and look for a slight jiggle in the center.
Q: Can I make the crust ahead of time?
A: Yes, you can bake the crust a day ahead of time. Let it cool completely and store it in an airtight container at room temperature.
Q: Can I use bottled lemon juice instead of fresh?
A: While you can, we highly recommend using fresh lemon juice for the best flavor. Bottled juice often lacks the bright, vibrant taste of fresh lemons.
Q: How do I prevent the crust from sticking to the pan?
A: Lining the baking dish with parchment paper is the best way to prevent sticking. Make sure to leave an overhang for easy removal.
Q: Why do I need to strain the lemon juice?
A: Straining the lemon juice removes any pulp and seeds, resulting in a smoother filling.
Final Thoughts
These lemon bars are more than just a dessert; they’re a small slice of sunshine, perfect for sharing with loved ones or savoring all on your own. I encourage you to try this recipe and experience the joy of baking. Don’t be afraid to put your own spin on it! Let me know how they turn out – I can’t wait to hear your feedback. Pair them with a cup of Earl Grey tea for a delightful afternoon treat. Happy baking!