
Mastering Sushi Rice: The Foundation of Exquisite Rolls
The first time I attempted sushi at home, armed with a borrowed bamboo rolling mat and a sense of culinary adventure, the results were… interesting. The fish was fresh, the nori crisp, but the rice! Oh, the rice. It was either a gluey mess or stubbornly individual grains refusing to stick together. After much trial and error (and a few questionable takeout orders), I finally cracked the code: perfect sushi rice is the key. It’s the foundation upon which all great sushi is built, and mastering it opens up a whole world of delicious possibilities.
Recipe Overview
- Prep Time: 15 minutes
- Cook Time: 31 minutes
- Total Time: 46 minutes
- Servings: Variable (depending on sushi rolls made)
- Yield: 4 cups
- Dietary Type: Gluten-Free, Vegan
Ingredients
- 2 cups short-grain rice or sushi rice (NOT long-grained!!!!)
- 2 1/4 cups water
- 4 tablespoons sushi vinegar
For the Sushi Vinegar:
- 1/3 cup rice vinegar (or white vinegar)
- 2 tablespoons sugar
- 1 teaspoon salt
Equipment Needed
- Medium saucepan with lid
- Large non-metal bowl
- Wooden spatula
- Cookie sheet (optional)
- Aluminum foil (optional)
- Small saucepan
Instructions
-
Begin by preparing the sushi rice. Rinse the short-grain rice thoroughly in a bowl under cold running water until the water runs clear. This removes excess starch and prevents the rice from becoming too sticky.
-
In a medium saucepan, bring 2 1/4 cups of water to a boil over high heat.
-
Pour the rinsed rice into the boiling water. Return to a boil for one minute, uncovered. This initial burst of high heat helps activate the starch in the rice.
-
Immediately reduce the heat to the lowest possible setting, cover the saucepan tightly with a lid, and simmer for 20 minutes. It’s crucial to keep the lid on throughout this step to allow the rice to steam properly. Resist the urge to peek!
-
After simmering for 20 minutes, remove the saucepan from the heat and let it sit, still covered, for another 10 minutes. This allows the steam to redistribute and the rice to fully absorb the remaining water.
-
While the rice is steaming, prepare the sushi vinegar. In a small saucepan, combine 1/3 cup rice vinegar (or white vinegar), 2 tablespoons sugar, and 1 teaspoon salt.
-
Bring the vinegar mixture to a boil over medium heat, stirring constantly until the sugar and salt are completely dissolved. Remove from heat and set aside to cool slightly.
-
After the rice has rested for 10 minutes, gently transfer it to a large non-metal bowl (a wooden bowl is ideal, but plastic or glass will also work). Avoid using a metal bowl as it can react with the vinegar and affect the flavor of the rice.
-
Pour the sushi vinegar over the hot rice. Using a wooden spatula, gently cut in the vinegar, using a slicing and folding motion. Be careful not to mash the rice grains. The goal is to evenly distribute the vinegar without making the rice mushy.
-
Once the sushi vinegar is incorporated, let the rice cool further. A traditional method is to spread the rice out on aluminum foil on a cookie sheet to cool quickly. This helps to separate the grains and prevent clumping. You can also fan the rice gently with a paper fan or a clean kitchen towel to speed up the cooling process.
-
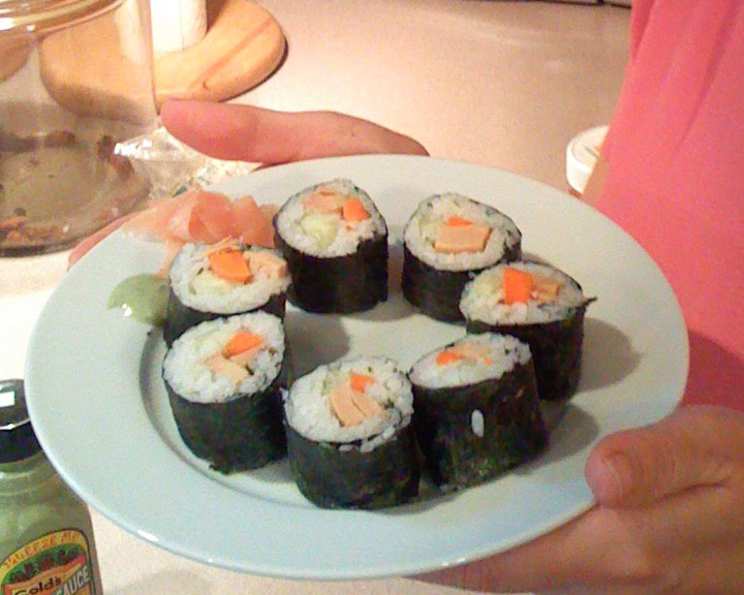
The sushi rice is now ready to use for rolling your favorite sushi!
Expert Tips & Tricks
- Rice Quality Matters: Investing in high-quality short-grain or sushi rice makes a significant difference. Look for brands specifically labeled for sushi.
- Rinsing is Key: Don’t skip the rinsing step! It removes excess starch, resulting in perfectly textured rice.
- Vinegar Temperature: Allow the sushi vinegar to cool slightly before adding it to the rice. If the vinegar is too hot, it can overcook the rice.
- Gentle Mixing: Be gentle when mixing the vinegar into the rice. Overmixing can make the rice sticky and clumpy.
- Don’t Overcook: Keep a close eye on the rice while it simmers to avoid burning or scorching.
- Wooden Utensils: Whenever possible, use wooden utensils when working with sushi rice. Wood is less reactive than metal and won’t impart any unwanted flavors.
- Adjust Sweetness: Feel free to adjust the amount of sugar in the sushi vinegar to your liking. Some prefer a sweeter rice, while others prefer a more tart flavor.
- Make Ahead: Sushi rice can be made ahead of time and stored in the refrigerator. However, it’s best used within 24 hours for optimal flavor and texture.
Serving & Storage Suggestions
Serve your freshly prepared sushi rice immediately with your favorite sushi fillings, such as raw fish, vegetables, and nori seaweed. You can also use it as a base for donburi bowls or poke bowls.
Leftover sushi rice should be stored in an airtight container in the refrigerator. It’s best consumed within 24 hours, as the rice can become dry and hard over time. To reheat, gently steam the rice or microwave it with a tablespoon of water until heated through. Be careful not to overcook it, as this can make it mushy. Do not leave cooked sushi rice at room temperature for more than two hours to prevent bacterial growth.
Nutritional Information
Please note that these values are estimates and can vary based on specific ingredients and portion sizes.
| Nutrient | Amount per Serving | % Daily Value |
|---|---|---|
| Calories | 210 kcal | 11% |
| Total Fat | 0.5g | 1% |
| Saturated Fat | 0.1g | 0% |
| Cholesterol | 0mg | 0% |
| Sodium | 147mg | 6% |
| Total Carbohydrate | 47g | 17% |
| Dietary Fiber | 0.6g | 2% |
| Sugars | 3.5g | |
| Protein | 3.8g | 8% |
Variations & Substitutions
- Vinegar Variety: Experiment with different types of vinegar, such as apple cider vinegar or champagne vinegar, for a unique flavor profile. Keep in mind these have different acidities than rice vinegar, so adjust the amount accordingly.
- Sugar Alternatives: If you’re looking to reduce your sugar intake, try using honey or maple syrup as a substitute for sugar in the sushi vinegar.
- Seasoned Rice Vinegar: For convenience, you can use pre-made seasoned rice vinegar, but be sure to taste and adjust the seasoning as needed.
- Brown Rice Sushi: While traditional sushi uses white short-grain rice, you can also use brown short-grain rice for a healthier alternative. Note that brown rice will require a longer cooking time and may result in a slightly chewier texture.
FAQs (Frequently Asked Questions)
Q: Why is it important to use short-grain rice for sushi?
A: Short-grain rice has a higher starch content than long-grain rice, which gives it a sticky texture that is essential for holding sushi rolls together.
Q: Can I use a rice cooker to make sushi rice?
A: Yes, you can use a rice cooker. Follow the rice cooker’s instructions for cooking short-grain rice, and then proceed with the vinegar seasoning as described in the recipe.
Q: How can I prevent the rice from sticking to the bowl or spatula?
A: Lightly dampen your hands and the wooden spatula with water before handling the rice. This will help prevent the rice from sticking.
Q: What is the best way to cool the rice quickly?
A: Spreading the rice out on a cookie sheet lined with aluminum foil and fanning it with a paper fan or clean kitchen towel will help it cool quickly and evenly.
Q: How long can I store sushi rice at room temperature?
A: Cooked sushi rice should not be left at room temperature for more than two hours to prevent bacterial growth. It’s best to refrigerate it promptly.
Final Thoughts
Mastering sushi rice is a culinary journey well worth taking. With a few simple ingredients and a bit of patience, you can create the perfect foundation for all your sushi creations. Don’t be afraid to experiment with different fillings and flavors to create your own signature sushi rolls. Once you get the hang of it, you’ll be impressing your friends and family with restaurant-quality sushi made right in your own kitchen. Now, grab your rolling mat and get ready to roll! And please, share your experiences – did you add any secret ingredients or find a particular technique that works best for you? I’m always eager to learn! Perhaps pair your homemade sushi with a crisp, dry sake for the ultimate dining experience.