
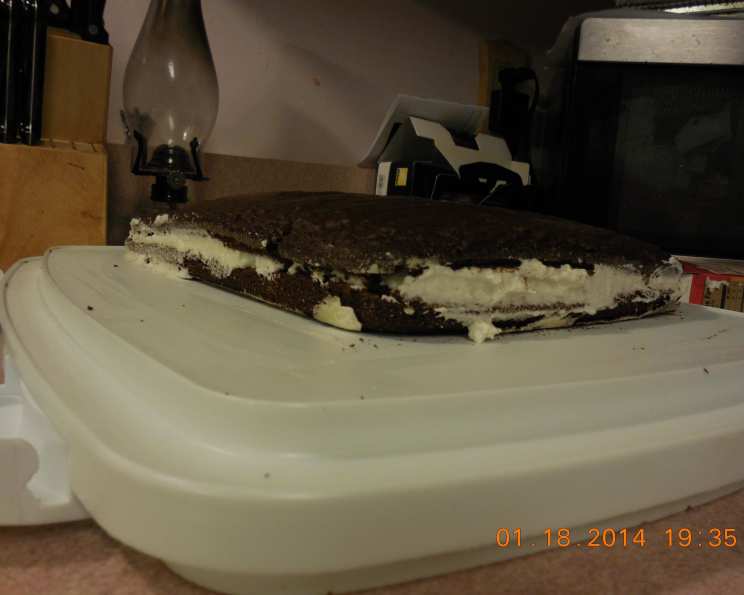
Homemade Suzy Q Cake: A Nostalgic Treat
I can still remember the crinkle of the cellophane wrapper, the unmistakable aroma of chocolate and cream, and the satisfying squish as I bit into my first Suzy Q. It was a cherished after-school indulgence, a little rectangular cloud of happiness. Recreating that iconic treat at home felt like a culinary quest, a journey back to simpler times and sweeter joys. This recipe captures the essence of that beloved snack cake, delivering a taste of nostalgia with every bite.
Recipe Overview
- Prep Time: 30 minutes
- Cook Time: 30 minutes
- Total Time: 60 minutes
- Servings: 20
- Dietary Type: Vegetarian
Ingredients
For the Cake:
- 18 1/4 ounces devil’s food cake mix
- 1 1/4 cups water
- 1/3 cup vegetable oil
- 3 eggs
For the Filling:
- 1 cup whole milk
- 5 tablespoons flour
- 1 cup granulated sugar
- 1 cup Crisco shortening
- 1/4 teaspoon salt
- 1 teaspoon vanilla extract, clear is best
- Powdered sugar, for dusting (optional)
Equipment Needed
- Large mixing bowl
- Electric mixer
- Measuring cups and spoons
- Greased and floured 13″ x 9″ baking pan
- Saucepan
- Whisk
- Refrigerator
- Flat surface for cutting
- Serrated knife
- Spatula
Instructions
-
Preheat your oven according to the instructions on your devil’s food cake mix box. This is crucial for even baking, so don’t skip this step!
-
In a large mixing bowl, combine the devil’s food cake mix, water, vegetable oil, and eggs. Use an electric mixer on medium speed to beat the ingredients together until a smooth batter forms. This should take about 2-3 minutes. Make sure to scrape down the sides of the bowl to ensure everything is well incorporated.
-
Prepare your 13″ x 9″ baking pan by greasing it thoroughly with butter or cooking spray, then flouring it. This will prevent the cake from sticking and make it easier to remove after baking. Pour the batter into the prepared pan, spreading it evenly.
-
Bake the cake according to the package directions on your devil’s food cake mix. The baking time will vary depending on your oven, but it usually takes around 25-30 minutes. To check for doneness, insert a toothpick into the center of the cake. If it comes out clean or with just a few moist crumbs, the cake is done.
-
Once the cake is baked, remove it from the oven and let it cool completely in the pan. This is important because trying to cut and handle the cake while it’s still warm can cause it to crumble.
-
While the cake is cooling, prepare the filling. In a saucepan, combine the whole milk and flour. Cook the mixture over low heat, whisking constantly, until it thickens into a smooth, pudding-like consistency. This usually takes about 5-7 minutes. Be patient and continue whisking to prevent lumps from forming.
-
Once the milk and flour mixture has thickened, remove it from the heat and let it cool completely in the refrigerator. This is a crucial step for achieving the right texture in your filling. Cooling it in the refrigerator will speed up the process.
-
While the heated mixture is cooling, prepare the rest of the filling. In a separate bowl, beat together the granulated sugar, Crisco shortening, salt, and vanilla extract until the mixture is light and fluffy. Use an electric mixer for best results.
-
Once the flour/milk mixture has completely cooled, add it to the sugar and shortening mixture. Beat the two mixtures together until the filling is smooth and creamy. The clear vanilla extract will help keep the filling a pure white color, reminiscent of the original Suzy Q filling.
-
Once the cake has cooled, carefully remove it from the pan and place it on a flat surface. Use a long, serrated knife to cut the cake in half horizontally, creating two equal layers. This can be a little tricky, so take your time and use a gentle sawing motion.
-
Spread the filling evenly over one half of the cake. Use a spatula to create a smooth, even layer.
-
Carefully place the other half of the cake on top of the filling, creating a sandwich.
-
If desired, sprinkle the top of the cake with powdered sugar for a finishing touch. This adds a touch of sweetness and visual appeal.
-
Cut into rectangular pieces to resemble the original Suzy Q snack cakes.
Expert Tips & Tricks
- For a richer chocolate flavor, add 2 tablespoons of unsweetened cocoa powder to the cake batter.
- If you’re short on time, you can use store-bought vanilla frosting instead of making the filling from scratch. Just be sure to use a good quality frosting.
- To prevent the cake from drying out, wrap it tightly in plastic wrap or store it in an airtight container.
- If the filling seems too thin, add a tablespoon of powdered sugar at a time until it reaches the desired consistency.
- For easier slicing, chill the assembled cake in the refrigerator for 30 minutes before cutting.
- If you find clear vanilla extract, it’s a worthwhile investment for achieving the authentic Suzy Q look.
Serving & Storage Suggestions
Serve the Homemade Suzy Q Cake chilled or at room temperature. It’s delicious on its own or with a glass of cold milk. Leftovers can be stored in an airtight container in the refrigerator for up to 3 days. The cake can also be frozen for longer storage, up to 2 months. Thaw overnight in the refrigerator before serving.
Nutritional Information
| Nutrient | Amount per Serving | % Daily Value |
|---|---|---|
| Calories | 298 kcal | |
| Total Fat | 19.1g | |
| Saturated Fat | 4.3g | |
| Cholesterol | 33mg | |
| Sodium | 258mg | |
| Total Carbohydrate | 31g | |
| Dietary Fiber | 0.7g | |
| Sugars | 20.6g | |
| Protein | 3.1g |
Variations & Substitutions
- Gluten-Free: Use a gluten-free devil’s food cake mix and a gluten-free flour blend for the filling.
- Dairy-Free: Substitute almond milk or soy milk for the whole milk in the filling. Use a dairy-free shortening instead of Crisco.
- Peanut Butter Filling: Add 1/2 cup of peanut butter to the filling mixture for a delicious peanut butter twist.
- Mint Chocolate: Add 1/4 teaspoon of mint extract to the cake batter and filling for a refreshing mint chocolate version.
FAQs (Frequently Asked Questions)
Q: Why is it important to cool the cake completely before cutting it?
A: Cooling the cake allows it to firm up, making it easier to cut without crumbling. A warm cake is more delicate and prone to falling apart.
Q: Can I use a different type of cake mix?
A: While devil’s food cake mix provides the most authentic flavor, you can experiment with other chocolate cake mixes. Just be sure to adjust the baking time accordingly.
Q: Why is it important to cool the milk and flour mixture completely before adding it to the sugar and shortening mixture?
A: Adding a warm mixture can melt the shortening and create a runny filling. Cooling ensures that the filling maintains its smooth and creamy texture.
Q: Can I freeze the finished cake?
A: Yes, the assembled cake can be frozen for up to 2 months. Wrap it tightly in plastic wrap and then foil to prevent freezer burn.
Q: What is clear vanilla extract?
A: Clear vanilla extract is a type of vanilla extract that has been processed to remove the dark color. It is often used in white frostings and fillings to maintain a pure white color.
Final Thoughts
Creating this Homemade Suzy Q Cake is more than just baking; it’s a trip down memory lane. The familiar flavors and textures will transport you back to childhood, bringing a smile to your face. I encourage you to try this recipe and share it with your loved ones. Feel free to experiment with variations and make it your own. And most importantly, enjoy every delicious bite!