
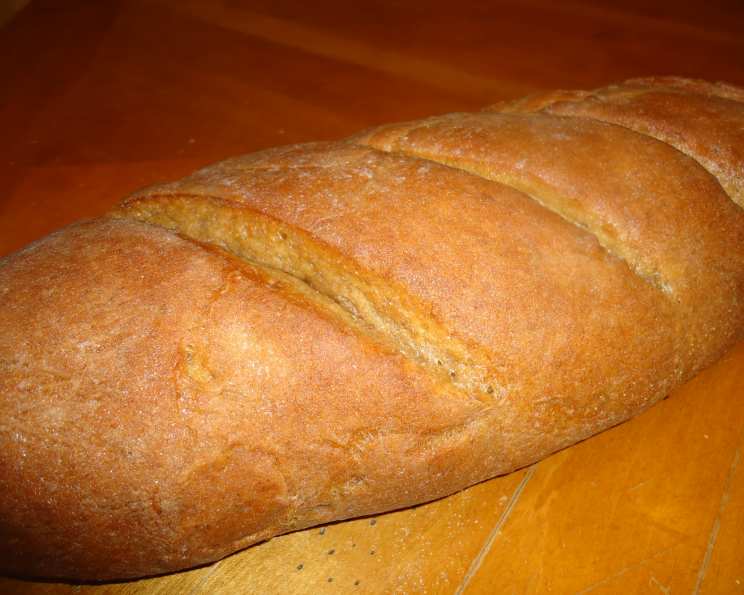
Swedish Limpa Bread: A Taste of Home
The scent of anise and orange always transports me back to my grandmother’s kitchen. She’d be humming a Swedish folk tune, her hands dusted with flour, as she pulled a warm loaf of Limpa bread from the oven. The dark, slightly sweet aroma would fill the entire house, a promise of comfort and connection to our heritage. Even now, years later, baking this bread feels like a warm hug from her, a way to keep her memory alive.
Recipe Overview
- Prep Time: 3 hours 5 minutes
- Cook Time: 35 minutes
- Total Time: 3 hours 40 minutes
- Yield: 2 loaves
- Dietary Type: Vegetarian
Ingredients
- ½ cup packed light brown sugar
- ¼ cup light molasses or ¼ cup dark molasses
- ¼ cup butter or ¼ cup margarine
- 1 tablespoon salt
- 1 teaspoon anise seed or 1 teaspoon caraway seed
- 2 tablespoons grated orange peel
- 1 cup boiling water
- 1 cup cold water
- ½ cup warm water (105 to 115 degrees)
- 2 (¼ ounce) packages active dry yeast
- 4 ½ cups unsifted all-purpose flour
- 4 cups unsifted rye flour
- Cornmeal
- 2 tablespoons butter or 2 tablespoons margarine, melted
Equipment Needed
- Large bowl
- Measuring cups and spoons
- Thermometer
- Measuring cup
- Pastry cloth or board
- Large cookie sheet
- Sharp knife
- Cooling rack
Instructions
-
In a large bowl, combine the brown sugar, molasses, ¼ cup butter, the salt, anise seed (or caraway seed), and orange peel.
-
Add 1 cup boiling water; stir until the sugar dissolves and the butter melts.
-
Add 1 cup cold water. Cool the mixture to lukewarm. This is crucial; too hot and you’ll kill the yeast!
-
Check the temperature of the warm water with a thermometer, ensuring it’s between 105 and 115 degrees Fahrenheit. This temperature range is ideal for activating the yeast.
-
Sprinkle the yeast over the warm water in a measuring cup. Stir until the yeast is dissolved. If the yeast doesn’t foam or bubble after a few minutes, it’s likely inactive and you’ll need to start again with fresh yeast.
-
Add the yeast mixture to the molasses mixture; mix well.
-
Gradually add 4 ½ cups all-purpose flour and 1 cup rye flour. Beat vigorously until the mixture is smooth and the dough begins to pull away from the sides of the bowl. This step is important for developing the gluten.
-
Gradually add 3 cups rye flour, continuing to mix. You may need to adjust the amount of flour slightly depending on the humidity and the type of flour used.
-
Mix in the last of the flour with your hand until the dough leaves the side of the bowl. The dough will be quite stiff.
-
Turn the dough out onto a lightly floured pastry cloth or board.
-
Knead the dough until it is smooth and elastic, about 10 minutes. Kneading develops the gluten, giving the bread its structure.
-
Place the dough in a lightly greased large bowl; turn the dough to bring up the greased side. This prevents the dough from drying out.
-
Cover the bowl with a towel and let it rise in a warm place (around 85 degrees Fahrenheit), free from drafts, until it has doubled in bulk, about 1 ½ hours. A slightly warm oven (turned off!) or a proofing drawer works well.
-
Grease a large cookie sheet and sprinkle it lightly with cornmeal. The cornmeal will prevent the bread from sticking and add a subtle texture to the crust.
-
Punch down the dough to release the air. Turn it out onto a lightly floured pastry cloth or board.
-
Cut the dough in half.
-
Shape each half into an oval.
-
With the palms of your hands, on a lightly floured surface, roll each half into a loaf, about 12 inches long, tapering the ends.
-
Place the loaves on the prepared cookie sheet, about 5 inches apart.
-
Cover the loaves with a towel and let them rise in a warm place, free from drafts, until they have doubled in bulk, about 1 to 1 ¼ hours.
-
Preheat the oven to 375 degrees Fahrenheit (190 degrees Celsius).
-
With a sharp knife, make four diagonal slashes on the top of each loaf, about ¼-inch deep. These slashes allow the bread to expand properly in the oven and create an attractive finish.
-
Bake the loaves on the middle shelf of the oven for 35 minutes. If the tops begin to brown too quickly, cover them loosely with foil for the last 10 minutes of baking.
-
Brush the tops of the baked loaves with melted butter. This will give the crust a beautiful sheen and a richer flavor.
-
Serve the bread warm, or cool it completely on a rack before slicing and serving.
Expert Tips & Tricks
- For a more intense orange flavor, try using orange extract in addition to the grated orange peel. Be careful not to overdo it, as orange extract can be quite potent.
- If you don’t have anise seeds, you can substitute fennel seeds for a slightly different, but equally delicious, flavor profile.
- To achieve a darker, glossier crust, brush the loaves with an egg wash (one egg beaten with a tablespoon of water) before baking.
- If your kitchen is cold, you can help the dough rise by placing the bowl in a slightly warmed oven (turned off) or by placing it on top of the refrigerator.
- To test for doneness, insert a wooden skewer into the center of a loaf. If it comes out clean, the bread is done. You can also tap the bottom of the loaf; it should sound hollow.
Serving & Storage Suggestions
Swedish Limpa bread is incredibly versatile. Serve it warm with a generous slather of butter, alongside a hearty bowl of soup, or as part of a Scandinavian-inspired smörgåsbord. It’s also fantastic toasted and topped with cheese or used for sandwiches.
Store leftover bread at room temperature in a breadbox or tightly sealed plastic bag for up to 3 days. For longer storage, wrap the bread tightly in plastic wrap and freeze it for up to 2 months. Thaw the bread at room temperature before slicing and serving. To refresh frozen bread, wrap it in foil and warm it in a 350°F (175°C) oven for about 10-15 minutes.
Nutritional Information
| Nutrient | Amount per Serving | % Daily Value |
|---|---|---|
| Calories | 1202 kcal | – |
| Total Fat | 20.5 g | 32% |
| Saturated Fat | 11.4 g | 57% |
| Cholesterol | 45.8 mg | 15% |
| Sodium | 1923 mg | 80% |
| Total Carbohydrate | 229.5 g | 76% |
| Dietary Fiber | 17.2 g | 69% |
| Sugars | 39.5 g | – |
| Protein | 27.4 g | – |
Note: Nutritional information is an estimate and may vary based on specific ingredients and preparation methods.
Variations & Substitutions
- Gluten-Free Limpa: While traditional Limpa relies on gluten for its structure, you can experiment with gluten-free flour blends. Look for blends specifically designed for bread making and consider adding a binder like xanthan gum to improve the texture. The rise time and baking time may need to be adjusted.
- Spiced Limpa: Add a pinch of ground cloves, cardamom, or ginger to the dough for a warmer, more complex flavor profile.
- Citrus Zest: Experiment with different citrus zests, such as lemon or grapefruit, to add a unique twist to the flavor.
- Sweetener Options: If you prefer a less sweet bread, reduce the amount of brown sugar or molasses. You can also substitute honey or maple syrup for the molasses.
- Vegan Limpa: Substitute the butter with a vegan butter alternative and ensure your molasses and sugar are processed without bone char to make it 100% vegan.
FAQs (Frequently Asked Questions)
Q: Why is my Limpa bread so dense?
A: Several factors can contribute to dense bread, including using old or inactive yeast, not kneading the dough enough, or not allowing it to rise sufficiently. Make sure your yeast is fresh, knead the dough for the full recommended time, and let it rise in a warm, draft-free place until doubled in size.
Q: Can I make this bread without anise or caraway seeds?
A: Yes, you can omit the anise or caraway seeds if you don’t like the flavor. The bread will still be delicious, but it will lack the characteristic flavor of traditional Limpa. Consider substituting with fennel seeds or a small amount of allspice.
Q: How do I get a nice crust on my Limpa bread?
A: Brushing the loaf with melted butter before and after baking helps to create a beautiful, golden-brown crust. You can also create a steamy environment in the oven by placing a pan of hot water on the bottom rack during baking.
Q: Can I make the dough ahead of time and bake it later?
A: Yes, you can make the dough ahead of time and store it in the refrigerator for up to 24 hours. Punch down the dough before refrigerating, and then let it come to room temperature for about 30 minutes before shaping and baking.
Q: My bread is browning too quickly. What should I do?
A: If your bread is browning too quickly, loosely tent it with aluminum foil during the last 10-15 minutes of baking. This will help to prevent the crust from burning while allowing the inside to finish baking.
Final Thoughts
Now it’s your turn to bring the warmth and comfort of Swedish Limpa bread into your own kitchen. Don’t be intimidated by the process – even if it’s your first time baking bread, following this recipe will guide you to a delicious result. Share your creations with friends and family, and don’t hesitate to experiment with variations to make it your own. Perhaps a slice of this bread alongside a cup of steaming coffee and a good book? The possibilities are endless, and the taste of home awaits!