
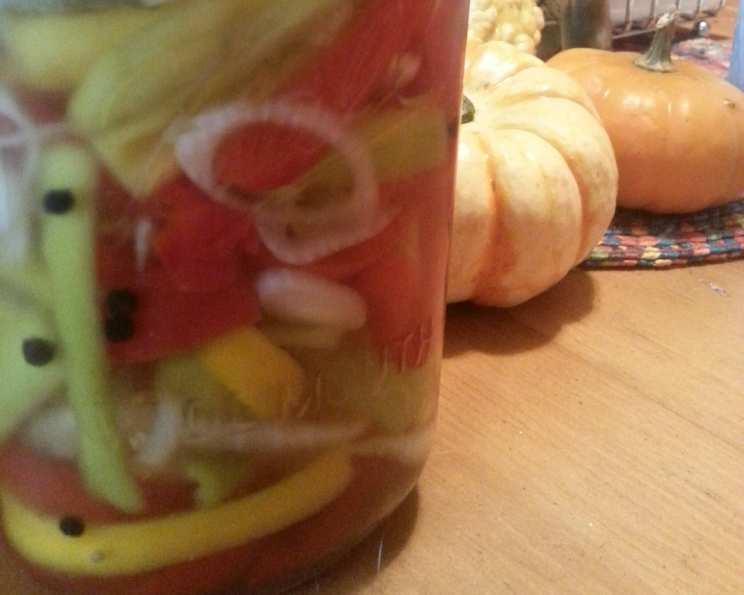
Sweet and Sour Pickled Bell Peppers by the Jar
The first time I tasted pickled bell peppers was at my grandmother’s table. She always had a jar tucked away in the back of her refrigerator, its colorful contents a beacon of summer even in the dead of winter. I remember the satisfying crunch as I bit into the crisp, sweet, and tangy pepper, a flavor explosion that instantly brightened any meal. These pickled peppers, with their vibrant hues and delightful taste, became a symbol of her love and the joy of preserving summer’s bounty, a tradition I’m thrilled to share with you.
Recipe Overview
- Prep Time: 15 minutes
- Cook Time: 20 minutes
- Total Time: 35 minutes
- Yields: Approximately 1 pint jar
- Serves: Varies depending on use
- Dietary Type: Vegan, Gluten-Free
Ingredients
- ¾ lb bell peppers (a mix of red, green, yellow, and orange looks best)
- ½ onion, halved and thinly sliced
- 1 cup sugar
- 1 cup water
- ¾ cup distilled white vinegar
- ½ cup cider vinegar
- 1 teaspoon celery seed
- 1 teaspoon black peppercorns
- ¼ teaspoon yellow mustard seeds
- 1 garlic clove, smashed
- 1 bay leaf
- ½ teaspoon salt
Equipment Needed
- Large saucepan
- Sterilized pint jar with lid
- Knife
- Cutting board
Instructions
-
Begin by preparing the bell peppers. Remove the stem end and seeds from each pepper. Slice the peppers into long, thin strips. Place the sliced bell peppers in a bowl along with the thinly sliced onion.
-
In a large saucepan, combine the sugar, water, distilled white vinegar, cider vinegar, celery seeds, black peppercorns, yellow mustard seeds, smashed garlic clove, bay leaf, and salt.
-
Bring the mixture to a boil over medium-high heat, stirring constantly to ensure the sugar dissolves completely.
-
Once the mixture is boiling, reduce the heat to low. Cover the saucepan and let the mixture simmer for 15 to 20 minutes. This allows the flavors to meld together beautifully.
-
While the vinegar mixture is simmering, ensure your pint jar is properly sterilized. You can sterilize the jar by boiling it in water for 10 minutes, or by running it through a hot cycle in your dishwasher.
-
After the vinegar mixture has simmered, pack the sliced bell peppers and onion into the hot, sterilized pint jar. Pack them tightly, but leave about ½ inch of headspace at the top of the jar.
-
Carefully pour the hot vinegar mixture over the peppers and onions in the jar, making sure to cover them completely. Again, maintain that ½ inch headspace.
-
Let the jar cool completely on the counter before sealing it with a lid.
-
Once cooled, cover the jar tightly and store it in the refrigerator for up to 6 months. The flavor will continue to develop and improve over time!
Expert Tips & Tricks
- Pepper Variety: Don’t be afraid to experiment with different colored bell peppers! A mix of red, yellow, orange, and green not only looks visually appealing, but also adds a more complex flavor profile.
- Onion Options: While yellow onions are commonly used, you can also try using sweet onions or even red onions for a slightly different flavor.
- Spice It Up: For a spicier pickle, add a pinch of red pepper flakes or a finely chopped jalapeño to the saucepan along with the other spices.
- Sweetness Adjustment: If you prefer a less sweet pickle, you can reduce the amount of sugar slightly. Start by reducing it by ¼ cup and adjust to taste.
- Don’t Skip the Simmer: The simmering step is crucial for allowing the flavors to meld together. Make sure not to rush this step for the best results.
- Jar Preparation: A sterilized jar is essential to prevent spoilage. Always ensure your jar is properly sterilized before filling it with the pickled peppers.
- Headspace Matters: Leaving the appropriate headspace (½ inch) in the jar is important for proper sealing and preservation.
Serving & Storage Suggestions
These sweet and sour pickled bell peppers are incredibly versatile and can be used in a variety of ways.
- Charcuterie Boards: Add them to a charcuterie board for a colorful and flavorful addition.
- Sandwiches & Wraps: Use them as a topping for sandwiches and wraps to add a burst of flavor.
- Salads: Toss them into salads for a tangy and crunchy element.
- Tacos & Burritos: Use them as a condiment for tacos and burritos.
- Pizza Topping: Add them to homemade pizzas for a sweet and tangy twist.
- Appetizers: Serve them as an appetizer alongside crackers and cheese.
Store the sealed jar of pickled peppers in the refrigerator for up to 6 months. Once opened, consume within a few weeks for the best flavor and quality. Because this is a refrigerator pickle (not canned), it’s important to keep it chilled. Do not store at room temperature.
Nutritional Information
(Estimated per serving, varies depending on serving size)
| Nutrient | Amount per Serving | % Daily Value |
|---|---|---|
| Calories | 80 kcal | 4% |
| Total Fat | 0g | 0% |
| Saturated Fat | 0g | 0% |
| Cholesterol | 0mg | 0% |
| Sodium | 100mg | 4% |
| Total Carbohydrate | 19g | 6% |
| Dietary Fiber | 1g | 4% |
| Sugars | 18g | 36% |
| Protein | 0g | 0% |
Variations & Substitutions
- Spice Level: As mentioned earlier, add a pinch of red pepper flakes or a finely chopped jalapeño for a spicier pickle. You could also add a small, dried chili pepper to the brine.
- Herb Infusion: Experiment with adding fresh herbs to the brine, such as thyme, rosemary, or oregano.
- Vinegar Variety: While the recipe calls for a combination of distilled white vinegar and cider vinegar, you can experiment with other types of vinegar, such as rice vinegar or white wine vinegar.
- Sweetener Alternatives: If you want to reduce the amount of sugar, you can try using a natural sweetener like honey or maple syrup. Start with a smaller amount and adjust to taste.
- Vegetable Medley: Add other vegetables to the mix, such as carrots, cauliflower florets, or green beans. Just be sure to cut them into similar-sized pieces as the peppers and onions.
- Citrus Zest: Add a teaspoon of lemon or orange zest to the brine for a brighter, more citrusy flavor.
FAQs (Frequently Asked Questions)
Q: Do I need to use a specific type of jar?
A: A standard pint jar with a lid and ring is ideal. Make sure the jar is clean and sterilized before using it.
Q: Can I double or triple this recipe?
A: Absolutely! Just be sure to adjust the ingredients accordingly and use a larger saucepan if needed. You’ll also need additional sterilized jars.
Q: How long do these pickles last in the refrigerator?
A: When properly stored in a sealed jar, these pickled peppers can last up to 6 months in the refrigerator.
Q: Can I use frozen bell peppers for this recipe?
A: While fresh bell peppers are preferred for their texture, you can use frozen bell peppers in a pinch. Just be aware that the texture may be slightly softer.
Q: What can I do if my pickles are too sweet or too sour?
A: If they’re too sweet, add a splash more vinegar. If they are too sour, add a little more sugar, a teaspoon at a time, tasting as you go.
Final Thoughts
These Sweet and Sour Pickled Bell Peppers are a delightful addition to any kitchen, offering a burst of flavor and color to a variety of dishes. With this easy-to-follow recipe, you can bring a touch of sunshine to your table any time of year. Don’t hesitate to experiment with different variations and substitutions to create your own signature pickle. I encourage you to give this recipe a try and share your feedback – I’d love to hear about your pickling adventures! Serve these vibrant peppers alongside a grilled cheese sandwich or tuck them into a homemade burrito for an instant flavor upgrade. Happy pickling!