
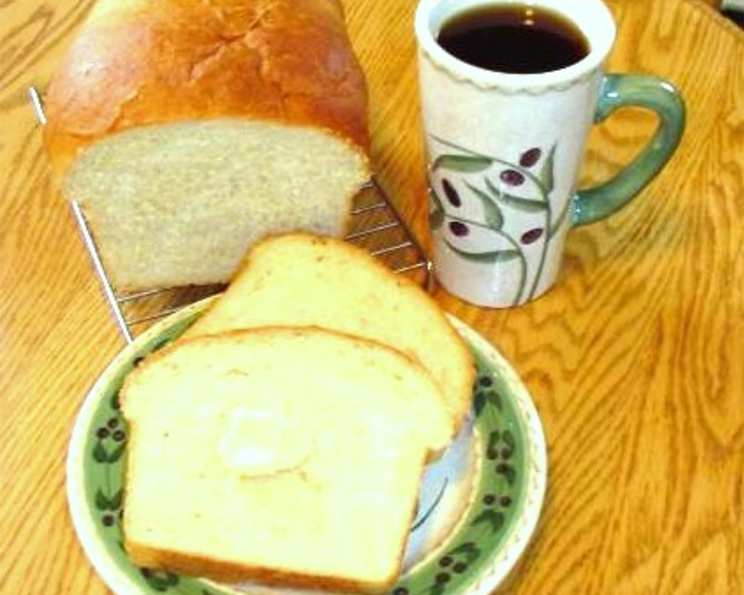
Sweet Bread (For Bread Machines)
The aroma alone still takes me back to that crisp Colorado December. Pat, our neighbor with a heart as warm as her wood-burning stove, presented us with a beautifully golden loaf tied with a festive ribbon. One bite of that sweet, tender bread, and I was hooked. It was unbelievably moist and flavorful, a perfect counterpoint to the snowy landscape. When she revealed it was made in a bread machine, it felt like a revelation. Suddenly, homemade bread wasn’t a daunting all-day affair. It was accessible, manageable, and utterly delicious. I asked my husband for a bread machine for Christmas, and this has been my go-to recipe ever since.
Recipe Overview
- Prep Time: 10 minutes
- Cook Time: Varies (Based on bread machine settings, or approximately 35-40 minutes in a conventional oven)
- Total Time: Varies (Based on bread machine settings, or approximately 45-50 minutes with conventional oven baking)
- Yields: 1 1/2 lb. loaf
- Serves: 15-20
- Dietary Type: Not specified (Can be adapted, see variations)
Ingredients
- 1 1/3 cups warm water
- 3 tablespoons dry buttermilk
- 1 teaspoon salt
- 4 tablespoons honey
- 4 tablespoons margarine or olive oil (Note: Using olive oil will alter the flavor profile slightly)
- 4 cups bread flour
- 1 tablespoon dry yeast
Equipment Needed
- Bread machine
- Measuring cups and spoons
- Oven (optional, for baking instead of using the bread machine)
- Loaf pan (if baking in the oven)
- Wire rack (for cooling)
Instructions
-
Prepare your bread machine: Carefully read your bread machine’s instruction manual to understand the proper order for adding ingredients. This is crucial for successful bread making.
-
Add the wet ingredients: Generally, you’ll begin by adding the warm water to the bread machine pan. Ensure the water isn’t too hot, as this can kill the yeast. Add the dry buttermilk to the water.
-
Add the dry ingredients: Next, add the salt, honey, and margarine (or olive oil) to the pan.
-
Add the bread flour: Carefully measure and add the bread flour to the pan. Create a small well in the center of the flour.
-
Add the yeast: Pour the dry yeast into the well you created in the flour. Ensure the yeast doesn’t come into direct contact with the salt, as this can inhibit its activation.
-
Select the bread setting: Secure the bread machine pan in the machine. Select the appropriate bread setting on your machine. Typically, this will be a standard bread setting for a 1 1/2 lb. loaf.
-
Start the machine: Press the start button to begin the bread-making cycle. The machine will handle the kneading, rising, and baking processes.
-
Monitor the process: Check on the bread as it bakes and if the top of the loaf is browning too quickly, you can gently lay a piece of foil over the top of the bread to keep it from burning.
-
Remove the bread: Once the bread machine cycle is complete, carefully remove the bread pan from the machine. Use oven mitts, as the pan will be hot.
-
Cool the bread: Turn the bread out onto a wire rack to cool completely before slicing.
Alternative Baking Method (Using a Conventional Oven):
-
If you prefer a different crust texture, you can use the bread machine’s dough cycle only. Once the dough cycle is complete, remove the dough from the machine.
-
Preheat the oven: Preheat your oven to 375°F (190°C).
-
Shape the dough: Gently shape the dough into a loaf and place it in a greased loaf pan.
-
Let the dough rise: Cover the loaf pan with a clean cloth and let the dough rise in a warm place for about 30 minutes, or until it has doubled in size.
-
Bake the bread: Bake the bread in the preheated oven for approximately 35-40 minutes, or until it is golden brown and sounds hollow when tapped on the bottom.
-
Cool the bread: Remove the bread from the oven and let it cool in the loaf pan for a few minutes before transferring it to a wire rack to cool completely.
Expert Tips & Tricks
-
Temperature is key: Ensure your water is warm (around 110-115°F or 43-46°C) but not hot. Too hot, and you’ll kill the yeast. Too cold, and the yeast won’t activate properly.
-
Flour Power: Bread flour is essential for this recipe. Its higher gluten content provides the structure needed for a good rise. All-purpose flour can be substituted, but the texture might be slightly different.
-
Honey’s Role: The honey not only adds sweetness but also acts as a humectant, helping to keep the bread moist.
-
Listen to Your Dough: If baking in a conventional oven, tapping the bottom of the loaf to check for doneness is a great indicator, but also use a thermometer. The internal temperature should read at least 200°F (93°C).
-
Bread Flour on a Budget: As mentioned, warehouse stores often have great prices on large bags of bread flour. This is a cost-effective way to bake bread regularly.
Serving & Storage Suggestions
This sweet bread is delicious served warm with butter or jam. It also makes excellent toast or sandwiches.
Storage: Store the cooled bread in an airtight container at room temperature for up to 3 days. For longer storage, wrap the bread tightly in plastic wrap and freeze it for up to 2 months. Thaw the frozen bread at room temperature before serving. To refresh, you can lightly toast the slices or warm them in a low oven.
Nutritional Information
Please note that these are estimates and can vary based on specific ingredients and portion sizes.
| Nutrient | Amount per Serving | % Daily Value |
|---|---|---|
| Calories | 173 kcal | 9% |
| Total Fat | 3.5g | 5% |
| Saturated Fat | 2g | 10% |
| Cholesterol | 9mg | 3% |
| Sodium | 191mg | 8% |
| Total Carbohydrate | 31g | 10% |
| Dietary Fiber | 1.1g | 4% |
| Sugars | 5.3g | N/A |
| Protein | 4.3g | 8% |
Variations & Substitutions
- Dairy-Free: Substitute the dry buttermilk with a dairy-free milk powder alternative. Use olive oil or a vegan margarine substitute.
- Gluten-Free: This recipe isn’t naturally gluten-free. To make it gluten-free, you’ll need to substitute the bread flour with a gluten-free bread flour blend specifically formulated for bread machines. Follow the instructions on the gluten-free flour blend for best results.
- Spice it Up: Add 1 teaspoon of cinnamon or cardamom to the dry ingredients for a warm, spiced flavor.
- Citrus Zest: Grated lemon or orange zest can brighten the flavor of the bread. Add 1-2 teaspoons of zest to the dry ingredients.
- Nutty Goodness: Add 1/2 cup of chopped nuts (walnuts, pecans, almonds) to the dough during the kneading process.
FAQs (Frequently Asked Questions)
Q: Can I use all-purpose flour instead of bread flour?
A: While you can, bread flour is recommended for its higher gluten content, which results in a better rise and texture. If you use all-purpose flour, the bread might be slightly denser.
Q: My bread is sinking in the middle. What went wrong?
A: This could be due to several factors, including too much yeast, too much liquid, or the oven temperature being too low. Ensure you are accurately measuring ingredients and that your oven is properly preheated if you’re baking it conventionally.
Q: Can I use active dry yeast instead of instant yeast?
A: Yes, but you’ll need to proof the active dry yeast in warm water before adding it to the bread machine. Let it sit for about 5-10 minutes until it becomes foamy.
Q: My bread is too dark on top. What should I do?
A: During the last 10-15 minutes of baking, tent the bread with aluminum foil to prevent it from browning too much.
Q: How do I store leftover bread?
A: Store cooled bread in an airtight container at room temperature for up to 3 days. For longer storage, freeze it for up to 2 months.
Final Thoughts
This sweet bread recipe, born from a neighbor’s kindness and a simple bread machine, has become a staple in my kitchen. It’s a testament to how easy and rewarding homemade bread can be. I encourage you to give it a try, experiment with different variations, and share the joy of fresh-baked bread with your loved ones. Don’t be afraid to get creative – perhaps a handful of dried cranberries or a swirl of Nutella would be just the thing! Let me know how it turns out!