
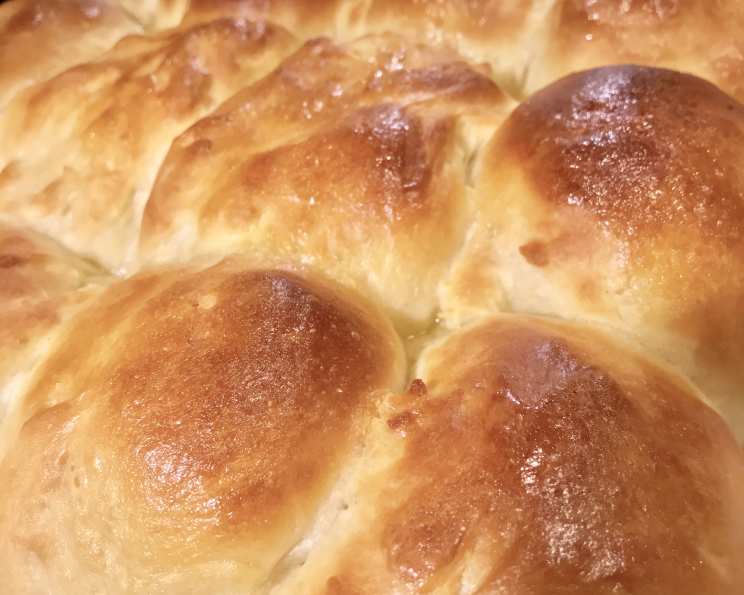
Sweet, Buttery Rolls (Bread Machine Recipe)
The scent of baking bread is, for me, the very essence of home. My grandmother, a woman whose hands seemed perpetually dusted with flour, always had a batch of rolls proofing on the warm shelf above her stove. These weren’t just any rolls; they were impossibly soft, slightly sweet, and glazed with butter. Every holiday, every Sunday dinner, every simple Tuesday evening felt elevated by their presence. I can still taste the way they melted in my mouth, a comforting reminder of family, love, and the simple joys of life. This recipe, adapted for the convenience of a bread machine, aims to capture that same magic.
Recipe Overview
- Prep Time: 15 minutes
- Cook Time: 20 minutes
- Total Time: 1 hour 55 minutes (includes rising time)
- Servings: 16
- Yield: 16 rolls
- Dietary Type: Vegetarian
Ingredients
- 1 cup milk (110 degrees F.)
- ½ cup butter, room temperature
- 2 eggs, room temperature and lightly beaten
- ¾ teaspoon salt
- 4 cups bread flour
- 3 teaspoons instant yeast
- ¼ cup sugar
Equipment Needed
- Bread Machine
- Measuring cups and spoons
- Lightly oiled surface or nonstick cooking spray
- Plastic wrap
- Oven
- Baking sheet
Instructions
- Begin by adding all the ingredients to the bread pan of your bread machine in the order listed. It is crucial to maintain the order of ingredients, especially ensuring the yeast doesn’t directly touch the salt or sugar, as this can inhibit its activation.
- Select the dough setting on your bread machine. This setting typically involves a kneading and rising cycle. Press start to begin the process. The bread machine will handle the initial kneading and first rise of the dough.
- Once the dough cycle has finished (typically around 1 hour to 1 hour and 30 minutes), carefully remove the dough from the bread pan and turn it out onto a lightly oiled surface or a surface sprayed with nonstick cooking spray. This prevents the dough from sticking and makes it easier to work with.
- Gently form the dough into an oval shape. This helps to create a more uniform texture before dividing it into individual rolls. Cover the oval of dough with plastic wrap and let it rest for 10 minutes. This resting period, known as “bench rest,” allows the gluten in the dough to relax, making it easier to shape.
- After resting, divide the dough into 16 equal pieces. You can use a dough cutter or a sharp knife to achieve this. Shape each piece as desired. Classic roll shapes include round balls, knots, or even cloverleaf rolls. Ensure each roll is roughly the same size for even baking.
- Preheat your oven to 375 degrees Fahrenheit (190 degrees Celsius). Make sure your oven rack is positioned in the center of the oven to promote even browning.
- Arrange the shaped rolls on a baking sheet lined with parchment paper or lightly greased. Cover the rolls loosely with plastic wrap or a clean kitchen towel and place them in a warm spot to rise for approximately 20 to 30 minutes. This second rise allows the rolls to become light and airy before baking.
- Bake the rolls for approximately 20 minutes, or until they are nicely browned. Keep a close eye on them, as baking times can vary depending on your oven. If the tops are browning too quickly, you can tent them with foil to prevent burning.
- Once baked, remove the rolls from the oven and let them cool slightly on the baking sheet before transferring them to a wire rack to cool completely.
Expert Tips & Tricks
- For an extra-rich flavor, brush the tops of the rolls with melted butter immediately after baking. This will also give them a beautiful sheen.
- If you prefer a slightly sweeter roll, you can increase the amount of sugar in the recipe by a tablespoon or two.
- To ensure the milk is at the correct temperature (110 degrees F), use a thermometer. If you don’t have a thermometer, the milk should feel warm to the touch, but not hot.
- If your kitchen is cold, you can create a warm environment for the second rise by placing the baking sheet in a slightly warmed oven (turned off!) or near a warm appliance.
- For a softer crust, brush the rolls with milk or an egg wash before baking.
- If the dough seems too sticky, add flour one tablespoon at a time until it reaches a manageable consistency. Be careful not to add too much flour, as this can make the rolls dry.
Serving & Storage Suggestions
These sweet, buttery rolls are best served warm, fresh from the oven. They make a delightful accompaniment to any meal, from soups and salads to holiday feasts. Leftover rolls can be stored in an airtight container at room temperature for up to 2 days. For longer storage, wrap them tightly in plastic wrap and freeze for up to 2 months. To reheat, thaw frozen rolls overnight in the refrigerator, then warm them in a low oven (300 degrees F) for about 10 minutes, or until heated through. You can also microwave them for a few seconds, but be careful not to overheat them, as this can make them tough.
Nutritional Information
| Nutrient | Amount per Serving | % Daily Value |
|---|---|---|
| Calories | 197.8 kcal | N/A |
| Calories from Fat | N/A | N/A |
| Total Fat | 7.3 g | 11% |
| Saturated Fat | 4.2 g | 21% |
| Cholesterol | 40.6 mg | 13% |
| Sodium | 177 mg | 7% |
| Total Carbohydrate | 28 g | 9% |
| Dietary Fiber | 1.1 g | 4% |
| Sugars | 3.2 g | 12% |
| Protein | 4.9 g | 9% |
Note: Nutritional information is an estimate and may vary based on specific ingredients and portion sizes.
Variations & Substitutions
- Dairy-Free: Substitute the milk with almond milk, soy milk, or oat milk. Use a dairy-free butter substitute for the butter.
- Whole Wheat: Replace up to half of the bread flour with whole wheat flour for a nuttier flavor and added fiber.
- Herb-Infused: Add a tablespoon of dried herbs, such as rosemary, thyme, or oregano, to the dough for a savory twist.
- Cinnamon Rolls: After the first rise, roll the dough out into a rectangle. Spread with softened butter, sprinkle with cinnamon and sugar, roll up tightly, and slice into rolls. Place in a baking dish and bake as directed.
- Garlic Rolls: Mix melted butter with minced garlic and brush over the rolls before baking.
FAQs (Frequently Asked Questions)
Q: Can I make the dough ahead of time and refrigerate it overnight?
A: Yes, you can! After the dough cycle is complete, place the dough in a lightly oiled bowl, cover it tightly with plastic wrap, and refrigerate it overnight. Let it come to room temperature for about 30 minutes before shaping and baking.
Q: What if I don’t have instant yeast?
A: You can use active dry yeast, but you’ll need to proof it first. Dissolve the active dry yeast in the warm milk with a teaspoon of sugar and let it sit for 5-10 minutes, or until foamy, before adding it to the bread machine.
Q: My rolls are browning too quickly. What should I do?
A: Tent the rolls with aluminum foil to prevent them from burning. This will allow the inside to cook through without over-browning the outside.
Q: Can I freeze the baked rolls?
A: Yes, baked rolls freeze well. Let them cool completely, then wrap them tightly in plastic wrap and place them in a freezer-safe bag. They can be frozen for up to 2 months.
Q: Why are my rolls dense and not as fluffy as I expected?
A: This could be due to several factors, including using old yeast, not measuring the ingredients accurately, or over-kneading the dough. Make sure your yeast is fresh, measure ingredients carefully, and avoid over-kneading.
Final Thoughts
Baking these sweet, buttery rolls is more than just following a recipe; it’s about creating something special, something that nourishes both body and soul. Whether you’re serving them at a holiday gathering, a Sunday supper, or simply enjoying them with a cup of coffee, I hope they bring you the same joy and comfort they bring me. Don’t be afraid to experiment with variations and make them your own. And most importantly, share them with the people you love. After all, the best things in life are meant to be shared, one warm, buttery roll at a time.