
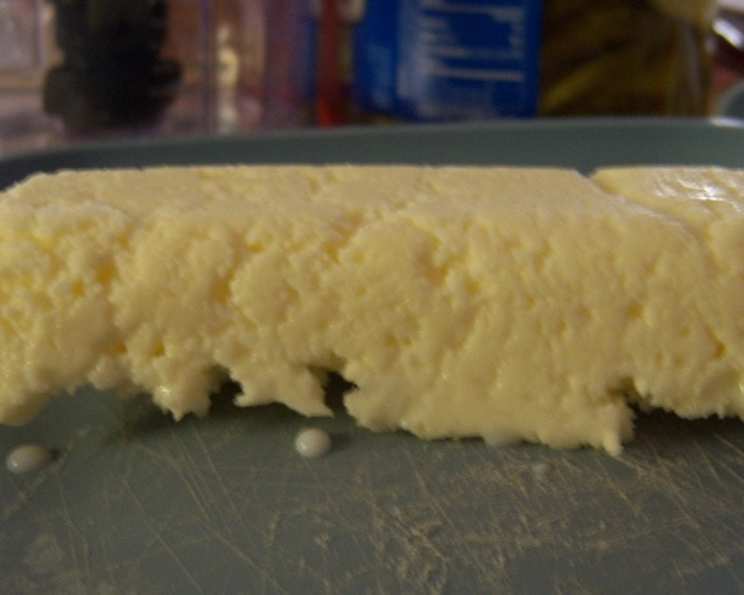
Sweet Creamy Butter: A Journey Back to Simplicity
I still remember the first time I tasted truly fresh butter. It was at my grandmother’s farm, a place where simple pleasures reigned supreme. She’d hand me a thick slab, still slightly cool from the cellar, spread on a warm slice of her homemade bread. The flavor was unlike anything I’d ever had – intensely creamy, subtly sweet, and possessing a richness that store-bought butter simply couldn’t match. That experience sparked a lifelong appreciation for real, homemade goodness, and a quest to recreate that unforgettable taste in my own kitchen. Now, I’m excited to share that experience with you with this simple recipe.
Recipe Overview
- Prep Time: 5 minutes
- Cook Time: 5-10 minutes
- Total Time: 10-15 minutes
- Yields: 1/2 cup
- Dietary Type: Vegetarian
Ingredients
- 1 pint heavy whipping cream
- 1 quart mason jar
- ½ teaspoon salt (optional)
Equipment Needed
- 1 quart mason jar
- Bowl
- Spoon
- Fine-mesh sieve or cheesecloth (optional)
Instructions
-
Pour the heavy whipping cream into the mason jar. Ensure the jar is no more than half full; this allows ample space for the cream to move during shaking. If desired, add the salt at this stage. The salt not only enhances the flavor but also acts as a preservative.
-
Secure the lid tightly onto the mason jar. This is a crucial step to prevent any leaks or spills during the shaking process.
-
Shake the jar vigorously. Initially, after a few minutes of shaking, the cream will transform into whipped cream. Continue shaking; this is where the magic happens. Eventually, the whipped cream will seem to “break,” and you’ll notice it loosening up again. You’ll begin to hear the distinct sound of the butter solids separating from the buttermilk liquid, hitting against the sides of the jar.
-
Once you hear the butter separating, stop shaking immediately. Open the jar carefully and drain the buttermilk liquid. I prefer to drain it into a separate cup for drinking, as it’s a byproduct that is rich in flavor and nutrients. You can strain it through a fine-mesh sieve or cheesecloth to remove any remaining butter solids.
-
Carefully spoon the butter solids out of the jar and into a bowl. At this stage, the butter is ready to use immediately. Alternatively, you can store it for later use. For a firmer consistency, place the butter in the refrigerator. Cold butter becomes harder and more spreadable. You can also transfer the butter into a mold for a more decorative presentation.
-
Tip: If the cream becomes overly whipped and difficult to shake freely within the jar, add a tablespoon of warm water. This will help to loosen the mixture and expedite the shaking process.
Expert Tips & Tricks
- Temperature is key: Ensure your heavy cream is cold for the best results. Chilled cream separates more efficiently.
- Don’t overfill the jar: As mentioned, half-full is ideal. Overfilling will hinder the butter-making process.
- Patience is a virtue: The shaking process can take anywhere from 5 to 10 minutes, depending on the cream’s temperature and your shaking intensity. Don’t give up!
- Washing the butter (optional): For longer storage and to remove any residual buttermilk, rinse the butter solids under cold water, kneading it gently to release any remaining liquid. This step significantly extends the butter’s shelf life.
- Flavor infusions: Get creative! Add herbs like rosemary or thyme during the butter-making process for a savory twist. Sweeten it with honey or maple syrup as mentioned in the original recipe for a delightful treat on pancakes.
Serving & Storage Suggestions
Serve your homemade sweet creamy butter spread on warm bread, rolls, muffins, or pancakes. It’s also delicious melted over steamed vegetables or used as a flavorful ingredient in your favorite recipes.
For storage, keep the butter in an airtight container in the refrigerator. It will last for approximately 1-2 weeks. If you washed the butter thoroughly, it can last even longer. You can also freeze the butter for up to 3 months. To freeze, wrap the butter tightly in plastic wrap and then place it in a freezer-safe bag. Thaw it in the refrigerator overnight before using.
Nutritional Information
| Nutrient | Amount per Serving | % Daily Value |
|---|---|---|
| Calories | 821 kcal | 41% |
| Total Fat | 91.8g | 141% |
| Saturated Fat | 57.3g | 287% |
| Cholesterol | 341mg | 114% |
| Sodium | 94.8mg | 4% |
| Total Carbohydrate | 6.9g | 2% |
| Dietary Fiber | 0g | 0% |
| Sugars | 0.3g | 1% |
| Protein | 5.1g | 10% |
Note: Nutritional information is an estimate and may vary based on specific ingredients and preparation methods.
Variations & Substitutions
- Salted vs. Unsalted: This recipe offers the option to add salt, creating salted butter. If you prefer unsalted butter, simply omit the salt.
- Herb Infused Butter: Experiment with adding your favorite fresh herbs, such as rosemary, thyme, chives, or parsley, to the cream before shaking. This will infuse the butter with a subtle herbal flavor.
- Garlic Butter: Add minced garlic to the cream before shaking for a savory garlic butter.
- Sweet Butter: As mentioned, maple syrup or honey can be stirred in after the butter is made for a delicious sweet spread.
- Cultured Butter: For a tangier flavor, add a tablespoon of buttermilk or yogurt to the cream and let it sit at room temperature for 12-24 hours before shaking. This will allow the cream to culture, resulting in a more complex flavor profile.
FAQs (Frequently Asked Questions)
Q: How long does it take to make butter using this method?
A: The shaking process typically takes between 5 and 10 minutes, but it can vary depending on the temperature of the cream and the intensity of your shaking.
Q: Why is my cream not turning into butter?
A: Ensure that your cream is very cold and that you are shaking the jar vigorously. Also, make sure the jar isn’t overfilled. Sometimes, it just takes a little extra patience!
Q: What can I do with the leftover buttermilk?
A: Buttermilk is a versatile ingredient! You can drink it straight, use it in baking recipes like pancakes or biscuits, or use it as a marinade for chicken.
Q: How do I know when the butter is ready?
A: You’ll know the butter is ready when you hear the butter solids separating from the buttermilk liquid and hitting against the sides of the jar. The mixture will also loosen up significantly.
Q: Can I use a blender or food processor instead of shaking?
A: Yes, you can use a blender or food processor. Blend or process the heavy cream until it separates into butter and buttermilk. This method is often faster than shaking.
Final Thoughts
Making your own sweet creamy butter is a surprisingly simple and rewarding experience. Not only does it yield a product far superior in taste to store-bought varieties, but it also connects you to the tradition of homemade food. Don’t be afraid to experiment with different flavors and additions to create your own signature butter. I encourage you to give this recipe a try and share your creations with friends and family. They will be amazed by the rich, delicious flavor of homemade butter!