
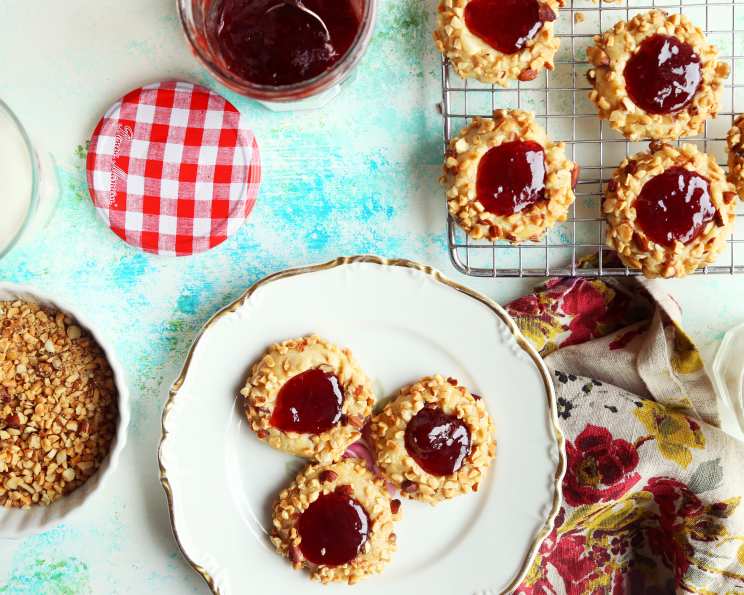
Sweet & Nutty Thumbprint Cookies: A Classic Reimagined
I remember the first time I made these cookies. I was maybe ten years old, perched on a stool next to my grandmother, her hands dusted with flour, guiding mine. The scent of butter, vanilla, and toasted nuts filled her warm kitchen. It felt like pure magic transforming simple ingredients into these bite-sized jewels. Even now, decades later, every batch I bake transports me back to that cozy kitchen, to the sweet, comforting feeling of home.
Recipe Overview
- Prep Time: 15 minutes
- Cook Time: 8-10 minutes
- Total Time: 25 minutes
- Yields: 20 cookies
- Dietary Type: Vegetarian
Ingredients
- ¼ cup packed brown sugar
- ¼ cup shortening
- ¼ cup butter, softened
- ½ teaspoon vanilla
- 1 egg, separated
- 1 cup flour
- ¼ teaspoon salt
- ¾ cup finely chopped nuts (walnuts, pecans, or almonds work well)
- Your favorite jelly or jam for filling
Equipment Needed
- Baking sheet
- Mixing bowl
- Electric mixer (optional, but helpful)
- Measuring cups and spoons
- Small bowl for egg white
- Cooling rack
Instructions
-
Preheat your oven to 350°F (175°C). Ensure your oven rack is positioned in the center for even baking.
-
In a mixing bowl, cream together the ¼ cup packed brown sugar, ¼ cup shortening, ¼ cup softened butter, and ½ teaspoon vanilla. If you’re using an electric mixer, start on low speed and gradually increase to medium. Beat until the mixture is light and fluffy. This step is crucial for achieving a tender cookie.
-
Add the egg yolk (reserving the egg white for later) to the creamed mixture and beat until well combined. The yolk adds richness and contributes to the cookie’s delicate texture.
-
In a separate bowl, whisk together 1 cup flour and ¼ teaspoon salt. This ensures the salt is evenly distributed throughout the dough, enhancing the overall flavor.
-
Gradually add the flour mixture to the wet ingredients, stirring until just combined. Be careful not to overmix, as this can result in a tough cookie. The dough should come together easily and hold its shape.
-
Shape the dough into 1-inch balls. Rolling the dough between your palms creates a smooth, uniform cookie.
-
In a small bowl, beat the reserved egg white slightly with a fork.
-
Dip each cookie ball in the beaten egg white, ensuring it’s fully coated. The egg white acts as a glue, helping the nuts adhere to the cookie.
-
Roll the egg white-coated cookie ball in the ¾ cup finely chopped nuts, pressing gently to ensure the nuts stick. The nuts add a wonderful crunch and flavor contrast to the soft cookie.
-
Place the nut-coated cookies about 1 inch apart on an ungreased baking sheet. This spacing allows for proper air circulation and even baking.
-
Using your thumb or the back of a small spoon, press deeply into the center of each cookie to create a well. Make sure the well is large enough to hold a generous amount of jelly or jam.
-
Bake in the preheated oven for 8-10 minutes, or until the cookies are lightly golden brown around the edges. Keep a close eye on them, as baking times can vary depending on your oven.
-
Remove the baking sheet from the oven and let the cookies cool on the sheet for a few minutes before transferring them to a wire rack to cool completely. This prevents them from breaking while they’re still warm and fragile.
-
Fill the thumbprints with your favorite jelly or jam. Raspberry, strawberry, apricot, or even a homemade fruit preserve work beautifully. A small spoon or piping bag makes this step neat and easy.
Expert Tips & Tricks
-
Chill the dough: For a slightly firmer cookie that holds its shape even better, chill the dough for 30 minutes before rolling into balls.
-
Toast the nuts: Toasting the nuts before chopping them enhances their flavor and adds an extra layer of complexity to the cookies. Spread the nuts on a baking sheet and bake at 350°F (175°C) for 5-7 minutes, or until fragrant.
-
Prevent spreading: If your cookies are spreading too much in the oven, try chilling the dough or adding a tablespoon of flour to the batter.
-
Consistent Thumbprints: For uniform thumbprints, use the back of a measuring spoon that is smaller than your thumb.
-
Jam consistency: If your jam is too thick, microwave it for a few seconds until it loosens up.
Serving & Storage Suggestions
These Sweet & Nutty Thumbprint Cookies are perfect served alongside a cup of tea or coffee, or as a sweet treat after a meal. They also make a lovely addition to a cookie platter or gift basket.
-
Storage: Store the cooled cookies in an airtight container at room temperature for up to 3 days.
-
Freezing: For longer storage, freeze the cookies in an airtight container for up to 2 months. Thaw at room temperature before serving. It’s best to freeze them unfilled and add the jelly after thawing to avoid a soggy filling.
Nutritional Information
| Nutrient | Amount per Serving | % Daily Value |
|---|---|---|
| Calories | 110.6 kcal | N/A |
| Calories from Fat | 70 g | 64% |
| Total Fat | 7.8 g | 12% |
| Saturated Fat | 2.5 g | 12% |
| Cholesterol | 15.4 mg | 5% |
| Sodium | 88.2 mg | 3% |
| Total Carbohydrate | 8.8 g | 2% |
| Dietary Fiber | 0.6 g | 2% |
| Sugars | 3 g | 11% |
| Protein | 1.9 g | 3% |
Variations & Substitutions
-
Gluten-Free: Substitute the all-purpose flour with a gluten-free blend for a gluten-free version.
-
Different Nuts: Experiment with different types of nuts, such as hazelnuts, macadamia nuts, or even pistachios.
-
Chocolate Thumbprints: Add 2 tablespoons of cocoa powder to the dry ingredients for chocolate thumbprint cookies.
-
Citrus Zest: Add the zest of a lemon or orange to the dough for a burst of citrus flavor.
-
Spice It Up: Add a pinch of cinnamon, nutmeg, or cardamom to the dough for a warm, spiced flavor.
FAQs (Frequently Asked Questions)
Q: Can I use margarine instead of butter?
A: While you can, butter provides a richer flavor and texture. If you use margarine, choose a high-quality variety.
Q: My jelly is running when I bake the cookies. What am I doing wrong?
A: It’s best to add the jelly after baking to avoid it melting and running. If you add it before, use a very small amount and ensure it’s a thick, high-quality jam.
Q: The nuts are falling off my cookies. How can I prevent this?
A: Make sure the egg white coating is even and that you press the nuts gently but firmly onto the dough.
Q: Can I make these cookies ahead of time?
A: Yes, you can make the dough ahead of time and store it in the refrigerator for up to 2 days. Let it soften slightly before rolling into balls. You can also bake the cookies (without the filling) and store them in an airtight container for up to 3 days.
Q: What can I use if I don’t have nuts?
A: If you have a nut allergy or simply don’t like nuts, you can use sprinkles, shredded coconut, or even crushed pretzels instead.
Final Thoughts
These Sweet & Nutty Thumbprint Cookies are more than just a recipe; they’re a little piece of edible nostalgia, a reminder of simpler times, and the joy of sharing delicious treats with loved ones. I hope you’ll give this recipe a try and create your own sweet memories. Don’t be afraid to experiment with different flavors and fillings to create your unique signature thumbprint cookie. And, of course, I’d love to hear about your baking adventures! Share your tips, variations, and photos – happy baking!