
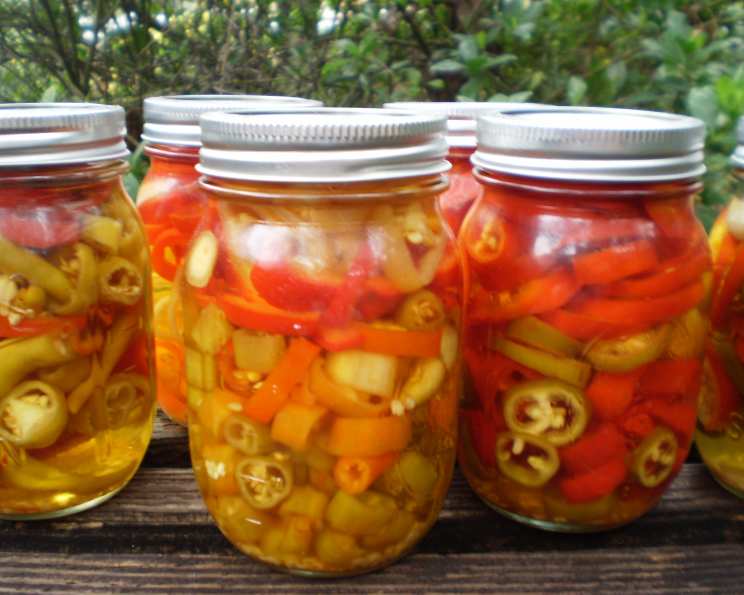
Sweet Pepper Relish: A Taste of Sunshine in a Jar
The memory is as clear as the summer sky above Grandma’s garden: rows of colorful bell peppers, glistening in the morning dew. Every year, as the season began to fade, we’d harvest those sweet peppers, transforming them into jars of this vibrant relish. The sweet, tangy aroma would fill her kitchen, a promise of sunshine even on the coldest winter days. This Sweet Pepper Relish isn’t just a condiment; it’s a taste of home, a little bit of love preserved in every spoonful.
Recipe Overview
- Prep Time: 45 minutes
- Cook Time: 25-30 minutes
- Total Time: 1 hour 15 minutes
- Yields: 3-4 pints (6-8 half pints)
- Dietary Type: Vegan, Gluten-Free
Ingredients
- 6 medium green bell peppers
- 6 medium red bell peppers (or mix and match as needed, yellow and orange peppers are good in here too)
- 3 medium onions
- 2-4 hot chili peppers (jalapeno, habanero, serrano) (optional)
- 1 1/2 cups apple cider vinegar
- 1 1/2 cups sugar
- 1 tablespoon pickling salt
- 1 tablespoon mustard seeds
- 1 tablespoon celery seed
- 2 garlic cloves, minced
Equipment Needed
- Food processor or food grinder
- 6-8 quart saucepot
- Pint or half-pint canning jars
- Boiling water canner
- Nonmetallic utensil
- Jar lifter
- Lid lifter (optional, but recommended)
Instructions
-
Begin by washing, coring, and seeding the bell peppers. Remove all the seeds and membranes from the inside of each pepper. This step is crucial for achieving the best texture and flavor in your relish.
-
Using a food processor or food grinder, coarsely grind the prepared bell peppers and onions. Be careful not to over-process them; you want a slightly chunky texture, not a puree. If you don’t have a food processor or grinder, you can finely chop them by hand, but it will take considerably longer.
-
In a 6-8 quart saucepot, combine the ground vegetables with the remaining ingredients: apple cider vinegar, sugar, pickling salt, mustard seeds, celery seed, and minced garlic. Mix well to ensure the sugar and salt are evenly distributed.
-
Place the saucepot over medium-high heat, stirring occasionally. Bring the mixture to a boil, then reduce the heat slightly to maintain a gentle, rolling boil.
-
Boil the relish mixture for 25-30 minutes, or until it has thickened to your desired consistency. Stir frequently during this stage to prevent the relish from sticking to the bottom of the pot and burning. The mixture should be noticeably reduced in volume and have a glossy appearance. A good test is to drag a spoon across the bottom of the pot; if the mixture slowly fills in the gap, it’s likely ready.
-
If you are not canning the relish, you can now transfer it to containers and refrigerate. It should keep in the refrigerator for about 2-3 weeks. You could also freeze the relish at this point, although it’s not the ideal method for long term storage as the texture may soften slightly upon thawing.
-
For canning, prepare your canning jars. Ensure your jars and lids are sterilized following proper canning procedures. Keep the jars hot until ready to fill.
-
Immediately fill the hot, sterilized pint or half-pint jars with the hot relish mixture, leaving 1/2-inch headspace at the top of each jar. Headspace is crucial for proper sealing.
-
Carefully run a nonmetallic utensil (like a spatula or wooden spoon) down inside of each jar to release any trapped air bubbles. This helps ensure a good seal and prevents spoilage.
-
Wipe the jar tops and threads clean with a damp cloth. Any food residue can interfere with the sealing process.
-
Place the lids on the jars, centering them carefully. Screw the bands on firmly, but not too tightly. You should be able to feel a little bit of give.
-
Process the filled jars in a boiling water canner for 15 minutes. Ensure the water covers the jars by at least 1 inch. Adjust processing time for altitude if necessary, following USDA guidelines.
-
Once the processing time is complete, turn off the heat and carefully remove the jars from the canner using a jar lifter. Place them on a towel-lined surface, leaving space between each jar for air circulation.
-
Let the jars cool completely, undisturbed, for 12-24 hours. As the jars cool, you should hear a “pop” sound, indicating that the lids have sealed properly.
-
After the cooling period, check the seals by pressing down on the center of each lid. If the lid doesn’t flex or pop back up, the jar is sealed. Any unsealed jars should be refrigerated immediately and used within a few weeks.
Expert Tips & Tricks
- Adjust the Heat: Feel free to adjust the amount of hot chili peppers to suit your taste. For a milder relish, use fewer peppers or remove the seeds and membranes. For a fiery kick, use more peppers or opt for hotter varieties like habaneros.
- Consistency is Key: The consistency of your relish will depend on the length of the boiling time. For a thicker relish, boil it for a few extra minutes, but be careful not to burn it.
- Spice it Up: For a deeper flavor, consider adding a pinch of ground cumin or coriander along with the other spices.
- Don’t Skip the Salt: The pickling salt is crucial for both flavor and preservation. Don’t substitute table salt, as it contains additives that can cloud the relish and affect its shelf life.
- Color Coordination: For a visually appealing relish, use a variety of bell peppers in different colors, such as red, yellow, and orange.
Serving & Storage Suggestions
This Sweet Pepper Relish is incredibly versatile. Serve it as a condiment with grilled meats, sausages, or burgers. It’s also delicious on sandwiches, in wraps, or as a topping for crackers and cream cheese. Try using it as a base for homemade pizza or as a flavorful addition to scrambled eggs.
Properly canned and sealed jars can be stored in a cool, dark place for at least 1 year. Once opened, refrigerate the relish and use it within a few weeks. If you choose not to can the relish, it should be stored in the refrigerator and used within 2-3 weeks. Freezing is possible but may affect the texture upon thawing.
Nutritional Information
| Nutrient | Amount per Serving | % Daily Value |
|---|---|---|
| Calories | 599.6 kcal | N/A |
| Calories from Fat | N/A | N/A |
| Total Fat | 2.5g | 3% |
| Saturated Fat | 0.3g | 1% |
| Cholesterol | 0mg | 0% |
| Sodium | 2357.6mg | 98% |
| Total Carbohydrate | 138.9g | 46% |
| Dietary Fiber | 11.5g | 45% |
| Sugars | 120.8g | N/A |
| Protein | 6.7g | 13% |
Variations & Substitutions
- Spicy Relish: Increase the amount of hot chili peppers or use hotter varieties like Scotch Bonnets or ghost peppers.
- Sweet & Tangy: Add a splash of balsamic vinegar along with the apple cider vinegar for a richer, more complex flavor.
- Fruit Forward: Include a cup of diced apples or pears along with the vegetables for a sweeter, fruitier relish.
- Mediterranean Twist: Add a handful of chopped olives and a tablespoon of capers for a Mediterranean-inspired relish.
- No Sugar Added: While the recipe calls for sugar, it can be reduced. Keep in mind that sugar helps preserve the relish, so reducing it significantly may affect shelf life. Alternative sweeteners can be used, but the flavor profile will change.
FAQs (Frequently Asked Questions)
Q: Can I use frozen peppers if I don’t have fresh ones?
A: While fresh peppers are preferred for the best texture, you can use frozen peppers in a pinch. Just be sure to thaw them thoroughly and drain off any excess liquid before grinding.
Q: How do I know if my jars are properly sealed?
A: After cooling, the lid should be concave and not flex when pressed down. You should also hear a distinct “pop” when the jars are sealing.
Q: What can I do if my relish is too watery?
A: If your relish is too watery, you can continue to boil it for a few more minutes to reduce the liquid. Be sure to stir frequently to prevent burning.
Q: Can I use different types of vinegar?
A: Apple cider vinegar is recommended for its flavor, but you can use white vinegar as a substitute. Avoid using stronger vinegars like red wine vinegar, as they can overpower the other flavors.
Q: How long does the relish last once it’s opened?
A: Once opened, the relish should be stored in the refrigerator and used within a few weeks for optimal quality and safety.
Final Thoughts
I truly hope this Sweet Pepper Relish recipe brings as much joy to your kitchen as it has to mine. Don’t be afraid to experiment with the ingredients and make it your own. Share your creations with friends and family, and let the sunshine in a jar brighten their day. Happy cooking, and don’t hesitate to leave a comment below with your feedback or any questions you may have!