
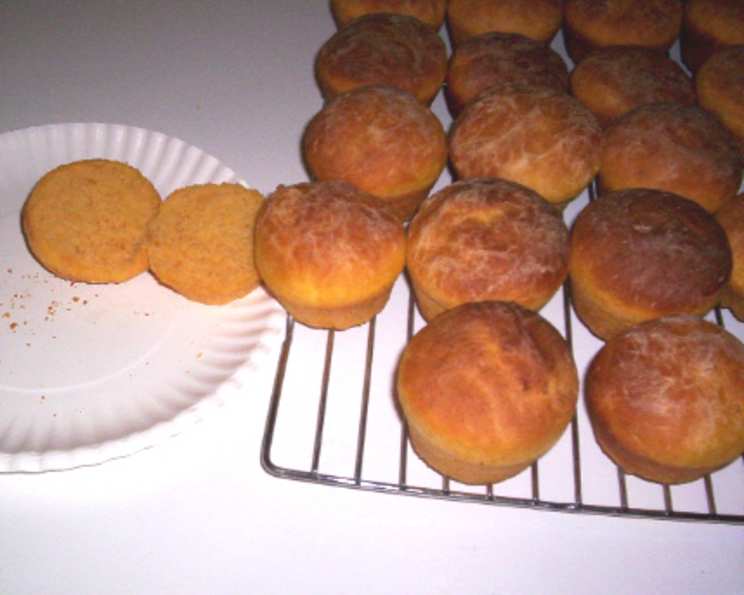
Sweet Potato Rolls: A Taste of Home
The scent of freshly baked bread has always been synonymous with comfort and family to me. As a child, I remember my grandmother’s kitchen, perpetually warm and filled with the aroma of yeast and sugar. One particular Thanksgiving, she surprised us all with rolls that were subtly sweet and boasted a beautiful, golden hue. We devoured them, marveling at their unique flavor, and she simply smiled, revealing her secret ingredient: sweet potato. These rolls became a holiday staple, a warm, comforting reminder of family and togetherness, and I’m thrilled to share my version with you.
Recipe Overview
- Prep Time: 45 minutes
- Cook Time: 13-15 minutes
- Total Time: 2 hours 30 minutes (including rise time)
- Yields: 20-24 rolls
- Serves: 20
- Dietary Type: Vegetarian
Ingredients
- 1 large sweet potato
- 1 (1/4 ounce) package active dry yeast
- 1 teaspoon salt
- 3 tablespoons sugar
- 1 tablespoon butter
- 1 cup milk
- 3 1/2 – 4 1/2 cups bread flour (all-purpose can substitute)
Equipment Needed
- Saucepan
- Measuring cups and spoons
- Mixing bowls
- Whisk
- Muffin pan
- Wire rack
- Clean tea towel
Instructions
- Begin by preparing the sweet potato. Peel it and dice it into small cubes. Place the diced potato in a saucepan and add enough water to just cover the pieces. Cook the sweet potato over medium heat until it is very tender. This usually takes about 15-20 minutes.
- Once the sweet potato is tender, drain the water, but reserve 1/4 cup of the potato water. Set the reserved potato water aside to cool.
- Allow the reserved potato water to cool until it is lukewarm. Once it reaches a comfortable temperature, dissolve the active dry yeast in the lukewarm potato water. Set aside for about 5-10 minutes, or until the yeast begins to foam. This indicates that the yeast is active and ready to use.
- While the yeast is proofing, mash the cooked sweet potato thoroughly until it is smooth, ensuring there are no large lumps.
- To the mashed sweet potato, add the salt, sugar, and butter. Beat the mixture vigorously until everything is well combined and the butter is melted. The warmth of the sweet potato will help melt the butter.
- In a separate small saucepan or in the microwave, heat the milk until a film just begins to form on top. Be careful not to boil the milk. If heating on the stovetop, watch closely.
- Skim off the film that forms on the milk and add the warmed milk to the sweet potato mixture. Whisk until everything is well combined and the mixture is smooth.
- Once the yeast mixture has foamed, indicating it is active, whisk it into the sweet potato mixture. Ensure everything is thoroughly combined.
- Now it’s time to add the flour. Begin by adding 3 1/2 cups of bread flour to the wet ingredients, one cup at a time, stirring well after each addition. The amount of flour needed will depend on the size and moisture content of the sweet potato, so adjust as necessary.
- Continue adding flour until the dough reaches a consistency that can be kneaded. It should be slightly sticky but not overly wet.
- Lightly flour a clean work surface. Turn the dough out onto the floured surface and begin to knead it. Knead the dough for about 8-10 minutes, adding flour as necessary to prevent it from sticking. The dough should become smooth and elastic.
- Grease a large bowl with butter or oil. Place the kneaded dough into the greased bowl, turning to coat all sides. This prevents the dough from drying out.
- Cover the bowl with a clean tea towel and place it in a warm place to rise. Allow the dough to rise until it has doubled in size. This usually takes about 1-1.5 hours, depending on the temperature of your environment.
- Once the dough has doubled in size, punch it down gently to release the air.
- Pinch off pieces of dough that are slightly larger than a golf ball. Shape each piece into a smooth ball.
- Grease a muffin pan. Place each dough ball into a greased muffin cup.
- Cover the muffin pan with a clean tea towel and let the rolls rise again until they have doubled in size. This second rise usually takes about 30-45 minutes.
- Preheat your oven to 425°F (220°C).
- Once the rolls have doubled in size, bake them in the preheated oven for 13 to 15 minutes, or until they are golden brown on top. Oven temperatures can vary, so keep a close eye on them to prevent burning.
- Remove the baked rolls from the oven and transfer them to a wire rack to cool.
- Serve warm and enjoy!
Expert Tips & Tricks
- For a richer flavor, use brown butter instead of regular butter in the dough.
- If you don’t have bread flour, all-purpose flour works well too, but the rolls may be slightly less chewy.
- To ensure a soft and fluffy texture, don’t over-knead the dough.
- If your kitchen is cold, place the dough in a slightly warmed oven (turned off) to rise.
- For a beautiful shine, brush the tops of the rolls with melted butter before baking.
Serving & Storage Suggestions
These sweet potato rolls are perfect served warm with butter, jam, or as a side to your favorite meal. They are especially delightful with Thanksgiving or Christmas dinner.
- Room Temperature: Store leftover rolls in an airtight container at room temperature for up to 2 days.
- Refrigerator: Store leftover rolls in an airtight container in the refrigerator for up to 5 days.
- Freezer: For longer storage, freeze the rolls in a freezer-safe bag or container for up to 2 months. Thaw overnight in the refrigerator before reheating.
To reheat, wrap the rolls in foil and warm them in a 350°F (175°C) oven for about 10-15 minutes, or until heated through. You can also microwave them for a shorter time, but they may become slightly tougher.
Nutritional Information
| Nutrient | Amount per Serving | % Daily Value |
|---|---|---|
| Calories | 106.5 kcal | N/A |
| Calories from Fat | 11g | 11% |
| Total Fat | 1.3 g | 1% |
| Saturated Fat | 0.7 g | 3% |
| Cholesterol | 3.2 mg | 1% |
| Sodium | 130.5 mg | 5% |
| Total Carbohydrate | 20.6 g | 6% |
| Dietary Fiber | 0.9 g | 3% |
| Sugars | 2.2 g | N/A |
| Protein | 2.9 g | 5% |
Note: Nutritional information is an estimate and can vary based on specific ingredients and portion sizes.
Variations & Substitutions
- Vegan: Substitute the butter with vegan butter and the milk with plant-based milk like almond, soy, or oat milk.
- Spiced: Add a pinch of cinnamon, nutmeg, or ginger to the dough for a warm, spiced flavor.
- Herbaceous: Incorporate fresh herbs like rosemary or thyme into the dough for a savory twist.
- Gluten-Free: Substitute the bread flour with a gluten-free bread flour blend. Be aware that the texture may be slightly different.
FAQs (Frequently Asked Questions)
Q: Can I use canned sweet potato puree instead of roasting a whole sweet potato?
A: Yes, you can use canned sweet potato puree. Just make sure it’s 100% sweet potato and doesn’t contain any added sugar or spices. Adjust the amount of liquid accordingly, as the puree might have a different moisture content.
Q: How can I tell if my yeast is still good?
A: To test your yeast, dissolve it in warm water with a pinch of sugar. If it foams up within 5-10 minutes, it’s active and good to use.
Q: Why aren’t my rolls rising properly?
A: Several factors can affect the rise of your rolls, including the temperature of your kitchen, the freshness of your yeast, and over-kneading the dough. Ensure your yeast is active, provide a warm environment for rising, and avoid over-kneading.
Q: Can I make the dough ahead of time and bake the rolls later?
A: Yes, you can prepare the dough ahead of time. After the first rise, punch down the dough, cover it tightly, and refrigerate it for up to 24 hours. When ready to bake, let the dough come to room temperature before shaping and baking.
Q: My rolls are browning too quickly. What should I do?
A: If your rolls are browning too quickly, tent them with aluminum foil during the last few minutes of baking to prevent them from burning.
Final Thoughts
These sweet potato rolls are more than just bread; they’re a taste of home, a warm embrace from the past. I encourage you to try this recipe and experience the joy of creating something truly special. Don’t be afraid to experiment with variations and make it your own. Share your creations and let me know how they turn out. Happy baking!