
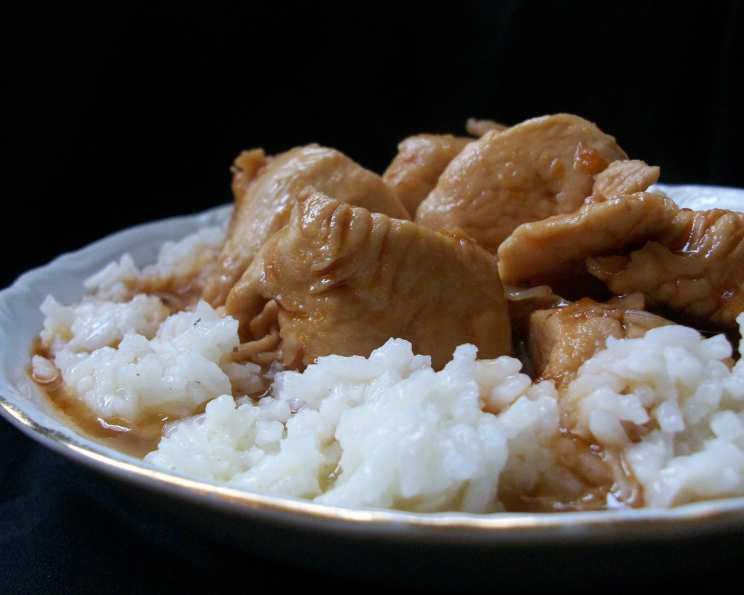
Sweet & Spicy Chicken: A Flavor Explosion
My earliest memories of comfort food involve a sweet and savory aroma wafting from the kitchen, a symphony of spices that promised warmth and satisfaction. This Sweet & Spicy Chicken recipe evokes that same nostalgic feeling – a culinary hug that balances the tangy zest of cider vinegar with the fiery kick of red pepper flakes, all wrapped around tender pieces of chicken. It’s a dish born from culinary experimentation, a happy accident where “fixing” one recipe led to the creation of a family favorite. This dish is meant to be personalized, so don’t be afraid to adjust the sweetness and spice levels to your liking.
Recipe Overview
Here are the key facts about this delicious Sweet & Spicy Chicken recipe:
- Prep Time: 10 minutes
- Cook Time: 30 minutes
- Total Time: 40 minutes
- Servings: 4-6
- Dietary Type: Varies (Can be Gluten Free)
Ingredients
Here’s what you’ll need to create this delightful dish:
- 1-2 lb boneless skinless chicken breast, cooked and chopped into large chunks
- 6 ounces frozen mixed vegetables (carrots, broccoli, and water chestnuts recommended)
For the Sauce:
- 2 garlic cloves, minced (or 2 tsp minced jarred garlic)
- ½ cup apple juice
- ⅔ cup brown sugar
- 4 tablespoons ketchup
- 1-2 teaspoon red pepper flakes (to taste)
- 1 ¼ cups water
- ¼ cup soy sauce
- 1 teaspoon beef base (or beef bouillon granules)
- ⅛ cup cider vinegar, plus 2 ½ teaspoons cider vinegar
- ½ teaspoon dark molasses
- ¼ teaspoon pepper
Equipment Needed
- Large chef’s pan or large pan with a lid
- Measuring cups and spoons
- Knife
- Cutting board
- Stirring spoon
Instructions
Follow these steps to create your own Sweet & Spicy Chicken:
- Combine the sauce ingredients: In a large chef’s pan (or any large pan with a lid), combine all the sauce ingredients: minced garlic, apple juice, brown sugar, ketchup, red pepper flakes, water, soy sauce, beef base, cider vinegar (both measurements), dark molasses, and pepper.
- Simmer the sauce: Place the pan on the stove over medium heat. Stir constantly until the mixture becomes slightly bubbly and all the ingredients are thoroughly combined. This ensures the flavors meld together beautifully.
- Add the chicken and vegetables: Add the cooked chicken and frozen mixed vegetables (if using) to the pan. Stir to coat the chicken and vegetables evenly with the sauce.
- Cook and simmer: Cover the pan with the lid. Cook over medium/high heat for 20-30 minutes, stirring every 10 minutes (or more frequently if your pan tends to stick). The cooking time may vary depending on your stove. The goal is to cook until the sauce reaches your desired thickness and the chicken and vegetables are heated through.
- Serve: Serve hot over rice.
Expert Tips & Tricks
- Adjusting the Sweetness and Spice: The beauty of this recipe lies in its adaptability. Adjust the amount of brown sugar to control the sweetness. Increase or decrease the red pepper flakes to customize the level of spiciness to your preference. Remember, you can always add more spice, but you can’t easily take it away!
- Achieving the Perfect Sauce Consistency: For a thicker, glaze-like sauce, cook the mixture for a slightly longer time and leave the lid off during most of the cooking process. This allows the excess moisture to evaporate, concentrating the flavors and creating a sticky, caramelized glaze. Be sure to keep a close eye on it to prevent burning.
- Preventing Overcooked Chicken: If you’re concerned about overcooking the chicken, especially when adding vegetables, you have a couple of options. You can cook the vegetables separately and add them towards the end of the cooking time. Alternatively, chop the chicken into pieces when raw and pan-fry it briefly to seal in the moisture before adding it to the sauce. This will help prevent it from breaking down during the simmering process.
- Don’t Reduce the Water: While it might be tempting to reduce the amount of water to speed up the cooking process, I would advise against it. The water plays a crucial role in the flavor development of the sauce. Reducing it can alter the taste in a way that might not be desirable.
- For Gluten Free: Ensure the soy sauce and beef base used are gluten free options.
Serving & Storage Suggestions
Serve your Sweet & Spicy Chicken hot, preferably over a bed of fluffy rice. Garnish with chopped green onions or sesame seeds for an added visual appeal and subtle flavor.
For leftovers, allow the chicken to cool completely before transferring it to an airtight container. Store it in the refrigerator for up to 3-4 days. To reheat, you can microwave it for a few minutes until heated through, or warm it up in a pan on the stovetop over medium heat. If the sauce has thickened too much during storage, add a splash of water or apple juice while reheating to restore its original consistency. Freezing is also an option; properly stored, it can last for up to 2 months.
Nutritional Information
Here’s an estimate of the nutritional content per serving:
| Nutrient | Amount per Serving | % Daily Value |
|---|---|---|
| Calories | 347 kcal | N/A |
| Total Fat | 3.4 g | 5% |
| Saturated Fat | 0.7 g | 3% |
| Cholesterol | 72.6 mg | 24% |
| Sodium | 1349.7 mg | 56% |
| Total Carbohydrate | 52.1 g | 17% |
| Dietary Fiber | 2.3 g | 9% |
| Sugars | 42.9 g | N/A |
| Protein | 28.1 g | 56% |
Note: Nutritional information is an estimate and can vary based on specific ingredients and serving sizes.
Variations & Substitutions
- Vegetarian Option: Substitute the chicken with firm tofu or tempeh for a vegetarian version. Be sure to press the tofu to remove excess water before adding it to the sauce.
- Honey-Garlic Chicken: Replace the brown sugar with honey for a slightly different flavor profile. The sweetness of honey combined with the savory garlic creates a delicious variation.
- Pineapple Chicken: Add chunks of pineapple to the sauce for a tropical twist. The tangy sweetness of pineapple complements the spicy elements beautifully.
- Spicy Level Adjustment: If you’re sensitive to spice, start with a smaller amount of red pepper flakes (like ¼ teaspoon) and gradually add more to taste. You can also use a milder chili powder or omit the red pepper flakes altogether and add a pinch of cayenne pepper for a more controlled heat.
- Maple Syrup Substitution: In a pinch, you can use maple syrup as a substitute for molasses, though the flavor profile will change slightly.
- Vegetable Variety: Feel free to experiment with different vegetable combinations. Bell peppers, snap peas, or even edamame would all be great additions.
FAQs (Frequently Asked Questions)
Q: Can I use chicken thighs instead of chicken breasts?
A: Absolutely! Chicken thighs will add a richer flavor to the dish. Just be sure to trim any excess fat before cooking.
Q: Can I make this dish ahead of time?
A: Yes, this Sweet & Spicy Chicken can be made ahead of time. In fact, the flavors often meld together even more beautifully when allowed to sit overnight in the refrigerator.
Q: How do I prevent the sauce from becoming too thick?
A: If the sauce becomes too thick, simply add a little more water or apple juice to thin it out to your desired consistency.
Q: Can I use a different type of vinegar?
A: While cider vinegar provides a unique tang, you can experiment with other vinegars like rice vinegar or white vinegar. Just be aware that the flavor will be slightly different.
Q: Can I freeze this dish?
A: Yes, this dish freezes well. Allow it to cool completely before transferring it to an airtight freezer-safe container.
Final Thoughts
Sweet & Spicy Chicken is more than just a recipe; it’s an invitation to experiment, to personalize, and to create a dish that truly reflects your own tastes. Don’t be afraid to play with the sweetness and spice levels, to add your own favorite vegetables, or to try different protein sources. So gather your ingredients, put on some music, and embark on a culinary adventure. I hope you enjoy the process as much as you enjoy the final product. And please, share your creations and feedback – I’m always excited to see how others make this recipe their own! This goes perfectly with a side of steamed broccoli, or a simple salad. Enjoy!