
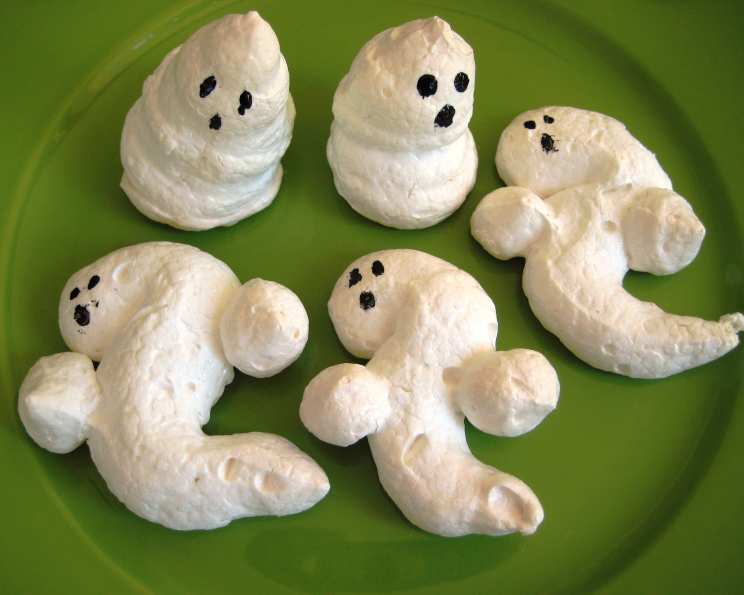
Mastering Swiss Meringue: A Chef’s Guide to Light and Airy Perfection
The first time I attempted meringue, I was eight years old, perched on a stool in my grandmother’s sun-drenched kitchen. I remember the almost unbearable anticipation as I watched her whip egg whites into glossy peaks, a transformation that seemed like pure magic. She let me lick the bowl, the sweetness of the sugar and the faint tang of egg a flavor I’ll never forget. Although my first attempt was a disaster – a soupy mess that refused to stiffen – my grandmother’s patience and guidance sparked a lifelong fascination with the delicate art of meringue making. And of all the meringues, Swiss meringue holds a special place, renowned for its stability, versatility, and exquisitely smooth texture.
Recipe Overview
- Prep Time: 15 minutes
- Cook Time: 15-20 minutes
- Total Time: 30-35 minutes
- Servings: Varies depending on size
- Yield: Varies depending on size
- Dietary Type: Gluten-Free, Dairy-Free
Ingredients
- 2 egg whites (room temperature)
- 1/4 teaspoon cream of tartar
- 1/4 cup vanilla sugar (or granulated sugar with a few drops of vanilla extract)
Equipment Needed
- Large grease-free mixing bowl
- Electric mixer (stand mixer or hand mixer)
- Large baking sheet
- Parchment paper
- Piping bag (optional)
- Piping tip (optional)
Instructions
-
Preheat your oven to a low temperature of 200 degrees Fahrenheit (93 degrees Celsius). It’s crucial to use a low temperature to dry the meringues slowly, preventing them from cracking or browning too quickly.
-
Line a large baking sheet with parchment paper. This will prevent the meringues from sticking and make it easier to remove them once they’re baked.
-
In a large, scrupulously grease-free mixing bowl, begin beating the egg whites at a slow, steady speed using your electric mixer. The bowl and beaters must be completely clean and free of any traces of fat, as fat inhibits the egg whites from properly whipping.
-
Once the egg whites become foamy – resembling a bubble bath – add the cream of tartar. Cream of tartar acts as a stabilizer, helping the egg whites hold their structure and preventing them from collapsing.
-
Gradually add the vanilla sugar (or granulated sugar with vanilla extract), one tablespoon at a time, while continuing to beat the egg whites. Adding the sugar slowly allows it to dissolve properly into the egg whites, creating a smooth and stable meringue.
-
As the meringue begins to form soft peaks – the peaks will gently fold over when the beaters are lifted – increase the mixer speed to moderate.
-
Continue beating for another 5-8 minutes, or until the meringue is thick, glossy, and forms firm, stiff peaks when the beaters are lifted. The meringue should hold its shape and not droop. This stage is critical for creating a stable meringue that will hold its shape during baking.
-
To secure the parchment paper to the cookie sheet and prevent it from sliding, place small dots of meringue under each corner of the parchment paper. This simple trick makes piping much easier.
-
If desired, transfer the meringue to a piping bag fitted with your desired tip. Keep your designs relatively simple, especially when starting out, as delicate meringue pieces can shatter easily. Practice piping a few shapes on a separate piece of parchment paper before starting on the baking sheet.
-
Bake small meringue pieces for about 15 minutes, and thicker pieces for 15-20 minutes. The meringues are done when they are dry to the touch and easily lift off the parchment paper. They should be mostly white, with very slight browning.
-
Once baked, turn off the oven and let the meringues cool completely inside the oven with the door slightly ajar. This gradual cooling process helps to prevent cracking.
Expert Tips & Tricks
- Room temperature egg whites: Egg whites whip up to a greater volume when they are at room temperature.
- Grease-free is key: Ensure your bowl and beaters are completely free of grease. A tiny bit of fat can prevent the egg whites from whipping properly.
- Slow and steady wins the race: Adding the sugar gradually is crucial for creating a stable meringue.
- Don’t overbake: Overbaking will result in browned and potentially cracked meringues. Aim for a pale white color.
- Humidity is the enemy: On humid days, meringues may take longer to dry and may be slightly sticky. Consider adding a tablespoon of cornstarch to the meringue for added stability in humid conditions.
- Troubleshooting: If your meringue is grainy, it may be overbeaten. Unfortunately, there’s no real fix for this, so it’s best to start over. If your meringue is weeping (releasing liquid), it may be underbeaten, or the sugar may not have dissolved properly.
Serving & Storage Suggestions
Serve your Swiss meringues as a light and airy dessert on their own, or use them to garnish cakes, pies, and other treats. They are especially delicious crumbled over fresh berries or served with a dollop of whipped cream.
Store fully cooled meringues in an airtight container at room temperature. They will keep for several weeks, provided they are protected from moisture. Avoid storing them in the refrigerator, as the humidity will cause them to become sticky and lose their crispness.
Nutritional Information
(Note: Nutritional information is an estimate and can vary based on ingredient variations and serving size.)
| Nutrient | Amount per Serving (Estimate) | % Daily Value (Estimate) |
|---|---|---|
| Calories | 15-20 kcal | 1% |
| Total Fat | 0g | 0% |
| Saturated Fat | 0g | 0% |
| Cholesterol | 0mg | 0% |
| Sodium | 1mg | 0% |
| Total Carbohydrate | 4-5g | 1-2% |
| Dietary Fiber | 0g | 0% |
| Sugars | 4-5g | N/A |
| Protein | 0g | 0% |
Variations & Substitutions
- Flavor variations: Experiment with different extracts, such as almond, lemon, or peppermint.
- Colored meringues: Add a few drops of food coloring to the meringue before piping for a festive touch.
- Chocolate-dipped meringues: Dip cooled meringues in melted chocolate and let them set for a decadent treat.
- Meringue kisses: Pipe small, round meringues for bite-sized treats.
- Meringue nests: Pipe meringue into small nests and fill them with whipped cream and fresh fruit.
FAQs (Frequently Asked Questions)
Q: Why are my meringues cracking?
A: Cracking is usually caused by baking the meringues at too high a temperature or cooling them too quickly. Ensure your oven temperature is accurate and let the meringues cool slowly inside the oven.
Q: My meringue is weeping. What did I do wrong?
A: Weeping can be caused by underbeating the egg whites or not dissolving the sugar properly. Make sure to beat the egg whites until stiff peaks form and add the sugar gradually, allowing it to dissolve completely.
Q: Can I make meringue on a humid day?
A: Humidity can make it more challenging to make meringue. Consider adding a tablespoon of cornstarch to the meringue mixture to help stabilize it.
Q: How long will Swiss meringue last?
A: Stored in an airtight container at room temperature, Swiss meringue will last for several weeks.
Q: Can I freeze Swiss meringue?
A: Freezing is not recommended, as it can alter the texture of the meringue.
Final Thoughts
Swiss meringue is a testament to the transformative power of simple ingredients. With a little patience and attention to detail, you can create these ethereal treats that are as beautiful as they are delicious. Don’t be discouraged if your first attempt isn’t perfect; meringue making is a skill that improves with practice. So, preheat your oven, gather your ingredients, and embark on a journey to meringue mastery. I encourage you to experiment with flavors and designs to create your own signature meringues. Share your creations and feedback – I’d love to see what you come up with! And consider pairing your meringues with a rich chocolate mousse or a tangy lemon curd for the ultimate dessert experience. Happy baking!