
Sylvia’s Perfect Pie Crust: A Baker’s Secret Weapon
The memory still lingers – the scent of cinnamon and baked apples wafting through Grandma’s kitchen, the golden-brown lattice of her apple pie, and the impossibly flaky crust that shattered with each bite. For years, I chased that elusive flakiness, experimenting with countless recipes that promised the world but delivered only disappointment. Then, a culinary angel named Sylvia shared her secret, and my pie-making world was forever changed. This isn’t just a pie crust; it’s a vessel for memories, a testament to friendship, and a guarantee of pie perfection.
Recipe Overview
- Prep Time: 45 minutes (includes chilling)
- Cook Time: Varies depending on the filling
- Total Time: Varies depending on the filling
- Servings: 6
- Yield: 3 thin crusts or 1 1/2 regular crusts
- Dietary Type: Vegetarian (easily adaptable to Vegan – see variations)
Ingredients
- 1 1⁄2 cups Crisco (vegetable shortening)
- 3 cups all-purpose flour
- 1 whole egg
- 5 tablespoons cold water
- 1 tablespoon white vinegar
- 1 teaspoon salt
Equipment Needed
- Large bowl
- Pastry cutter or food processor
- Small bowl
- Fork
- 3 large Ziploc bags
- Rolling pin
- Floured surface
- Metal spatula
- Pie pan
Instructions
- In a large bowl, use a pastry cutter (or a food processor for speed) to gradually work the Crisco into the flour. The goal is to break down the shortening into smaller pieces, creating a mixture that resembles a coarse meal. This process usually takes about 3 to 4 minutes. Don’t overmix! You want visible pieces of shortening to ensure flakiness. If using a food processor, pulse in short bursts to prevent over-processing.
- In a small bowl, beat the egg lightly with a fork. Then, pour the beaten egg into the flour and shortening mixture.
- Add 5 tablespoons of cold water, 1 tablespoon of white vinegar, and 1 teaspoon of salt to the bowl.
- Stir gently until all of the ingredients are just incorporated. Avoid overmixing, as this can develop the gluten in the flour and result in a tough crust. The dough should come together without being sticky. If it’s too dry, add a teaspoon of water at a time until it forms a cohesive ball.
- Separate the dough into thirds. Note: Separating it into thirds will result in three thin crusts. If you prefer a more substantial crust, separate it in half.
- Form each portion of dough into an evenly sized ball. Place each ball of dough into a large Ziploc bag.
- Using a rolling pin, slightly flatten each ball of dough to about ½ inch thick within the bag. This makes rolling it out later much easier and prevents it from sticking.
- Seal the bags and place them in the freezer until you need them. If you plan to use the dough immediately, chilling it in the freezer for about 15 to 20 minutes is still highly recommended. This chilling process is crucial for relaxing the gluten and solidifying the fat, resulting in a flakier crust.
- When you are ready to use the dough, remove it from the freezer and allow it to thaw for about 15 minutes. The dough should be pliable but still cold.
- On a lightly floured surface, roll out the dough, starting at the center and working your way out. If the dough is a bit too moist, sprinkle a little flour over the top. Avoid adding too much flour, as this can dry out the crust.
- If the dough is sticking to the countertop, use a metal spatula to carefully scrape it up and flip it over. Continue rolling until it’s about ½ inch larger in diameter than your pie pan.
- With a spatula, lift the dough carefully from the surface of the counter into the pie pan.
- Gently press the dough against the corner of the pan.
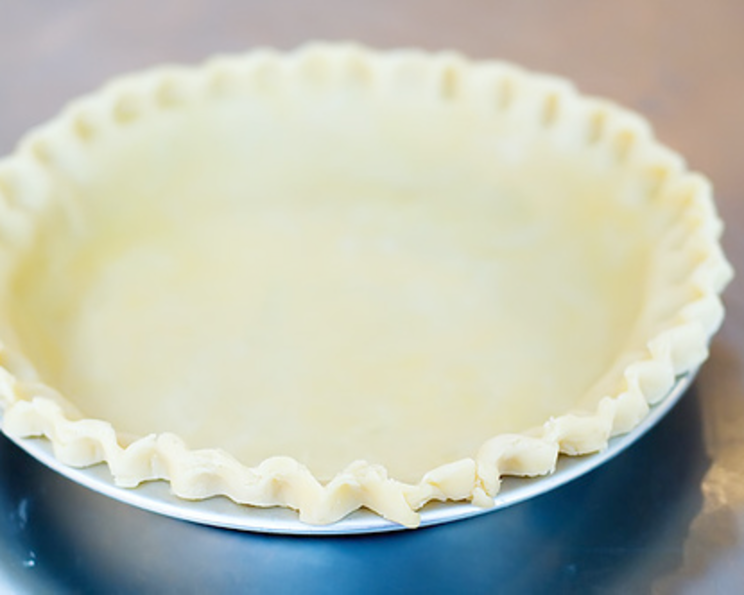
- Go around the pie pan, pinching and tucking the dough to make a clean, decorative edge. You can crimp the edges with a fork, flute them with your fingers, or use any decorative technique you prefer.
- At this point, the crust is ready to be filled and baked according to your pie recipe. For a blind-baked crust (for pies like cream pies), prick the bottom of the crust with a fork several times to prevent it from puffing up during baking. You can also line the crust with parchment paper and fill it with pie weights or dried beans. Bake at 375°F (190°C) for 15-20 minutes, or until lightly golden brown. Remove the pie weights and parchment paper and bake for another 5-10 minutes, or until the crust is fully baked.
Expert Tips & Tricks
- Keep everything cold: Cold ingredients are key to a flaky crust. Use ice water, chill your flour and shortening before you start, and work quickly to prevent the butter from melting.
- Don’t overmix: Overmixing develops the gluten in the flour, which leads to a tough crust. Mix the ingredients just until they come together.
- Rest the dough: Chilling the dough allows the gluten to relax, resulting in a more tender crust.
- Use the right amount of flour: Too much flour will make the crust dry and crumbly, while too little will make it sticky and difficult to work with. Measure your flour accurately and add more only if needed.
- Dock the crust: Pricking the bottom of the crust with a fork before baking prevents it from puffing up.
- Blind bake for a crisp crust: For pies with wet fillings, blind baking the crust ensures that it stays crisp.
- Egg Wash (optional): For a golden, glossy crust, brush with an egg wash (1 egg beaten with 1 tablespoon of water) before baking.
- Sugar Sprinkle (optional): Sprinkle the crust with sugar before baking for added sweetness and a beautiful caramelized finish.
Serving & Storage Suggestions
Serve your freshly baked pie warm or at room temperature. The crust is best enjoyed on the day it is baked. If you have leftovers, store them in the refrigerator for up to 3 days. To prevent the crust from becoming soggy, store the pie uncovered or loosely covered with plastic wrap. You can also freeze baked pies for up to 2 months. Wrap them tightly in plastic wrap and then in foil. Thaw overnight in the refrigerator before serving. You can re-crisp slightly by putting in a 350F oven for about 10 minutes before serving.
Nutritional Information
Note: Nutritional information is an estimate and will vary depending on the specific ingredients and pie filling used.
| Nutrient | Amount per Serving | % Daily Value |
|---|---|---|
| Calories | 347 kcal | 17% |
| Total Fat | 23g | 35% |
| Saturated Fat | 10g | 50% |
| Cholesterol | 15mg | 5% |
| Sodium | 260mg | 11% |
| Total Carbohydrate | 31g | 10% |
| Dietary Fiber | 1g | 4% |
| Sugars | 0g | 0% |
| Protein | 3g | 6% |
Variations & Substitutions
- Vegan Pie Crust: Substitute the egg with 3 tablespoons of applesauce or plain yogurt. Ensure your shortening is vegan as some brands may not be.
- Gluten-Free Pie Crust: Use a gluten-free all-purpose flour blend and follow the recipe as directed. You may need to add a bit more water to get the dough to come together.
- Whole Wheat Pie Crust: Substitute half of the all-purpose flour with whole wheat flour for a nuttier flavor and added fiber.
- Herb-Infused Crust: Add a tablespoon of dried herbs, such as rosemary or thyme, to the flour for a savory crust.
- Citrus Zest: Add the zest of a lemon or orange to the dough for a bright, citrusy flavor.
FAQs (Frequently Asked Questions)
Q: Why is my pie crust tough?
A: Overmixing the dough develops the gluten in the flour, resulting in a tough crust. Mix the ingredients just until they come together.
Q: Why is my pie crust shrinking?
A: This can happen if the gluten wasn’t fully relaxed. Make sure to chill the dough for the recommended time. You can also try letting the dough rest in the pie pan for 15 minutes before baking.
Q: Can I make the dough ahead of time?
A: Absolutely! The dough can be stored in the freezer for up to 2 months. Just thaw it overnight in the refrigerator before using.
Q: How do I prevent a soggy bottom crust?
A: Blind bake the crust before adding a wet filling. You can also brush the bottom crust with melted chocolate or a beaten egg white before adding the filling to create a barrier.
Q: What if I don’t have Crisco?
A: You can substitute with a high-quality butter, but make sure it is very cold and cut into small cubes. Shortening provides the best flakiness as it contains no water like butter does.
Final Thoughts
Sylvia’s Perfect Pie Crust is more than just a recipe; it’s a foundation for countless delicious memories. Don’t be intimidated by the process – with a little practice, you’ll be creating flaky, golden-brown crusts that will impress your friends and family. So, gather your ingredients, put on your favorite music, and embrace the joy of pie-making. I encourage you to try this recipe and adapt it to your own tastes. Pair your perfect pie with a scoop of vanilla ice cream or a dollop of whipped cream for the ultimate indulgence. Happy baking!