
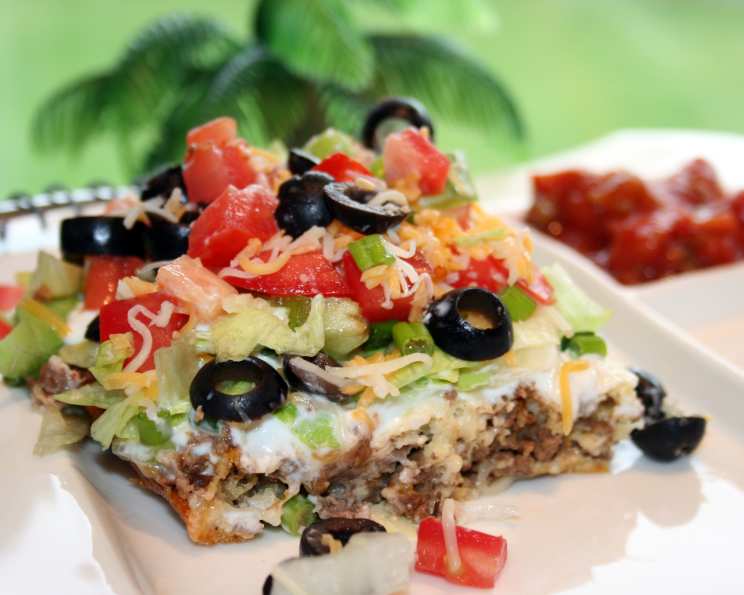
Taco Quiche: A Fiesta in Every Slice
I can still picture it: my mom, apron dusted with flour, humming along to the radio as she pulled a golden-brown, bubbling creation from the oven. It wasn’t a traditional apple pie or chocolate cake, but a quirky, savory dish she called “Taco Quiche.” The aroma alone – a tantalizing blend of seasoned beef, warm cheese, and a hint of spice – was enough to make my brother and me practically levitate with anticipation. Every bite was an explosion of flavors and textures, and it quickly became a weeknight family favorite. Now, years later, I’m excited to share this updated version of my mom’s recipe, bringing a touch of nostalgia and a whole lot of deliciousness to your table.
Recipe Overview
- Prep Time: 20 minutes
- Cook Time: 25 minutes
- Total Time: 45 minutes
- Servings: 8
- Yield: 1 quiche
- Dietary Type: Variable (can be adapted for gluten-free or dairy-free)
Ingredients
- 2 lbs ground beef
- 2 (1 1/4 ounce) envelopes taco seasoning
- 4 eggs
- 3/4 cup milk
- 1 1/4 cups baking biscuit mix (like Bisquick)
- 1 dash pepper
- 1/2 cup sour cream
- 2 1/2 cups chopped lettuce
- 3/4 cup chopped tomato
- 1/4 cup chopped green pepper
- 1/4 cup chopped green onion
- 2 cups shredded cheddar cheese
- 1 (4 ounce) can black olives (optional)
Equipment Needed
- Large skillet
- Greased 13x9x2-inch baking dish (glass preferred)
- Mixing bowl
- Whisk
- Measuring cups and spoons
Instructions
- Preheat your oven to 400°F (200°C). Ensure your oven rack is positioned in the center for even baking.
- In a large skillet over medium-high heat, brown the ground beef. Use a spatula or wooden spoon to break it up into smaller pieces as it cooks.
- Once the beef is fully browned, drain off any excess grease. This step is crucial for preventing a soggy quiche.
- Add the taco seasoning to the cooked beef. Follow the package directions for preparing the taco meat, typically involving adding water and simmering until the liquid is absorbed. Ensure the seasoning is evenly distributed for maximum flavor.
- Grease a 13x9x2-inch baking dish. Glass baking dishes conduct heat evenly, which is ideal for quiches.
- Spoon the seasoned ground beef mixture into the prepared baking dish, spreading it evenly across the bottom. This will form the flavorful base of your quiche.
- In a mixing bowl, beat together the eggs and milk until well combined. A whisk works best for this.
- Add the baking biscuit mix and pepper to the egg mixture. Mix until just combined. Be careful not to overmix, as this can result in a tough quiche. A few lumps are okay.
- Pour the egg mixture evenly over the meat in the baking dish. Ensure the beef is fully covered.
- Bake the quiche, uncovered, at 400°F (200°C) for 20-25 minutes, or until the top is golden brown and the egg mixture is set. The quiche is done when a knife inserted into the center comes out clean.
- Remove the quiche from the oven and cool for 5-10 minutes before adding the toppings. This allows the quiche to set further and prevents the sour cream from melting too much.
- Spread the sour cream evenly over the top of the cooled quiche.
- Sprinkle with the chopped lettuce, tomato, green pepper, green onion, and black olives (if using).
- Finally, top with the shredded cheddar cheese.
- Serve immediately. Consider serving with fresh salsa on the side for an extra burst of flavor.
Expert Tips & Tricks
- For a spicier quiche, use a spicier taco seasoning or add a pinch of cayenne pepper to the beef mixture.
- If you want a slightly firmer crust, pre-bake the beef mixture for 5 minutes before pouring the egg mixture over it.
- To prevent the edges from browning too quickly, you can cover the edges of the baking dish with aluminum foil during the last 10 minutes of baking.
- Feel free to experiment with different cheeses. Monterey Jack, pepper jack, or a Mexican blend would all be delicious alternatives.
- Make-ahead tip: Prepare the ground beef mixture a day in advance and store it in the refrigerator. This will save you time on the day you plan to bake the quiche.
Serving & Storage Suggestions
This taco quiche is best served warm, straight from the oven. Cut it into squares and serve as a main course for brunch, lunch, or dinner. You can also serve it with a side salad or refried beans for a complete meal.
Leftovers can be stored in an airtight container in the refrigerator for up to 3 days. To reheat, warm in the oven at 350°F (175°C) until heated through, or microwave individual portions. While freezing is possible, the texture of the sour cream and vegetables may change slightly upon thawing.
Nutritional Information
Please note that the following nutritional information is an estimate and may vary depending on specific ingredients and portion sizes.
| Nutrient | Amount per Serving | % Daily Value |
|---|---|---|
| Calories | 544.7 kcal | – |
| Calories from Fat | 320 kcal | – |
| Total Fat | 35.6 g | 54% |
| Saturated Fat | 16.4 g | 81% |
| Cholesterol | 210.8 mg | 70% |
| Sodium | 1230.3 mg | 51% |
| Total Carbohydrate | 21.1 g | 7% |
| Dietary Fiber | 2.6 g | 10% |
| Sugars | 5.5 g | – |
| Protein | 34.3 g | 68% |
Variations & Substitutions
- Gluten-Free: Use a gluten-free baking biscuit mix or create a gluten-free crust from scratch using almond flour or a similar alternative.
- Dairy-Free: Substitute the milk with unsweetened almond milk or another dairy-free alternative. Use a dairy-free sour cream alternative and dairy-free shredded cheese.
- Vegetarian: Replace the ground beef with a plant-based ground meat substitute or use a mixture of black beans, corn, and sautéed vegetables like bell peppers and onions.
- Spicy Kick: Add diced jalapenos or a dash of hot sauce to the beef mixture for extra heat.
- Crustless: Omit the biscuit mix altogether for a lighter, crustless version.
FAQs (Frequently Asked Questions)
Q: Can I use a pre-made pie crust instead of the biscuit mix?
A: Absolutely! A pre-made pie crust can be a great time-saver. Just be sure to pre-bake it according to the package directions before adding the filling.
Q: Can I add other vegetables to the quiche?
A: Yes, feel free to customize with your favorite vegetables! Sautéed mushrooms, zucchini, or spinach would all be delicious additions. Just make sure to cook them before adding them to the quiche to prevent a soggy filling.
Q: What’s the best way to prevent the quiche from sticking to the pan?
A: Greasing the baking dish thoroughly is key. You can also use a non-stick baking spray or line the dish with parchment paper.
Q: Can I make this quiche ahead of time and reheat it?
A: Yes, this quiche can be made a day or two in advance. Store it in the refrigerator and reheat it in the oven at 350°F (175°C) until heated through.
Q: My quiche is browning too quickly on top. What should I do?
A: If the top of your quiche is browning too quickly, you can loosely cover it with aluminum foil during the last 10-15 minutes of baking.
Final Thoughts
I hope you’re inspired to give this Taco Quiche recipe a try! It’s a fantastic way to add a little excitement to your meal routine, and it’s incredibly versatile, allowing you to customize it with your favorite ingredients. Don’t be afraid to experiment and make it your own! Once you try it, I’d love to hear what you think. Perhaps you could even pair it with a refreshing margarita for a truly festive meal. Happy cooking!