
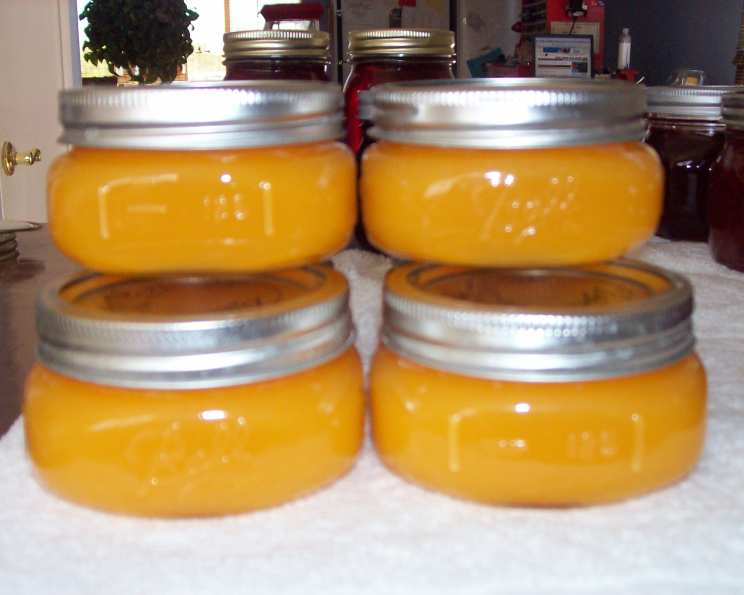
Tang-Breakfast Drink Jelly: A Blast From the Past
My earliest memories of Tang aren’t from breakfast, but from summer camping trips. The bright orange powder, mixed with icy water from a canteen, was pure magic. It wasn’t just a drink; it was an adventure in a glass. So, when I stumbled upon this vintage recipe for Tang jelly, a wave of nostalgia washed over me. Could that iconic flavor actually transform into a delicious, spreadable treat? I had to find out, and share the journey with you.
Recipe Overview
- Prep Time: 15 minutes
- Cook Time: 10 minutes
- Total Time: 25 minutes
- Yields: 6 half-pint jars
- Serves: **64
Ingredients
- 3 ¾ cups sugar
- 3 cups water
- ½ cup Tang orange crystals, powdered drink
- ⅛ teaspoon baking soda
- 1 (1 ¾ ounce) box fruit pectin (powdered)
Equipment Needed
- Large saucepan
- Metal spoon
- Half-pint glass jars
- Lids and rings for jars
- Water bath canner
Instructions
- Begin by precisely measuring out the sugar and setting it aside. This step is crucial as you’ll need it quickly later.
- In a large saucepan, combine the remaining ingredients: water, Tang orange crystals, baking soda, and fruit pectin. Ensure they are well mixed to prevent clumping and ensure even gelling.
- Place the saucepan over high heat. Stir the mixture continuously until it comes to a hard boil. A “hard boil” means the bubbles are vigorously breaking the surface and stirring doesn’t make them stop.
- Once a hard boil is achieved, immediately add all of the sugar that you measured earlier. Stir constantly to dissolve the sugar completely. This rapid addition of sugar is key to the proper setting of the jelly.
- Bring the mixture back to a full rolling boil. This means a boil that continues even while you are stirring. Maintain this full rolling boil for exactly one minute, stirring constantly. It’s important to stir continuously during this minute to prevent scorching and ensure the pectin activates properly.
- Remove the saucepan from the heat. Use a metal spoon to carefully skim off any foam that has formed on the surface of the jelly. This step improves the clarity and appearance of the finished product.
- Quickly pour the hot jelly into sterilized half-pint glass jars, leaving about ¼ inch of headspace at the top.
- Wipe the rims of the jars clean with a damp cloth to ensure a proper seal.
- Apply the lids and rings to the jars, tightening them finger-tight.
- Place the filled jars into a water bath canner. Ensure the jars are completely submerged in boiling water, with at least 1-2 inches of water covering the tops of the jars. Process the jars for 10 minutes in the boiling water. This step creates a vacuum seal and preserves the jelly.
- After processing, carefully remove the jars from the canner using a jar lifter. Place the jars on a clean, dry towel, leaving some space between them. Allow the jars to cool completely. As they cool, you should hear a “pop” sound as the lids seal.
- After the jars have cooled completely (approximately 12-24 hours), check the seals. The lids should be concave and not flex when pressed. Any jars that didn’t seal properly should be refrigerated and used immediately.
Expert Tips & Tricks
- Sugar is Key: Don’t reduce the amount of sugar in this recipe. The sugar is essential for the jelly to set properly and also acts as a preservative.
- Sterilization: Properly sterilize your jars and lids before filling them with jelly. This ensures a safe and long-lasting product. You can sterilize them by boiling them in water for 10 minutes.
- Pectin Power: Use fresh fruit pectin for the best results. Older pectin may not work as effectively, resulting in a runny jelly.
- Foam Control: A tiny pat of butter added before boiling can help reduce foaming. However, skimming is still recommended.
- Altitude Adjustments: If you live at a high altitude, you may need to increase the processing time in the water bath canner by 5-10 minutes.
- Batch Size: I recommend making this recipe in smaller batches to ensure even cooking and prevent scorching.
- Jar Handling: Always use a jar lifter when handling hot jars to prevent burns.
Serving & Storage Suggestions
This Tang jelly is fantastic on toast, bagels, or English muffins. It’s a fun and nostalgic spread that’s sure to be a conversation starter. You can also use it as a filling for thumbprint cookies or as a glaze for cakes.
Properly sealed jars of Tang jelly can be stored in a cool, dark place (like a pantry) for up to a year. Once opened, refrigerate the jelly and use it within a few weeks. If you have jars that didn’t seal properly, store them in the refrigerator immediately and use them within a week.
Nutritional Information
| Nutrient | Amount per Serving | % Daily Value |
|---|---|---|
| Calories | 53.6 kcal | N/A |
| Calories from Fat | N/A | N/A |
| Total Fat | 0 g | 0% |
| Saturated Fat | 0 g | 0% |
| Cholesterol | 0 mg | 0% |
| Sodium | 4.4 mg | 0% |
| Total Carbohydrate | 14 g | 4% |
| Dietary Fiber | 0.1 g | 0% |
| Sugars | 13.1 g | 52% |
| Protein | 0 g | 0% |
Note: Nutritional information is an estimate and may vary based on specific ingredients and preparation methods.
Variations & Substitutions
- Other Flavors: Experiment with other powdered drink mixes to create different jelly flavors. Lemonade, grape, or fruit punch could all be interesting options.
- Spice it Up: Add a pinch of ground cinnamon or nutmeg to the jelly mixture for a warm, spiced flavor.
- Citrus Zest: For a more intense orange flavor, add a teaspoon of orange zest to the jelly mixture before boiling.
- Liquid Pectin: While the recipe calls for powdered pectin, you can use liquid pectin. Follow the manufacturer’s instructions for the correct amount and addition method. Typically, liquid pectin is added after the sugar.
- Sugar-Free: While it will alter the flavor and texture significantly, you could experiment with sugar substitutes. Ensure the product you choose is suitable for high-heat cooking and canning. It might be necessary to use a “no sugar needed” pectin as well.
FAQs (Frequently Asked Questions)
Q: Why is baking soda in this recipe?
A: The baking soda neutralizes some of the acidity of the Tang, which helps with the gelling process and can improve the flavor.
Q: Can I use less sugar?
A: No, reducing the sugar will affect the gelling of the jelly and can also compromise its preservation. Sugar is essential for both texture and safety.
Q: My jelly didn’t set. What went wrong?
A: Several factors can cause jelly to not set, including using old pectin, not boiling the mixture long enough, or not using enough sugar. Ensure you are using fresh pectin and follow the recipe instructions carefully.
Q: Do I have to water bath can the jars?
A: Yes, water bath canning is essential for preserving the jelly and ensuring it’s safe to store at room temperature. Skipping this step means you’ll need to refrigerate the jelly and use it quickly.
Q: Can I freeze this jelly?
A: While you can freeze jelly, it may affect the texture. It might become slightly watery upon thawing. If you choose to freeze it, use freezer-safe containers and leave some headspace.
Final Thoughts
This Tang jelly recipe is more than just a nostalgic treat; it’s a testament to the simple pleasures of childhood. The vibrant color, the familiar tangy flavor, and the satisfying “pop” of the sealed jar all come together to create a truly unique experience. So, go ahead, dust off that vintage Sure-Jell booklet (or just use this recipe!), and give this blast from the past a try. Share your creations with friends and family, and let the conversations begin! You might just be surprised by how much everyone loves this unexpected and delightful jelly.