
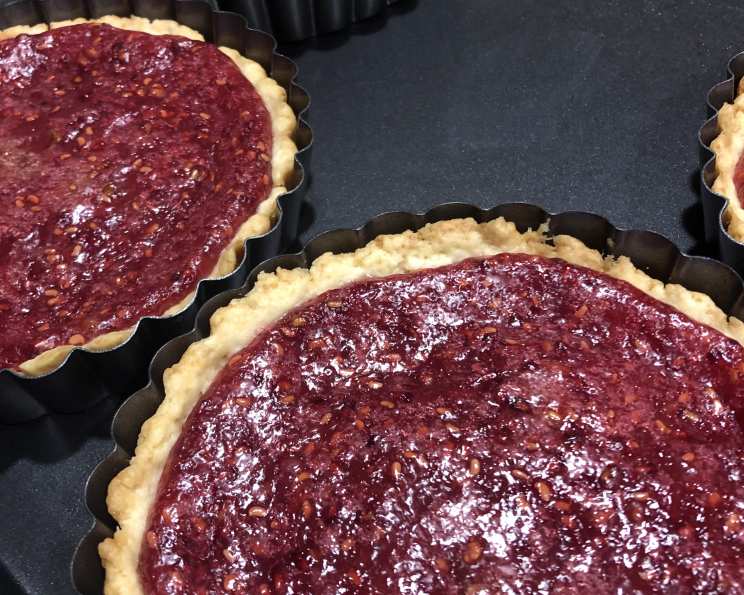
Tantalizing Raspberry Tarts
The memory is as vivid as the tartness of the first bite: perched on a stool at my grandmother’s kitchen counter, watching her nimble fingers crimp the edges of miniature tart shells. The air, thick with the aroma of warm butter and sweet raspberries, wrapped around me like a hug. She’d let me sprinkle the finished tarts with a dusting of powdered sugar, a task I took with utmost seriousness. These weren’t just desserts; they were tiny vessels of love and tradition, each one a perfect balance of crumbly crust and jewel-toned, bursting fruit.
Recipe Overview
- Prep Time: 30 minutes
- Cook Time: 25 minutes
- Total Time: 55 minutes
- Servings: 8-10
- Yield: 8-10 tarts
- Dietary Type: Vegetarian
Ingredients
For the Crust:
- 1 cup all-purpose flour
- 1 tablespoon sugar
- 1/4 teaspoon salt
- 6 tablespoons unsalted butter, chilled
- 1 egg yolk
- 1 tablespoon water
- 1 tablespoon lemon juice
For the Filling:
- 1 (10 ounce) package frozen unsweetened raspberries, thawed (or 1 cup fresh raspberries)
- 3 tablespoons cornstarch
- 1/4 cup cold water
- 3/4 cup sugar
Equipment Needed
- Large mixing bowl
- Fork
- Tart pans
- Small saucepan
- Cooling rack
- Oven
Instructions
-
Preheat your oven to 425°F. This initial blast of high heat is crucial for a flaky, golden crust.
-
In a large mixing bowl, combine the flour, sugar, and salt. Whisk these dry ingredients together to ensure even distribution, which helps in creating a consistent crust texture.
-
Cut the chilled butter into the flour mixture. The best way to do this is with a pastry blender or two knives, working quickly to prevent the butter from melting. You’re aiming for a mixture that resembles tiny peas – this creates pockets of fat that will steam during baking, resulting in a flaky crust.
-
In a separate small bowl, combine the egg yolk, water, and lemon juice. Whisk them together with a fork until lightly emulsified. The egg yolk adds richness and binds the dough, while the lemon juice tenderizes the gluten, contributing to a more delicate texture.
-
Sprinkle the egg yolk mixture over the flour mixture. Using a fork, gently stir the ingredients together until they just form a ball. Be careful not to overmix, as this will develop the gluten and result in a tough crust.
-
Pull small pieces of pastry from the ball and press them into the bottom and sides of the tart pans to about 1/8 inch thickness. Evenly distribute the dough to ensure a consistent baking time and avoid overly thick or thin spots. Refrigerate the tart shells until you’re ready to use them. Chilling the dough relaxes the gluten and helps prevent shrinkage during baking.
-
In a small saucepan, combine the cornstarch and cold water. Stir until smooth, ensuring there are no lumps. Lumps of cornstarch can lead to a grainy filling.
-
Stir in the sugar and raspberries into the cornstarch mixture. Gently fold the ingredients together, being careful not to crush the raspberries too much if using fresh ones.
-
Cook and stir the raspberry mixture over medium-low heat until thickened, about 10-15 minutes. Stir constantly to prevent the mixture from scorching on the bottom of the pan. The filling is ready when it coats the back of a spoon.
-
Allow the raspberry mixture to cool slightly. This helps prevent the crust from becoming soggy.
-
Spoon the filling evenly into the tart shells, filling each no more than 2/3 full. Overfilling can cause the filling to bubble over during baking, making a mess.
-
Bake at 425° F for 10 minutes. This initial high heat sets the crust quickly, preventing it from becoming soggy.
-
Reduce the heat to 350° F and bake for an additional 15 minutes, or until the pastry is golden brown. Keep a close eye on the tarts during this phase to ensure the crust doesn’t burn.
-
Remove the tarts from the oven and cool them in the pans for 15 minutes. This allows the filling to set further and prevents the tarts from breaking when you transfer them.
-
Remove the tarts from the pans to cooling racks and cool completely. Enjoy!
Expert Tips & Tricks
- Keep your ingredients cold! Cold butter is essential for a flaky crust. If you find your butter is getting too soft, pop the dough back into the refrigerator for a few minutes.
- Blind Baking: For an extra crispy crust, consider blind baking the tart shells before adding the filling. To do this, line the chilled shells with parchment paper and fill with pie weights or dried beans. Bake at 375°F for 15 minutes, then remove the weights and parchment and bake for another 5-10 minutes, or until lightly golden. Let cool completely before filling.
- Egg Wash: Brush the crust with a beaten egg before baking for a shiny, golden finish.
- Prevent Soggy Crust: A thin layer of melted chocolate on the bottom of the crust before filling can help prevent a soggy bottom. White chocolate pairs wonderfully with raspberries!
- Make Ahead: The tart shells can be made ahead of time and stored in the refrigerator for up to 2 days or in the freezer for up to a month.
Serving & Storage Suggestions
Serve the raspberry tarts chilled or at room temperature. A dollop of whipped cream or a scoop of vanilla ice cream makes a delightful accompaniment. A sprig of fresh mint adds a touch of elegance.
Store leftover tarts in an airtight container in the refrigerator for up to 3 days. The crust may soften slightly over time.
You can also freeze the baked tarts for up to 2 months. Wrap them individually in plastic wrap and then place them in a freezer-safe container. Thaw in the refrigerator before serving.
Nutritional Information
| Nutrient | Amount per Serving | % Daily Value |
|---|---|---|
| Calories | 248.5 kcal | N/A |
| Calories from Fat | 85 g | 35% |
| Total Fat | 9.5 g | 14% |
| Saturated Fat | 5.7 g | 28% |
| Cholesterol | 43.6 mg | 14% |
| Sodium | 76.2 mg | 3% |
| Total Carbohydrate | 39.5 g | 13% |
| Dietary Fiber | 2.8 g | 11% |
| Sugars | 22 g | 87% |
| Protein | 2.5 g | 4% |
Variations & Substitutions
- Gluten-Free Crust: Use a gluten-free all-purpose flour blend and follow the recipe as directed. Be sure to use a blend that contains xanthan gum for best results.
- Vegan Crust: Substitute the butter with a vegan butter alternative and replace the egg yolk with 1 tablespoon of applesauce.
- Other Berries: Feel free to experiment with other berries such as blueberries, strawberries, or blackberries.
- Citrus Zest: Add a teaspoon of lemon or orange zest to the filling for a brighter flavor.
- Almond Extract: A drop or two of almond extract in the filling enhances the nutty notes and complements the raspberries beautifully.
FAQs (Frequently Asked Questions)
Q: Can I use pre-made tart shells?
A: Yes, you can use pre-made tart shells to save time. Just be sure to adjust the baking time accordingly.
Q: My crust shrank during baking. What did I do wrong?
A: Overworking the dough or not chilling it properly can cause shrinkage. Be gentle when mixing and make sure to chill the dough before baking.
Q: Can I use fresh raspberries instead of frozen?
A: Absolutely! Fresh raspberries work beautifully in this recipe. You may need to adjust the sugar slightly depending on their sweetness.
Q: My filling is too runny. How can I fix it?
A: If your filling is too runny, you can thicken it by simmering it for a few more minutes with a little extra cornstarch mixed with cold water.
Q: How do I prevent the crust from burning?
A: If the crust starts to brown too quickly, you can tent it with aluminum foil to protect it from the heat.
Final Thoughts
These Tantalizing Raspberry Tarts are more than just a dessert; they’re a little piece of sunshine on a plate. I encourage you to try this recipe and create your own memories in the kitchen. Don’t be afraid to experiment with variations and make it your own. Share your creations with loved ones and let the simple joy of a homemade tart brighten their day. And if you have any questions or feedback, please don’t hesitate to share – happy baking!